Service Manager
This is the latest version of the help for Ivanti Service Manager 2018. If you cannot find some of the features described in the help, you may be using an older version of the application. To upgrade the application, click here.To view the help for the latest version of Service Manager, click here
Creating a Notification
You can perform this action from either the Configuration Console or the Service Manager Application, but you must be logged in as an administrator.
1.Log into the Service Manager Application.
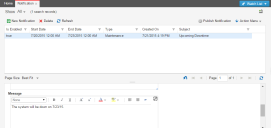
2.Open the Notification workspace. The list of current notifications appears.
3.Click New Notification. The Notification: New record page appears.
4.Enter information into the fields.
| Field | Description |
|---|---|
|
Start Date/Time |
The start time for the notification. Click the calendar to choose the date. |
|
End Date/Time |
The end time for the notification. Click the calendar to choose the date. |
| Type |
The notification type. Select from the drop-down list: Maintenance Release |
| Subject | A subject for the notification. |
| Message | The notification main message. |
| Is Enabled |
Enables the notification and allows it to be published. This option is selected by default. Uncheck this to keep the notification in the database, for example for archiving purposes, but to not display it to users. |
5.Click Publish Notification.
6.Click Save.
Users will see the notifications within the start and end dates and times.
Deleting a Notification
1.Log into the Service Manager Application.
2.Open the Notification workspace. The list of current notifications appears.
3.Open a notification.
4.Click the delete icon  next to the notification to delete.
5.In the confirmation dialog box, click Yes.
Was this article useful?
The topic was:
Inaccurate
Incomplete
Not what I expected
Other
Copyright © 2018, Ivanti. All rights reserved.
