Using the REST API Key
The REST API Key created for a tenant is used for authorizing REST API endpoints. These keys are static and do not change or expire, unlike Session IDs.
Creating a REST API Key Group
When using this feature for the first time, you need to create a group for REST API. If it already exists, then you can skip this step and proceed to create a REST API Key.
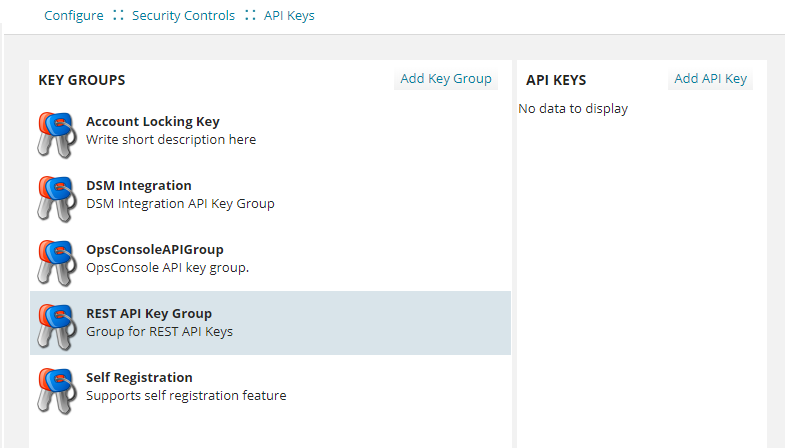
1.From the Configuration console, click Configure > Security Controls > API Keys.
2.Click Add Key Group. The application displays the New API Group page.
3.Enter a contextual name and description for the group in the Name and Description fields.
4.Click Save Key Group. A REST API group is created.
5.Click Back to return to the API Keys page.
Creating a REST API Key
1.From the Configuration console, click Configure > Security Controls > API Keys.
2.Select the relevant group created for REST API from the Key Groups section.
REST API Group
3.Click Add API Key. The application displays the New API Key page.
4.Enter information into the fields:
•Reference ID - This field is auto-generated. This ID is the REST API Key you need to use for endpoint authorization.
•Activated - Select or clear the check box to activate and deactivate the key.
•Description - Enter a description for the key.
•On Behalf Of - Select the name of the user creating the key.
•In Role - Select the role of the user creating the key.
5.By default, the REST API Key created is applicable for the logged-in tenant. However, you can add additional IPs to this key. To do so, click Add New IP, enter the IP address and click Ok.
6.Click Save Key. The generated REST API Key is saved with the details you entered.
7.Click Back to return to the API Keys page.
Editing a REST API Key
1.From the Configuration console, click Configure > Security Controls > API Keys.
2.Select the relevant group for REST API from the Key Groups section. The application displays the list of available keys.
3.Find the key and click Edit.
4.Modify the details as required and click Save Key.
Deleting a REST API Key
1.From the Configuration console, click Configure > Security Controls > API Keys.
2.Select the relevant group for REST API from the Key Groups section. The application displays the list of available keys.
3.Find the key and click Delete.
Using the REST API Key
To use the REST API Key as authorization when executing an endpoint:
1.Create a new request in the Postman application.
2.Enter the following information in the Header tab:
•Select the Authorization check box.
•Enter the Reference ID (REST API Key) generated for the tenant in the Value column in the format - rest_api_key={Reference ID}.
3.In the same endpoint request window, enter the endpoint request payload details and click the Send button or press the ENTER key.
When executing REST APIs from a tenant, the REST API Key generated for the same tenant can only be used and not of any other tenant. For example, REST API Key generated for Tenant#X cannot be used for executing APIs from Tenant#Y.
Troubleshooting REST API Key
When you execute a REST API endpoint, you get a not authorized error.
Reason:
The REST API Key used to authorize the endpoint does not belong to this tenant/IP.
Solution:
Create a new REST API Key for this tenant/IP. See Creating a REST API Key.