Editing a Layout
•Using the Try Our New Look Style
Using the Old Style
You can edit a layout after it has been created. For example, you can add a tab, change the tab order, change the view, edit search options, and so on.
1.From the Configuration console, click Build > Business Objects.
2.Select a business object.
3.Click the Layouts tab and open a layout. The application displays the Edit Layout page.
4.Do the following to change the tab order:
| a. | Click formView. |
| b. | Navigate to the Child Panels area. |
| c. | Select an item, using the icon on the left side move it up or down to set the tab order for this layout. |
5.Do the following to hide a tab from initial view:
| a. | Click formView. |
| b. | Navigate to the Child Panels area. |
| c. | Select a tab and navigate by scrolling, to the Hidden Expression column. |
| d. | Click <Not Set>. |
| e. | In the Expression Editor, enter False. |
| f. | Click Save. This hides the tab at the initial view. The tab remains accessible by clicking the add icon. icon. |
6.Click Save from the toolbar.
Using the Try Our New Look Style
•Opening the Layout in the Try Our New Look Style
•Editing the Properties of a Panel Within a Layout
Opening the Layout in the Try Our New Look Style
1.From the Configuration Console, click Build > Business Objects to open the Business Object workspace.
2.Open the business object associated with the layout to modify.
3.Click the Layouts tab and open a layout to modify. The application displays the Edit Layout page.
4.Under Views in this layout, click formView. the application displays the Form View Editor [formView] page.
5.Click Try our new look! to go to the new Form View Editor [formView] page. The page shows the layout.
See Adding the ESX Business Object to the CI Layout for a step-by-step process for editing a layout.
Adding a Panel to a Layout
1.Perform steps 1-6 in Opening the Layout in the Try Our New Look Style.
2.Under the Toolbox heading, expand any of the panel categories, such as Custom Panels.
3.Click a panel name and drag it into the Layout area. As you drag the panel, the application highlights in yellow the places where you can drop it.
Adding a Panel to a Layout
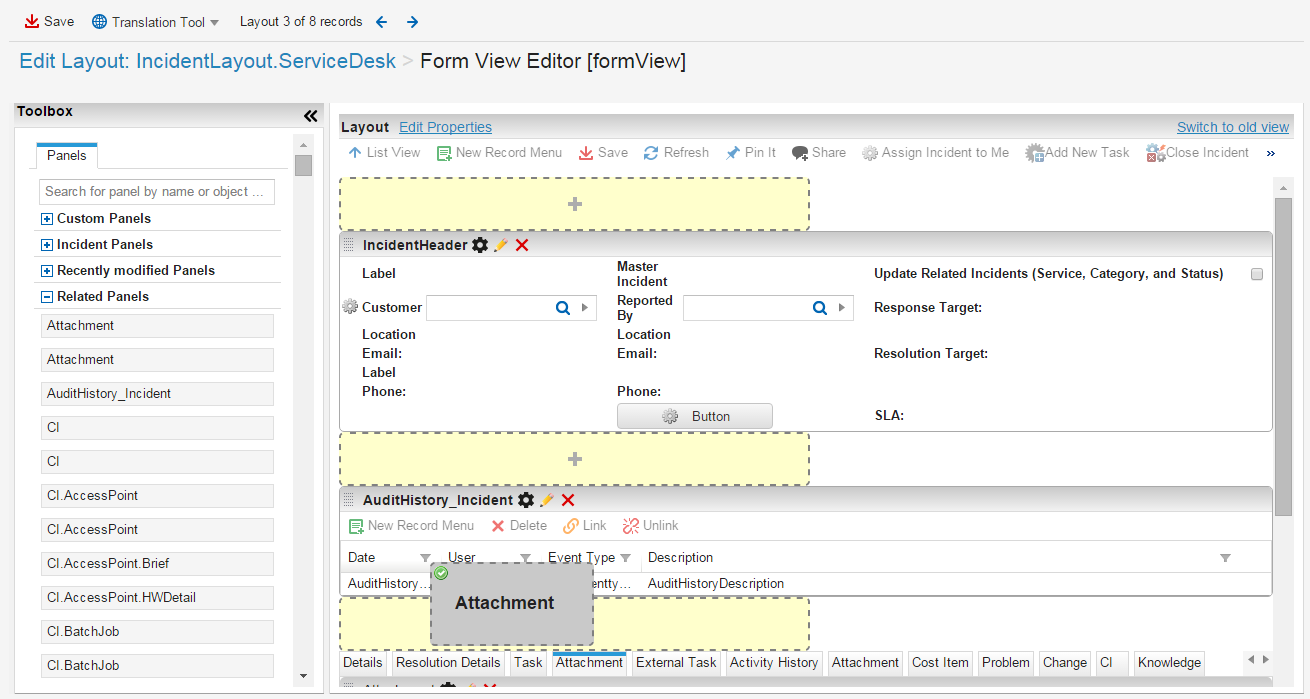
After you drop it, the application displays the FormView Child Panel Relationship Editor dialog box.
4.Select the relationship type. See About Data Rollups for information about the relationship types.
5.Click Save to close the dialog box.
6.Click Save to save the layout.
7.To view the new layout, do the following:
| a. | Go to the Service Manager Application. |
| b. | Open the business object associated with the layout that you modified. |
8.To remove the panel from the layout, click the delete icon.
icon.
9.To edit the panel, click the edit icon.
icon.
Editing Layout Properties
1.Perform steps 1-6 of Opening the Layout in the Try Our New Look Style.
2.Click Edit Properties. The application displays the Form View Properties Editor dialog box.
3.Enter information into the fields.
| Field | Description |
|---|---|
| Display name | A unique name that appears to users. The default name is formView. |
| Enable Object View Auditing | Automatically shows audit information. |
| Enable smart fill on repetitive input of some values | Enables smart fill. When entering repetitive data, the application automatically enters data into certain fields (not template fields). You can overwrite the information if needed. |
| Enable Next/Previous buttons on the search bar | Enables the Next and Previous buttons on the toolbar. This allows you to move from one record to the next. |
| Enable Cost Management | Enables costing for this layout. Click Edit Cost Settings to set costing information. The application displays the Edit Cost Management dialog box. Select a child relation and a parent relation and click OK. |
| Enable Matching panel | Enables the related items search feature. Click Edit Matching Settings to set the matching information. See Working with Object Matching and Related Items for more information. |
|
After saving object show |
Selects the view to show after the user saves the business object. Otherwise, the original view remains. Click not set and select a view from the drop-down menu. |
4.Click Save.
Editing the Properties of a Panel Within a Layout
1.Perform steps 1-6 in Opening the Layout in the Try Our New Look Style.
2.For any panel within a layout, click the settings icon. The application displays the Panel Properties Editor dialog box.
3.Enter information into the fields.
| Field | Description |
|---|---|
| Display Name | A unique name that appears to users. |
| Relationship | Specifies the relationship type. See About Data Rollups for information about the relationship types. |
| Hidden Expression | Specifies an expression that defines when the panel is hidden. Click not set to open the Expression Editor. Enter false and click Save to specify that the panel is not hidden. |
| Link Button Filter | Shows the list of records to be displayed so you can restrict the records to be shown. |
| List Filter | Specifies an expression that defines a filter for the list. Click not set to open the Expression Editor. |
| Initially Visible | Specifies an expression that defines if the panel is initially visible. Click not set to open the Expression Editor. Enter true and click Save to specify that the panel is initially visible. |
| Closable | Specifies if the panel can be closed. |
|
Show Count In Title |
Displays the number of records in the header. |
4.Click Save.