Using Workflows
•Viewing a Workflow from the Configuration Console
•Viewing a Workflow from the Action Menu
•Accessing the Workflow Designer
•Creating an Exception Notification
•Creating a Scheduled Workflow
•Publishing, Editing, and Locking Workflow Versions
Viewing a Workflow Instance
A workflow instance is a triggered workflow. The application updates the status of the workflow instance whenever the workflow block is executed.
1.From the Configuration Console, click Build > Workflow > Workflow Instances to open the Workflow Instance workspace. The list of available workflows appears.
2.Double-click a workflow instance to open the workflow record.
Workflow Record
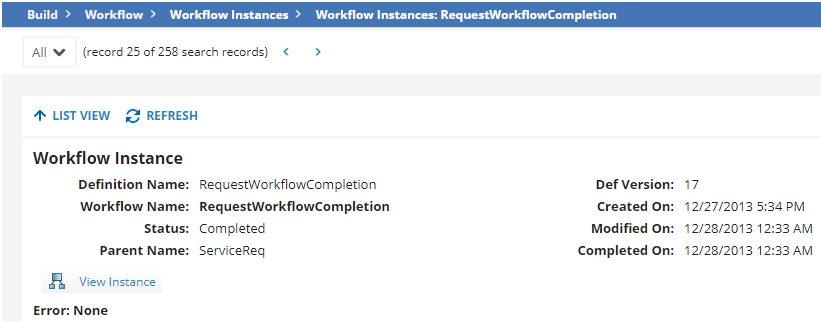
3.Click View Instance to see the workflow design.
Workflow Instance
Viewing a Workflow from the Configuration Console
1.From the Configuration Console, click Build > Business Objects to open the Business Objects workspace.
2.Open a business object.
3.Click the Workflows tab. If this button is disabled (gray) or does not appear, then this business object is not part of a workflow.
4.Click on the name of a workflow.
5.Next to any workflow version, click the edit icon.
icon.
Viewing a Workflow from the Action Menu
1.Log into the Service Desk Console.
2.Open any record.
3.From the Action Menu drop-down list, click View Workflow.
The item might be listed under a specific category such as form actions in this example.
If View Workflow does not appear under the Action Menu, then it has not been set up to appear for your role.
The View workflow definition and instance window appears.
4.Click Show Definition to view the approval workflow or click Show Instance to see where the approval process is at.
5.Click Close.
Creating a Workflow
1.From the Configuration Console, click Build > Workflow > Workflows to open the Workflows workspace. The list of available workflows appears.
2.Click Add new.... The Add New Workflow page appears.
Adding a Workflow
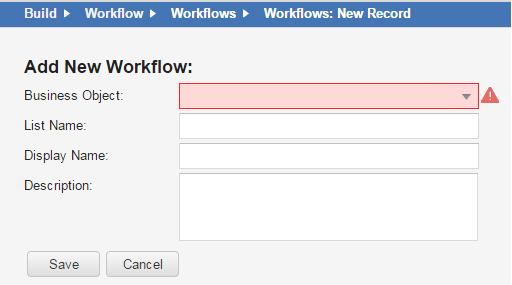
3.Enter information into the fields.
| Field | Description |
|---|---|
|
Business Object |
The business object to which this workflow applies. Choose from the drop-down list. |
|
List Name |
A unique name for the workflow. |
|
Display Name |
The name that appears in the interface. |
|
Description |
A description of what the workflow does. |
4.Click Save. The workflow version page appears.
5.Click Add Version. The Workflow Designer appears.
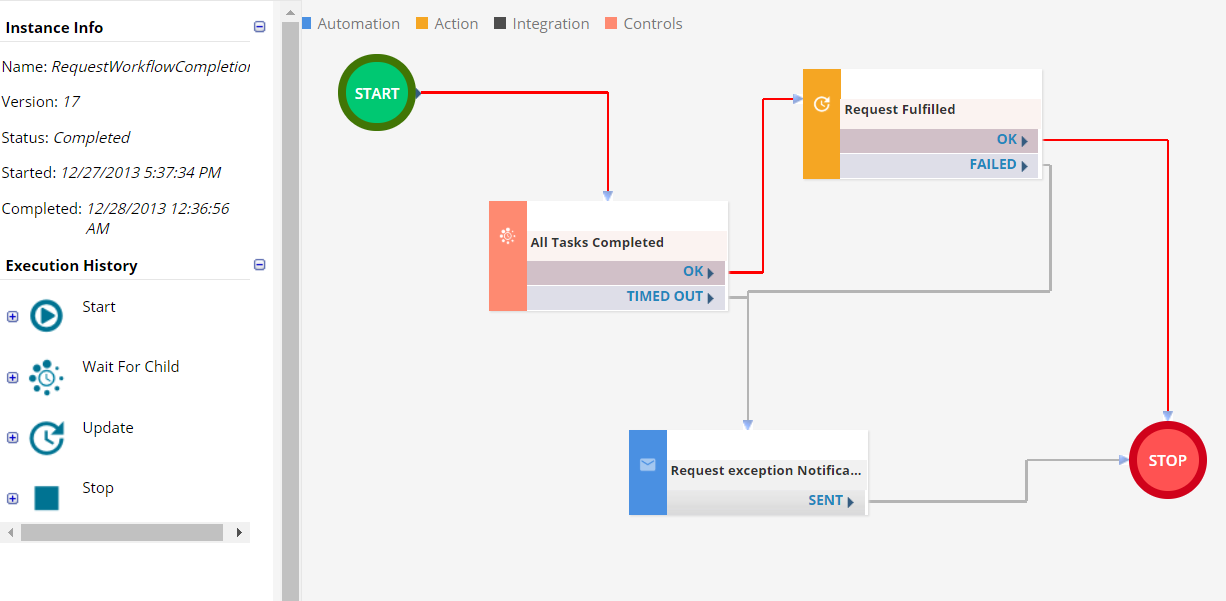
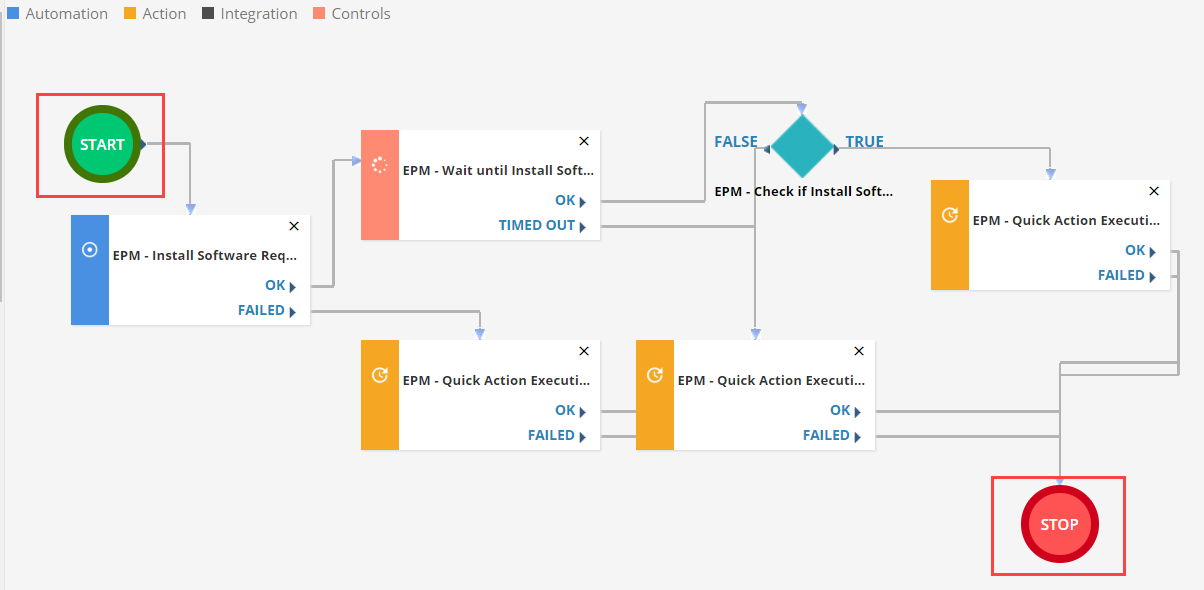
6.Drag the blocks onto the designer as needed, and connect them. Be sure to include Start and Stop blocks.
Workflow Example with Start and Stop Blocks
7.Configure the block properties as needed. See Workflow Object Blocks.
8.Select the Validate before saving check box to validate the workflow.
9.Click Save.
10.Click the back to version icon  to return to the workflow version page.
11.Click the publish icon  to activate the workflow.
Accessing the Workflow Designer
1.From the Configuration Console, click Build > Workflow > Workflows to open the Workflows workspace.
2.Click the name of a workflow.
3.Next to any workflow version, click the editicon. The application displays the Workflow Designer.
Configuring a Trigger
A trigger is what starts the workflow process.
1.From the Workflow Designer, click Configuration from the toolbar. The Workflow Configuration window appears.
2.Select the Trigger Definition tab.
3.Enter information into the fields.
| Option | Description |
|---|---|
| Object Level Conditions | |
| Created | The workflow is sent to the process queue when the business object is created. |
| Updated | The workflow is sent to the process queue when the business object is modified. |
| Field Level Conditions | |
| Any field updated | Triggers the workflow when any field is modified, except for application fields. |
| Specific fields updated - at least one of the following fields should be updated. | Triggers the workflow when specific fields are modified. |
| AND | Choose the trigger the workflow based on all fields (AND). |
| OR | Choose the trigger the workflow based on any field (OR). |
| Field | Choose from the drop-down list. |
| Operator | Choose from the drop-down list. |
| Value | The value that triggers the workflow. |
4.Click the add icon  to add fields to the trigger.
5.Click the delete icon  to remove a field from the trigger.
6.Click Save.
Creating an Exception Notification
Service Manager can send you an email every time it encounters an exception to the trigger.
1.From the Workflow Designer, click Configuration from the toolbar. The Workflow Configuration window appears.
2.Select the Exception Notification tab.
3.From the left panel, select trigger fields, relationships, or functions.
4.From the right panel, select an email template.
5.Click Save.
Creating a Scheduled Workflow
You can import scheduled workflows, such as LDAP synchronization or cost service, into the ScheduleEntry business object. When using a schedule workflow, do not use another business object as a trigger; only use the ScheduleEntry business object to create a workflow that runs at a specific time or interval. See About the Schedule Entry and Scheduled Jobs Workspaces.
The maximum number of records a workflow updates in one session is 1000. Re-run the workflow to continue updating records.
1.From the Configuration Console, click Build > Business Objects to open the Business Objects workspace.
2.In the Find window, enter Schedule Entry to open the ScheduleEntry business object. The ScheduleEntry Details page appears.
3.Choose the Workflows tab. The list of current scheduled workflows appears.
4.Click Add New. The Add New Workflow: page appears.
5.Enter information into the fields.
| Field | Description |
|---|---|
Business Object | The name of the business object. Select the ScheduleEntry business object. |
List Name | A unique name for the workflow. This is how it will appear in a list. Do not include spaces or punctuation. |
Display Name | The name of the workflow as it will appear to users. |
Description | A description of what the workflow does. |
The following is an example:
Example Workflow
wf_sample.png)
6.Click Save. The workflow version page appears.
7.From the lower toolbar, click Add Version. The Workflow Designer appears.
8.Click Configuration from the toolbar. The Workflow Configuration window appears.
Workflow Configuration Window

9.Select the schedule definition from the drop-down list. This list is populated from the ScheduleEntry workspace.
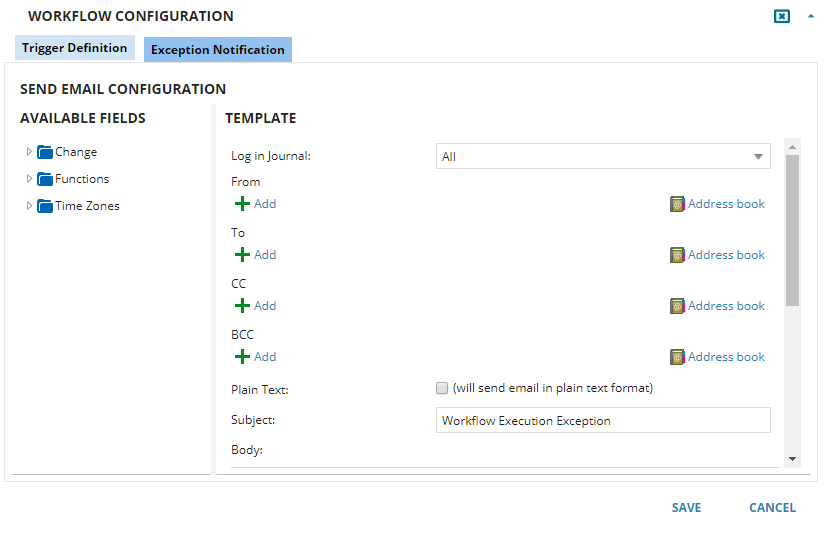
10. Enter an Exception Notification if needed. The following shows an example of an exception notification.
Exception Notification
11.Click Save.
12.Add business object blocks and edit your workflow in the design area as needed.
13.Click Save.
Modifying a Workflow
You can easily modify a workflow. You cannot modify a workflow that has been published or is active. You can, however, create a new version, modify it, then publish it. This procedure describes how to modify a workflow that has not been published.
1.From the Configuration Console, click Build > Workflow > Workflows to open the Workflows workspace. The list of available workflows appears.
2.Select the workflow to change. The Edit Workflow page appears.
3.From the list, click the edit icon on the workflow to modify.
4.Modify the workflow as needed, then click Save.
Publishing, Editing, and Locking Workflow Versions
You can create different versions of a workflow; however, only one version can be active at a time. Once a workflow has been published, it cannot be changed. You can, however, create a new version from this workflow, then publish it.
1.From the Configuration Console, click Build > Workflow > Workflows to open the Workflows workspace. The list of available workflows appears.
2.Choose a workflow from the list. The workflow version list appears. The active workflow is highlighted in green.
3.Do one of the following:
•Click Publish to publish the workflow.
•Click Edit to edit the workflow.
•Click Lock to make the workflow read only.
Creating a Workflow Version
You can create multiple versions of a workflow. This is useful when working on workflows as you might have a version that works well, then make some changes that do not work out as well, and want to revert to an earlier copy.
1.From the Configuration Console, click Build > Workflow > Workflows to open the Workflows workspace. The list of available workflows appears.
2.Choose a workflow from the list. The workflow version list appears.
3.From the version list, click Add Version on the toolbar. A blank workflow appears.
Publishing a Workflow
When a workflow is activated, it is considered published. If the workflow is later deactivated, it is still considered published, although not active. Once a workflow has been published, it cannot be modified. You can, however, create a new version from a published workflow.
1.From the Configuration Console, click Build > Workflow > Workflows to open the Workflows workspace. The list of available workflows appears.
2.Select the workflow to publish. The Edit Workflow page appears.
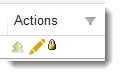
3.Select the workflow version to publish, then click Publish from the Actions column.
Actions Column
The workflow is now active.
Deactivating a Workflow
Use caution when deactivating a workflow, as related workflows and business objects might not operate as expected.
1.From the Configuration Console, click Build > Workflow > Workflows to open the Workflows workspace. The list of available workflows appears.
2.Choose a workflow from the list. The workflow version list appears.
3.Check the active workflow.
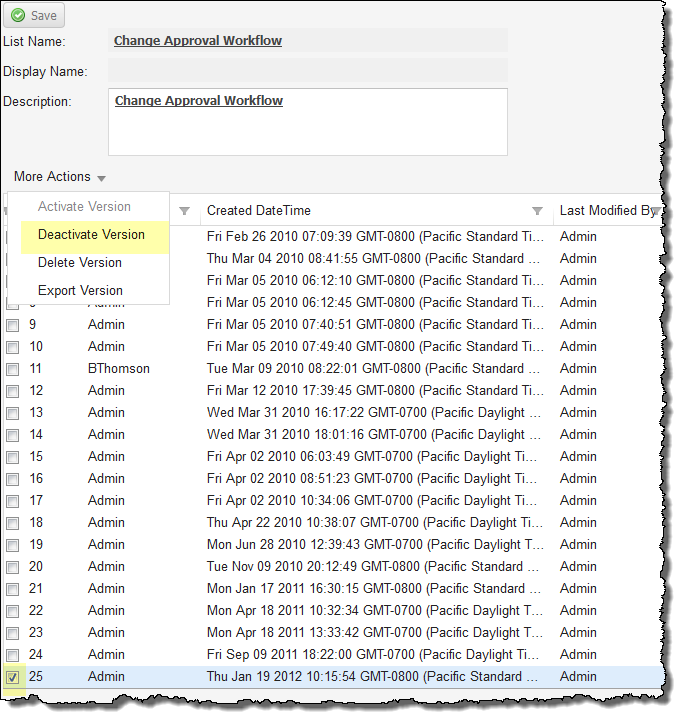
4.Choose More Actions > Deactivate Version.
Deactivating a Workflow
The workflow is no longer active or working.
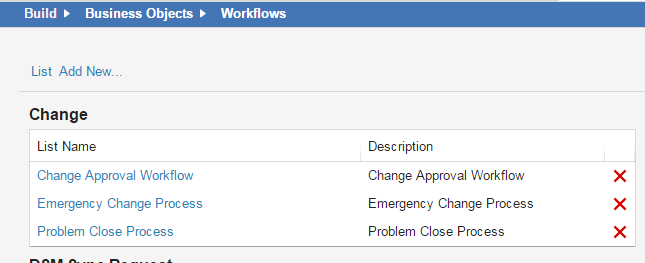
Deleting a Workflow
Use caution when deleting a workflow, as related workflows and business objects might not operate as expected. This action is permanent and cannot be undone.
1.From the Configuration Console, click Build > Business Objects to open the Business Objects workspace.
2.From the right-side panel under Manage Object Workflows, click View Workflows. The list of available workflows appears.
3.Click the delete icon  next to the workflow to delete.
Deleting a Workflow