Working With Attachments and URLs
You can attach files or images to records, enabling users to view extra data not limited by the defined fields. Many Neurons for ITSM workspaces allow attachments and URLs to be added to a record, including incidents, knowledge articles, tasks, problems, change requests, releases, and service requests.
Administrators can limit the size and type of attachments allowed
•About Modifying an Attachment
•Working with Attachment Types
•Storing Attachments as External Files
•Working with Searchable Attachments for Knowledge Base Articles
•Displaying a URL or HTML Content in a Workspace
•Supporting a URL in a Dashboard
•Opening a Workspace From a URL
Adding an Attachment
You can add multiple attachments to a record if:
•You are using Google Chrome, Mozilla Firefox, or Microsoft Internet Explorer versions 10 and higher.
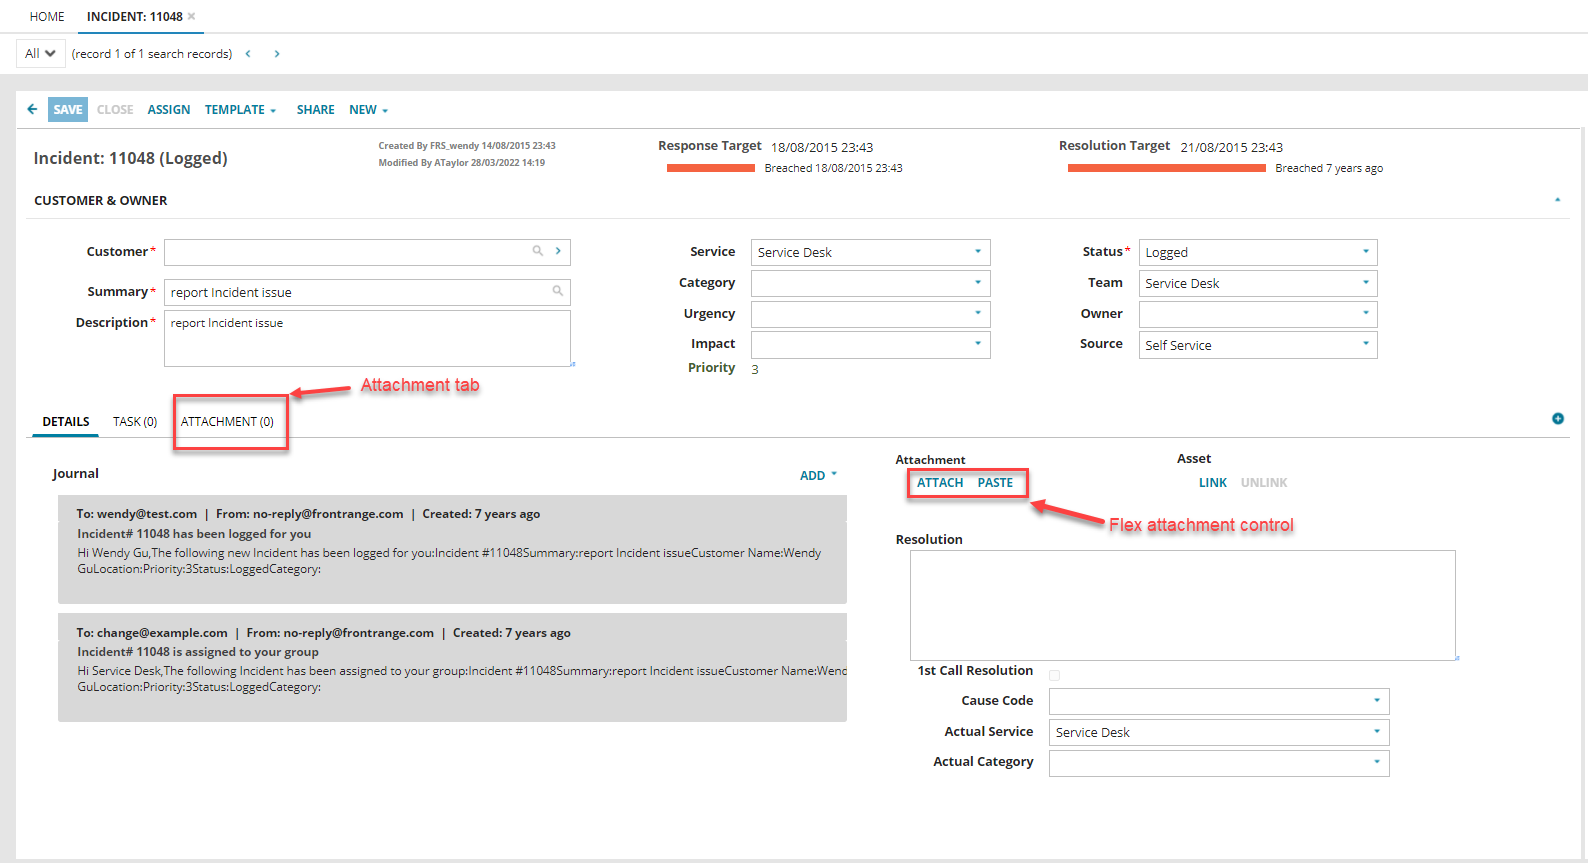
Attachments can be added from the Details tab using the Flex Attachment Control, or from the Attachments tab.
Flex Attachment Control and Attachments Tab
When attaching a file, the application uploads the attachments to the attachment path folder.
•If the path drive exists, but not the folder, the application creates the folder and the uploads the attachments.
•If the path drive does not exist, the application displays the following error message when the file is uploaded: "Upload failed with error: Could not find a part of the path 'g:\temp2\346918CF43BD4FE2BAE0C57D781076C3'."
•If the Save Type parameter is empty, but the path is correct, it uploads the attachment to the database.
Follow these steps to add an attachment in the Attachments tab:
1.Log into the Service Desk Console.
2.Open a workspace.
3.Open a record. The application displays the record details page.
4.Select the Attachment tab.
If the Attachments tab is not visible, you can open it by selecting Attachment from the Restore Hidden Tabs list (select the ![]() icon).
icon).
5.Select New on the toolbar. The application displays the File Upload dialog box.
6.Navigate to a file and select Open. The application uploads the file and displays the name in the attachment list.
Follow these steps to add an attachment in the Details tab:
1.Log into the Service Desk Console.
2.Open a workspace.
3.Open a record. The application displays the record details page.
4.Select the Details tab.
5.Select Attach. The application displays the File Upload dialog box.
6.Navigate to a file and select Open. The application uploads the file and displays the name in the attachment list.
7.Save the record.
Follow these steps to add an attachment in the Details tab by pasting from the clipboard:
1.Copy the item to the clipboard that you want to attach (select the item and press CTRL+C).
2.Open a record. The application displays the record details page.
3.Select the Details tab.
4.Select Paste. The application displays he attachment preview dialog box.
5.Enter a name for the attachment in the Attachment name field.
6.Select the Clipboard preview section and paste the item on the clipboard into it (press CTRL+V).
7.Select OK.
You can add an image using HTML control (such as Description box) for a record. For example, follow the below steps to add an image using Description field:
1.Log into the Service Desk Console.
2.Open a workspace.
3.Open a record.
The application displays the record details page.
4.Copy an image and paste into the Description box.
5.Click Save.
The application saves the image as a thumbnail in the Description box. Also, the application uploads the image and displays the name of the image in the Attachment section.
6.Click on the image in the Description box to view the image in a separate window.
You can delete the image from the Attachment list only.
Viewing an Attachment
You can view files that are attached to a record if the file type is compatible with opening into a browser (example: Image file, Html file, etc).
Files that are not compatible with opening in a browser are automatically downloaded when you select View.
1.Log into the Service Desk Console.
2.Open a workspace.
3.Open a record. The application displays the record details page, where attached files are displayed under Attachment in the Details tab, or in the Attachment tab list.
4.Select the attachment you want to view. The Attachment Confirmation popup opens.
5.Select View.
The attached file opens in the browser (if compatible), or is automatically downloaded, in which case you can open the file in a compatible application.
Adding a URL
You can add multiple URLs to a record.
To add a URL in the Attachments tab:
1.Log into the Service Desk Console.
2.Open a workspace.
3.Open a record. The application displays the record details page.
4.Select New URL. The application displays the Add attachment dialog box.
5.Enter a valid URL (such as https://www.ivanti.com; be sure to include https://), then click Save. If you attach a URL beginning with HTTP, Neurons for ITSM blocks the content. Remind users to follow the steps in Opening a URL to display the content.
The application displays the URL in the attachment list.
To add a URL in the Details tab:
If the New URL control is not visible in the Details tab, you need to enable it in the form Attachment Display Settings, see the Attachments section in About the "Other" Form Controls
1.Log into the Service Desk Console.
2.Open a workspace.
3.Open a record. The application displays the record details page.
4.Select New URL. The application displays the Add attachment dialog box.
5.Enter a valid URL (such as https://www.ivanti.com; be sure to include https://), then click Save. If you attach a URL beginning with HTTP, Neurons for ITSM blocks the content. Remind users to follow the steps in Opening a URL to display the content.
The application displays the URL in the attachment list.
Opening a URL
If you try to open a URL that begins with HTTP rather than with HTTPS, Neurons for ITSM blocks the content so that you are not fooled into thinking that you are viewing secure and valid content.
You can override this and view a URL beginning with HTTP by following these steps:
1.When you try to open a URL beginning with HTTP, the dashboard does not display the content and the browser displays an icon on the right edge of the URL indicating that an unsafe script was trying to load.
Unsafe URL
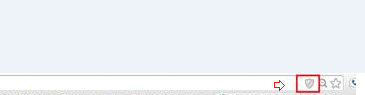
2.To view the page, click the badge icon.
3.The application prompts you to allow non-secure content.
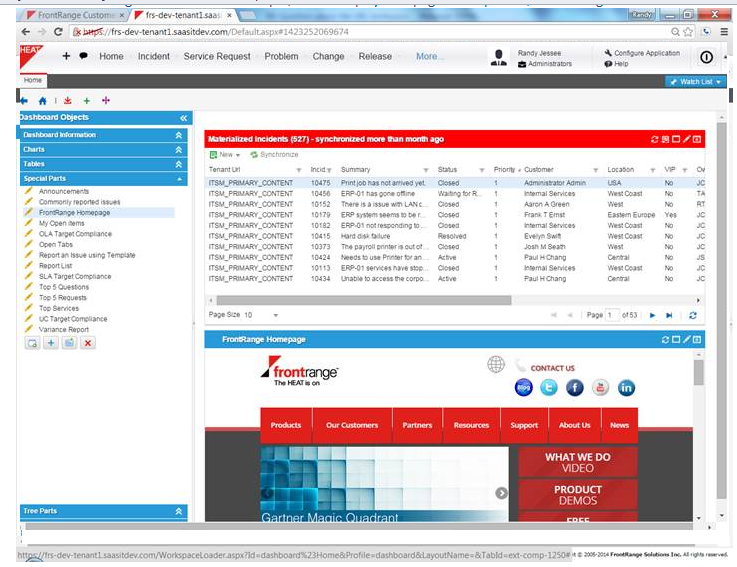
4.Click Load unsafe scripts. The browser refreshes and loads the requested page.
Requested Content
About Modifying an Attachment
You can add additional attachments to incidents, Knowledge Base articles, tasks, problems, change requests, releases, and service requests, after they have been created. You cannot modify individual attachments, but you can delete it, change it outside of Neurons for ITSM, and then re-attach it.
Only Knowledge Managers can view or edit attached files from other users when a Knowledge Base article is in draft status.