Configuring Landscapes
For a definition of landscape and common landscape types, see Landscapes.
•About the Landscape Workspace
•Working with Landscape Groups
•Working with Database Servers
About the Landscape Workspace
Use the Landscape workspace to perform a variety of landscape management activities, including creating and configuring landscape groups, landscapes, and database servers. You must create a landscape group before you can create a landscape, and you must create a landscape before you can create any tenants.
Working with Landscape Groups
About Landscape Groups
A landscape group is a group comprised of different landscapes. The following are examples of landscape groups:
•Independent landscapes group: The production, staging, and UAT landscapes all have different Ivanti Service Manager configuration databases. Each landscape is on a separate server which makes it easier to independently shut down or restart the servers, if needed. However, this option requires more hardware, which means you need additional licenses.
•Shared landscapes group: The production landscape has its own Ivanti Service Manager configuration database and the staging and UAT landscapes share the same Ivanti Service Manager configuration database. This makes it easier to perform upgrades because you have to upgrade the staging and UAT landscapes at the same time. (All landscapes must use the same release of Ivanti Service Manager in order to migrate data.) This is typically how Ivanti Service Manager Cloud systems are deployed.
•All-in-one landscape group: The production, staging, and UAT landscapes all share the same Ivanti Service Manager configuration database and servers. This deployment is used mainly by testing and development teams or systems with limited resources.
We recommend using either an independent or shared landscape group. However, there are advantages and disadvantages to each landscape group. See the Installation and Deployment Guide for Ivanti Service Manager for more information about the different deployment types.
We highly recommend that you only install the Operations Console in the staging landscape, and not in any other landscape. For migrating data, you only need to install the Operations Console in one landscape; you should not install it in more than one landscape.
Adding a Landscape Group
You must add a landscape group before you can add any landscapes. To add a landscape group, do the following:
1.Log in to the Operations Console.
2.Click the Landscape tab. The system displays the Landscape workspace.
3.Click Landscape Group on the left. The system displays all of the landscape groups in the system.
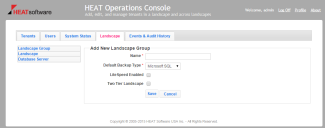
4.Click Add Landscape Group. The system displays the Add New Landscape Group page. See Add New Landscape Group Page.
5.Enter a name for the landscape group.
6.Choose the default backup type. You can either select Microsoft SQL or LiteSpeed.
7.If you selected LiteSpeed as the default backup type, you must check LiteSpeed Enabled. Otherwise, leave it empty.
Ivanti Service Manager supports using LiteSpeed for Microsoft SQL Server for backing up your Ivanti Service Manager databases. Before you can use LiteSpeed for Microsoft SQL Server, you must purchase it, install it on your system, and configure the Operations Console to support it.
8.Ensure that Two Tier Landscape is not checked. With a two-tier landscape group, the migration path is only between two tenant instances, usually the production instance of the tenant and the staging instance of the tenant. If you do not check th is option, you have a three-tier landscape group. With a three-tier landscape group, there are migration paths between three tenant instances, usually the production instance of the tenant, the staging instance of the tenant, and the UAT instance of the tenant.
We recommend always using a three-tier landscape group unless you have a demo environment.
9.Click Save.
Editing a Landscape Group
1.Log in to the Operations Console.
1.Click the Landscape tab. The system displays the Landscape workspace.
2.Click Landscape Group on the left. The system displays all of the landscape groups in the system.
3.Do one of the following:
•Click the underlined name of the landscape group. In the resulting dialog box, click Edit.
•Click the pencil icon to the right of the landscape group name.
1.Edit the values.
2.Click Save.
Deleting a Landscape Group
1.Log in to the Operations Console.
1.Click the Landscape tab. The system displays the Landscape workspace.
2.Click Landscape Group on the left. The system displays all of the landscape groups in the system.
3.Click the red X to the right of the landscape group name to delete it.
4.In the resulting dialog box, click OK.
Working with Landscapes
About Landscapes
A landscape consists of a Ivanti Service Manager configuration database and two Ivanti Service Manager web servers for connecting to the Ivanti Service Manager application server.
After you create a landscape group, you can start creating landscapes to add to it. You can have a maximum of one of the following landscape types in a landscape group:
•Production
•Staging
•UAT
•Development
•Pilot
Adding a Landscape
1.Log in to the Operations Console.
1.Click the Landscape tab. The system displays the Landscape workspace.
2.Click Landscape on the left. The system displays all of the landscapes in the landscape group.
3.(Optional) To view the landscapes for a different landscape group, select a different landscape group from the drop-down list and click Go. The system displays all of the landscapes in the landscape group.
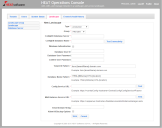
4.Click Add Landscape. The system displays the New Landscape page. See New Landscape Page.
5.Select a landscape type from the drop-down list.
6.Select the landscape group to which this landscape will be attached.
7.Enter the name of the Ivanti Service Manager configuration database server.
8.Enter the name of the Ivanti Service Manager configuration database.
9.Click Test Connectivity to test the connection from the Operations Console to the Ivanti Service Manager configuration database.
10.If you are using Windows Integrated Security, check Windows Authentication.
If you check Window Authentication, the system hides the Database User ID, Database User Password, and Confirm User Password fields. These fields are only displayed if you do not check Window Authentication, which means that you are using Microsoft SQL authentication.
11.If you did not check Window Authentication, enter values into the Database User ID, Database User Password, and Confirm User Password fields.
12.Enter a tenant ID pattern. This is the format in which all tenants in this landscape will be named. You can optionally use the {tenantName} variable as a placeholder for the tenant name. The following are examples:
•{tenantName} for the production instance of the tenant.
•{tenantName}.stg for the staging instance of the tenant.
•{tenantName}.uat for the UAT instance of the tenant.
For example, if the value of the {tenantName} parameter is demo1, then for the production landscape, the tenant ID is demo1 and the URL is http://demo1/HEAT; for the staging landscape, the tenant ID is demo1-STG and the URL is http://demo1-STG/HEAT; and for the UAT landscape, the tenant ID is demo1-UAT and the URL is http://demo1-UAT/HEAT.
13.Enter a database name pattern. This is the format in which all databases in this landscape will be named. You can optionally use the {dbName} variable as a placeholder for the database name. The following are examples:
•{dbName} for the production instance of the tenant.
•{dbName}-STG for the staging instance of the tenant.
•{dbName}-UAT for the UAT instance of the tenant.
For example, if the value of the {dbName} parameter is TRAINING, then the database name for the production landscape is TRAINING; the database name for the staging landscape is TRAINING-STG; and the database name for the UAT landscape is TRAINING-UAT.
14.Enter the URL for the Ivanti Service Manager configuration service, which is the location of the Ivanti Service Manager configuration database. The value must be in the format http[s]://Central_ConfigDB_hostname/CentralConfig/ConfigServiceAPI.asmx. Click Test to ensure that Ivanti Service Manager can contact the URL.
15.Enter the URL for the multi-instance service. This is the web service URL for connecting to a tenant. The value must be in the format http[s]://App_Server_hostname/HEAT/services/MultiInstanceManager.asmx. Click Test to ensure that Ivanti Service Manager can contact the URL.
16.Enter the email domain string for your organization.
17.Check Allow All Backup Options to allow all backup options for tenant and tenant instances that are part of this landscape. See Backup Types for more information about database backup types.
18.Click Save.
Editing a Landscape
1.Log in to the Operations Console.
1.Click the Landscape tab. The system displays the Landscape workspace.
2.Click Landscape on the left. The system displays all of the landscapes in the landscape group.
3.(Optional) To view the landscapes for a different landscape group, select a different landscape group from the drop-down list and click Go. The system displays all of the landscapes in the landscape group.
4.Do one of the following:
•Click the underlined name of the landscape. In the resulting dialog box, click Edit.
•Click the pencil icon to the right of the landscape name.
5.Edit the values.
6.Click OK.
Deleting a Landscape
1.Log in to the Operations Console.
1.Click the Landscape tab. The system displays the Landscape workspace.
2.Click Landscape on the left. The system displays all of the landscapes in the landscape group.
3.(Optional) To view the landscapes for a different landscape group, select a different landscape group from the drop-down list and click Go. The system displays all of the landscapes in the landscape group.
4.Click the red X to the right of the landscape name.
5.In the resulting dialog box, click OK.
Working with Database Servers
About Database Servers
Each landscape must have one or more Ivanti Service Manager database servers associated with it to host the tenant instance databases. The Ivanti Service Manager database server is controlled by the Ivanti Service Manager configuration database. You must specify the data and backup locations for the database server before you can add a tenant using the Operations Console.
Ivanti Service Manager database servers either use Windows Integrated Security or by Microsoft SQL Server authentication, in which case you must enter a user name and password. You define which authentication model to use when you initially install Ivanti Service Manager using the System Configuration Wizard.
Adding a Database Server
To add a database server, do the following:
1.Log in to the Operations Console.
1.Click the Landscape tab. The system displays the Landscape workspace.
2.Click Database Server on the left. The system displays all of the database servers in the landscape.
3.(Optional) To view the database servers for a different landscape, select a different landscape from the drop-down list and click Go. The system displays all of the database servers in the landscape.
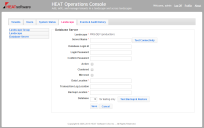
4.Click Add Database Server. The system displays the Database Server screen as shown in Add a Database Server Screen.
5.Enter a name for the database server. This is usually the host name, IP address, or machine name.
6.Enter a database login ID and password. The database login ID must have permission to back up any tenant or tenant instance database; must have permission to restore any tenant or tenant instance database; and must become the database owner of any new databases that are created on the tenant or tenant instance. The database login ID must have read and write access to the data location and backup locations.
7.Click Test Connectivity to test the connectivity between the Operations Console and the Ivanti Service Manager databases.
If you are using Windows Integrated Security (as opposed to Microsoft SQL authentication), the Database Login Id, Login Password, and Confirm Password fields are not shown. These fields are only displayed if you are using Microsoft SQL authentication.
8.Do not check Active, Clustered, or Mirrored. These are internal settings that should not be used.
9.Enter a location for the database server data. Do not enter a UNC path. Change the application pool identity so that it has read access to the data location.
10.Enter the location of the transaction log. Do not enter a UNC path. Change the application pool identity so that it has read access to the transaction log location.
11.Enter a location for the backup data for the database server. This is used for the automatic transfer of the database backup files from the source Microsoft SQL database server to the target Microsoft SQL database server.
•If you have more than one database server, each database server must have its own backup data location, but it must be a shared location that is dedicated for Ivanti Service Manager backups. Use a UNC path if you are using a shared location. Do not use the Microsoft SQL Server default backup location if you have more than one database server.
Change the application pool identity so that it has read and write permissions on both the Sharing and Security tabs in the Windows Explorer Properties dialog box for the shared backup location.
The identity (user) that the database server runs must have read and write permissions on both the Sharing and Security tabs in the Windows Explorer Properties dialog box for the shared folder used for the database backup location of the given database server.
Change the application pool identity to an account that has read and write permission to the backup data location.
•If all of the landscapes share the same database instance, you can use one backup data location.
12.To test the backup and restore function, select a database from the drop-down list. Click Test Backup & Restore. This may take some time.
The drop-down list is only populated if you successfully tested the connection as shown in step 8 above.
Select a small database, such as the Ivanti Service Manager configuration database, to quickly test the user's permission to back up and restore, to ensure that the backup location is set with the correct permissions, and to ensure that the data location for creating the database is correct.
13.Click Save.
Editing a Database Server
1.Log in to the Operations Console.
1.Click the Landscape tab. The system displays the Landscape workspace.
2.Click Database Server on the left. The system displays all of the database servers in the landscape.
3.(Optional) To view the database servers for a different landscape, select a different landscape from the drop-down list and click Go. The system displays all of the database servers in the landscape.
4.Do one of the following:
•Click the underlined name of the database server. In the resulting dialog box, click Edit.
•Click the pencil icon to the right of the database server name.
5.Edit the values.
6.Click Save.
Deleting a Database Server
You cannot delete a database server that is in use.
1.Log in to the Operations Console.
1.Click the Landscape tab. The system displays the Landscape workspace.
2.Click Database Server on the left. The system displays all of the database servers in the landscape.
3.(Optional) To view the database servers for a different landscape, select a different landscape from the drop-down list and click Go. The system displays all of the database servers in the landscape.
4.Click the red X to the right of the database server name.
5.In the resulting dialog box, click OK.


