Using Resource Capacity
With the addition of resource capacity, there is a new layout for the Employee business object workspace. Portfolio, Project and Demand Managers can all use this new layout to create and allocate resources to Tasks.
Note: For Administrators, there are no changes to the Employee business object.
About Resource Capacity
Previously PPM users could assign Project Roles, create Resource Plans and then search for Employee Resources based on Roles. They could then assign Tasks to the available Resources.
In this new release, resourcing capabilities have been enhanced to include Effort and Capacity Management. Project & Portfolio Managers can assign Project Tasks to the right person (Resource) with the right Skills and available Capacity. Managers can also manage Effort around a Project. They now have insight into Resources to avoid exceeding capacity, limit assignment outside of job scope, and assign the right Skills to any given Task.
Creating a Resource
1.Log in as a Portfolio Manager, Project Manager, or Demand Manager.
2.Open the Employee workspace.
3.Select an existing employee.
4.Check the Details tab to ensure you have selected the correct employee; the fields on the Details tab are unavailable for editing because this information is provided by HR.
5.Complete the tabs as described:
•Adding Information to the Overview
•Allocating a Task to an Employee
•Adding Incidents and Changes to Resource Capacity
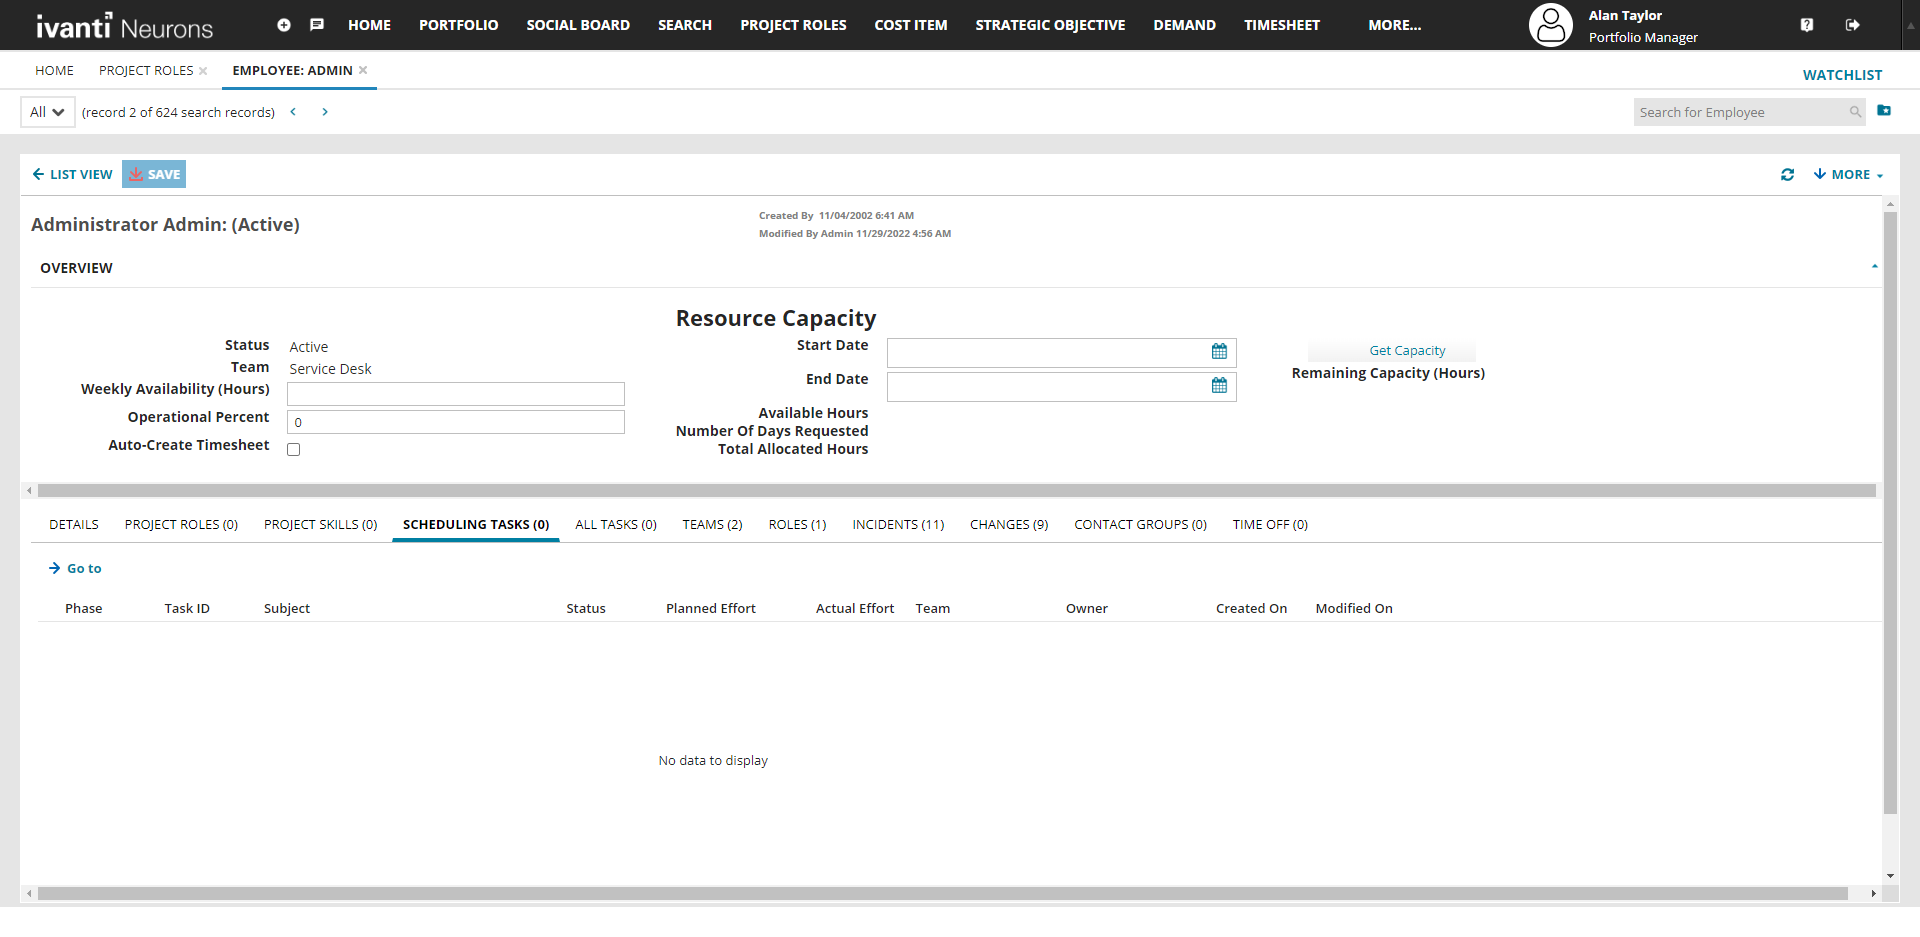
Adding Information to the Overview
| Field | Description |
|---|---|
| Status | The employee's company status. |
| Team |
The employee's team. |
| Weekly Availability (Hours) | The number of hours in a working week for the company. |
| Operational Percent |
Percentage of time (0-100) that a resource is not available to work on PPM projects. Derived as follows: Operational Hours = Operational Percent / 100 * Daily Hours Available Hours = DailyHours - Operational Hours * Number of Days Requested Daily Hours = WeeklyAvailability / 5 |
| Start Date |
Start date for employee availability. |
| End Date | End date for employee availability. When Start Date and End Date are populated, any Tasks that include that date range appear in the Scheduling Tasks tab. |
| Available Hours | This field is automatically calculated from the Weekly Availability value minus the Operational Percent. |
|
Number of Days Requested |
The difference between the Start Date and End Date using 9 to 5 hours from the Hours of Operation calendar. See: Setting Up Hours of Operation In more depth, this is automatically calculated from Weekly Availability value minus the Operational Percent. That result is divided by the Available Hours. For example, 40 hours per week minus 10% = 36 hours per week available divided by 5 days = 7.2 hours per day. A Number of Days Requested of 4.62 comes from dividing 33.26 Available Hours by 7.2 = 4.62. |
|
Total Allocated Hours |
Select a Task. If Planned Effort has a value then Total Allocated Hours for that Task is subtracted from the Available Hours. If a Task does not intersect with the chosen date range, it isn't listed in the Scheduling Tasks tab and does not affect the Remaining Capacity. |
|
Remaining Capacity |
Click Get Capacity to have all Tasks in the Scheduling Tasks tab considered and the remaining hours shown. Note: If only a portion of the Task's date range overlap with the employee's availablity, that is taken into account automatically because Planned Effort is divided by the days in the Task's Date Range. |
6.Select Save. This updates all the calculated fields.
Note: For help on creating Tasks, go to: Working with Project Management.
About the Details Tab
Information on the Details tab is read only because it is owned by HR. It is useful for checking if you have the correct employee before you start allocating tasks.
About the Scheduling Tasks Tab
The Scheduling Tasks tab displays information about Tasks scheduled within the Start Date and End Date provided for the Resource Capacity search.
Searching for Tasks for an Employee
When looking at Resource Capacity, you can search to review all assigned Tasks within a time frame. The search results display Planned Effort and Actual Effort in addition to other standard fields.
1.From the Employee BO, click on the Scheduling Tasks tab.
2.In the Overview section, enter the Start Date and End Date under Resource Capacity.
3.Click Get Capacity to display the employee's remaining Capacity in hours and a list of the Tasks assigned in the specified time frame.
Adding a PPM Role
If you want to add an extra role to an employee for a Project (example: DBA, Backup Admin, Trainer, Treasurer, Scrum Master), you can do this using the PPM Roles tab.
1.To link an existing role, click Link, and then click Select or use Custom Search to search for a role.
2.To create a new PPM Role, click New PPM Role.
3.Provide the name of the role and click Save.
Allocating a Task to an Employee
To view a list of Tasks assigned to an employee, click the All Tasks tab. This tab displays each Task assigned to the employee with Planned Effort and Actual Effort.
Note: Tasks are employee-specific and cannot be shared between employees.
Creating a Task
1.Select the All Tasks tab.
2.Click New Task.
3.Complete the following fields:
| Field | Description |
|---|---|
|
Summary |
Provide a summary of the Task (example: Plan training program for new IT induction process). |
| Details |
Describe the Task in more detail (example: Training needs to be planned in detail ensuring it achieves buy-in from all attendees for the new IT process). |
| Service |
Select the Service carrying out the Task from the drop-down list. |
|
Team and Owner |
Select the owning Team and individual from the drop-down lists. |
Details |
|
|
Planned Start/End Date |
When assigning a Task, if Planned Effort has a value, Planned Start Date and Planned End Date are mandatory fields. Planned Effort has a validation rule that the minutes entered must be less than or equal to the difference between the Planned Start and Planned End dates. When the date range overlaps all or part of the Resource's availability, the task appears automatically on the Scheduling Tasks tab. You cannot add or delete Tasks on the Scheduling Tasks tab. Note for Ivanti Professional Services Organization: The above changes can affect existing tasks. This means that there may be some manual clean-up to be assessed before the Neurons for ITSM Enterprise paid enhancement package is applied and possibly some data to clean up afterward. |
| Start/End Date | Both fields are optional but you cannot have a start date without an end date. |
| Priority | Select between 1 and 5 from the drop-down list. Usually 1 is highest priority but your company can decide. |
|
Planned Effort (Mins) |
Provide the amount of effort planned in minutes. This Effort value rolls up via the Project Phase to the Project. |
|
Actual Effort (Mins) |
Provide the actual effort expended in minutes. This Effort value rolls up via the Project Phase to the Project. |
|
Percent Complete (%) |
Provide the percentage complete for this task as the work is carried out. This figure is then rolled up into the Project and then in to the Program and Portfolio. |
Creating a Task From a Search
After Searching for Resources, you can create Tasks and assign them to the Resources returned in the Search.
1.Click on the Resources tab of the Project Phase.
2.Select an employee with the Capacity to complete a Task from the list of search results.
3.Click Create Task and complete the fields:
Enter Subject: Enter a name for the Task.
Enter Details: Enter any details associated with the Task.
Enter Planned Effort: Enter the expected effort in minutes.
Click OK.
4.To create the same Task for multiple Resources, select those employees in the Resources tab, and click Create Task.
Linking a Team
You can link as many teams as you like to an employee's record. Use this feature to track which teams are working on a task.
1.Select the Teams tab.
2.Click Link.
3.Select your chosen Team if it is already listed, or select the Custom Search option to search for a Team using fields and expressions.
Note: You cannot unlink the employee's default team which is automatically linked for you.
Adding a Role
You can link as many ITSM-related roles as you like to an employee's record.
1.Select the Roles tab.
2.Click Link.
3.Select your chosen Role if it is already listed, or select the Custom Search option to search for a Role using fields and expressions. Examples of Roles include Analyst, Demand Manager, Portfolio Manager, Project Manager.
Adding Incidents and Changes to Resource Capacity
You can add new Incidents or Changes to an employee or you can view existing associated Incidents or Changes.
1.Select the Incidents tab or the Changes tab.
2.Click New Incident or New Change.
3.For information on how to create Incidents or Changes, go to:
4.Select Go To to view an existing associated Incident or Change.
Adding Contact Groups
You can link as many contact groups (change approval groups) as you like to an employee's record.
1.Select the Contact Groups tab.
2.Click Link.
3.Select your chosen group if it is already listed, or select the Custom Search option to search for a group using fields and expressions.
4.Select Go To to view an existing linked group.
Adding Time Off
You can request time off for the selected employee using this tab. This is automatically factored into an Employee's available hours.
1.Select the Time Off tab.
2.Click New Time Off.
3.Enter start and end dates for the time off.
4.Click Save.