Working with Mobile Analyst
The Mobile Analyst portal is a web-based responsive user interface that you can access using the Mobile Analyst role. As a Mobile Analyst user, you can perform the following actions using this portal:
•Create, track, resolve, and complete Incidents.
•Create, edit, and fulfill Service Requests.
•Create and complete Tasks and assign Tasks to others.
•Add notes and attachments to Incidents and Tasks.
All of these can be done on-the-go using your mobile devices.
When you login to Ivanti Neurons for ITSM on your mobile devices including tablets, only mobile-based user roles are available. If you want to login to non-mobile based user roles, use your desktop or a laptop.
Logging in to the Mobile Analyst portal
1.On your mobile device, enter the login URL provided by your administrator in the Tenant URL field.
or
2.Click the Scan Tenant QR, allow access to camera While using the App.
3. From the desktop application click the QR Code  icon and scan the QR Code using the phone camera.
The login page is displayed.
4.In the login page, enter your username and password and click Login.
5.Select the Mobile Analyst user role and click Submit.
The application displays the Home page.
Navigating the Mobile Analyst portal
The Home page is the default view of the Mobile Analyst portal. You can navigate to different workspaces from the Home page based on the actions you want to perform.
Home Page
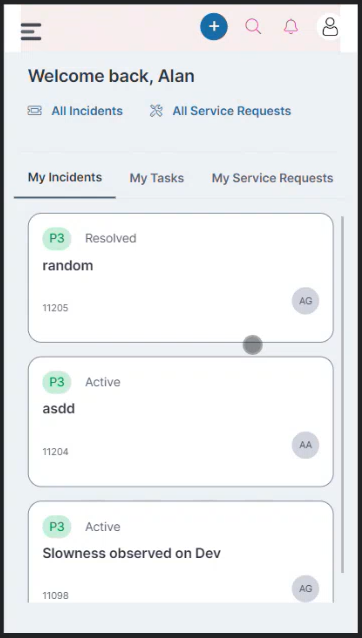
•All Incidents: By default, it displays your team's active incidents; however, you can choose from the following favourite saved searches:
•All Active Incidents, My Team's Active Incidents (default), and All.
•All Service Requests: By default, it displays all active service requests; however, you can choose from the following favourite saved searches:
•All Active Asset Requests, All Active Service Requests, My Service Requests, and many more.
•My Incidents: Displays all incidents assigned to you.
•My Tasks: Displays all tasks assigned to you.
•My Service Requests: Displays all service requests assigned to you.
•Main Action Button: On the Home page, this  icon is available in the header. It helps to create incidents and service requests, and it is accessible from all the pages. To configure this new UI, you have to enable the NewUIElements in Global Constants. For more information, refer to Default Global Constants.
Using Search
You can refine your search and also sort and filter the records displayed for incidents and tasks:
1.Select either View Incidents or View Tasks.
2.To search by a keyword:
•Type a keyword in the search bar.
3.To search using the favorite search options:
| a. | Tap the drop-down arrow under the search option name. |
| b. | Select from the options displayed. |
4.To filter and sort:
| a. | Tap the filter icon  . . |
| b. | Select the required options in the Sort and Filter page and tap the close icon  once you finish. once you finish. |