Decision Quick Action and Branched Decision Editor
•About the Decision Quick Action and Branched Decision Editor
•Example: Creating an Escalation Workflow using the Decision Quick Action (GAD)
•Classic Action Designer: No equivalent.
About the Decision Quick Action and Branched Decision Editor
To use this Quick Action, set the global constant EnableActionService to True. If EnableActionService is not available in the global constants list (this may be the case for upgraded instances), Administrators can manually add the constant.
Use the Decision Quick Action and the Branched Decision Editor to define multiple cases, or branches, where actions executed sequentially based on defined conditions.
With this Quick Action, you can build branching logic into Composite Actions to create advanced workflows for managing and automating processes.
The Decision Quick Action allows you to:
1.Add multiple branches.
2.Add an unlimited number of actions to each branch, including other Decision Quick Actions.
3.Use Go to Action Quick Actions within or before branches to jump in to or out of other branches, or anywhere else within the action. For example, use Go to Action to conditionally run actions in another branch after the current branch completes execution.
Order of Execution
When a Decision Quick Action executes, the cases are evaluated in the order defined in the Decision Editor. The default case is always considered last.
The first condition that evaluates to true activates execution of all of the actions within its branch. The Decision Quick Action is completed after all the actions on the branch with a true condition have been executed. Overall execution is finished unless Go to Action is used to jump to other actions.
If none of the conditions for any of the other cases are met, the default case is executed. There must always be at least one default and one conditional case for a Decision Quick Action to be valid.
The default branch is always automatically the last to be processed regardless of its list position in the Decision Editor.
Parameters
You can access parameters for the Decision Quick Action block using the Block and Common tabs of the Settings pane. For more information on the Common tab settings, see About Advanced Quick Actions.
Block Tab
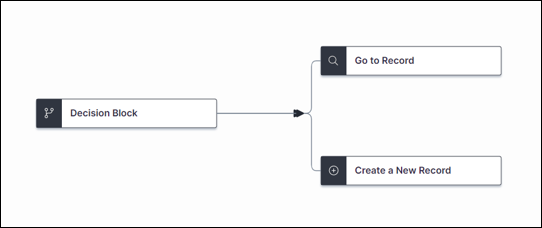
After dragging the Decision Quick Action block on to the Designer Board, you need to link the Decision Quick Action to at least two other Quick Action blocks before the Decision Editor button is enabled.
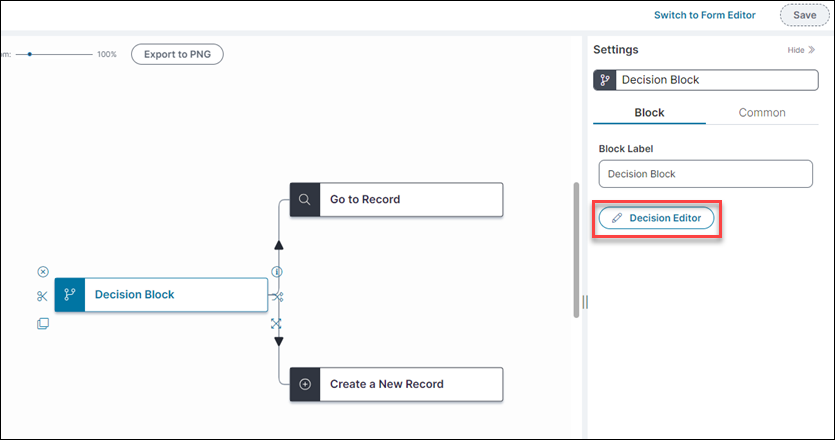
For Quick Action blocks linked to the Decision Quick Action, select each one and then configure block-specific parameters on the Block tab of the Settings pane.
Add or remove actions via the Designer Board; you can not add or remove actions when using the Decision Editor.
Select the Decision block to access the expression-based criteria for each action/branch:
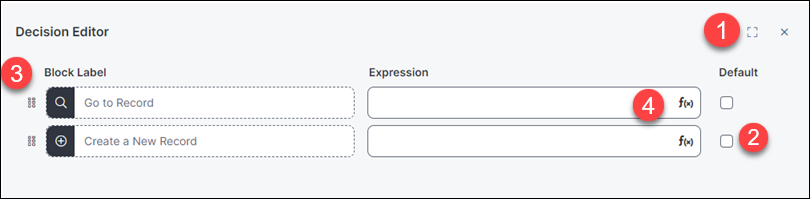
•1: Click this symbol  to expand the window to full-screen.
•2: Select this option to choose which action is to be the default. The default case is executed if none of the conditions for any of the other cases are true.
•3: Click and hold this symbol  to drag cases and rearrange their order.
•4: Click f(x) to open the Simplified Expression Editor. Enter the expressions for the default branch and the alternative branches. For more information: Using the Simplified Expression Editor.
•Click Save .
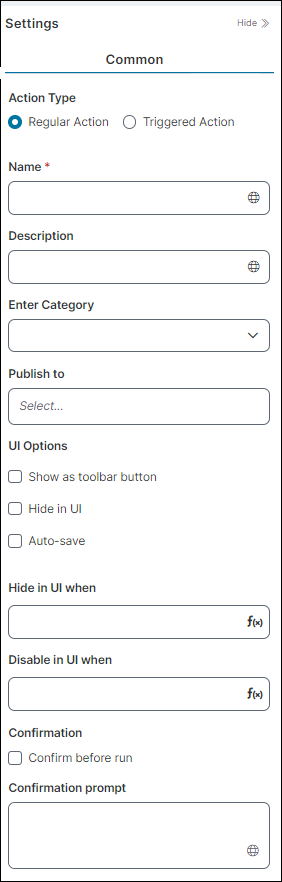
Common Tab
Click the Common tab in the Settings pane to view the parameters specific to the Common part of the block.
For Common tab field details, see Start Block Settings