AI Configuration Hub
Role: Administrators.
Platform: SaaS only.
Minimum Version: Ivanti Neurons for ITSM 2024.2.
Feature Eligibility: Ivanti's AITSM capabilities are available to customers who have subscribed to Premium or Enterprise Premium license. To know your eligibility, reach out to your Ivanti Account Manager.
The AI Configuration Hub is a centralized AI ITSM workspace where you can manage all AI capabilities within Ivanti Neurons for ITSM. This hub provides configuration options for advanced features such as the AI content generator, knowledge base AI, and intelligent automation tools that enhance your IT service management experience.
In addition to content generation, the hub supports language translation and AI translation, enabling seamless translation and localization of knowledge articles, tickets, and user communications. Administrators can now configure custom translation models, choosing from providers such as OpenAI (custom hosted), Azure OpenAI, Google Translate, Azure Translate, and DeepL.
By consolidating these powerful tools into a single knowledge base platform, the AI Configuration Hub empowers administrators to configure, customize, and optimize AI-driven processes for better efficiency and service quality.
Accessing the AI Configuration Hub
1.Log in to Neurons for ITSM as an Administrator.
2.Open the Configuration console, scroll to select AI Configuration Hub.
AI Configuration Hub
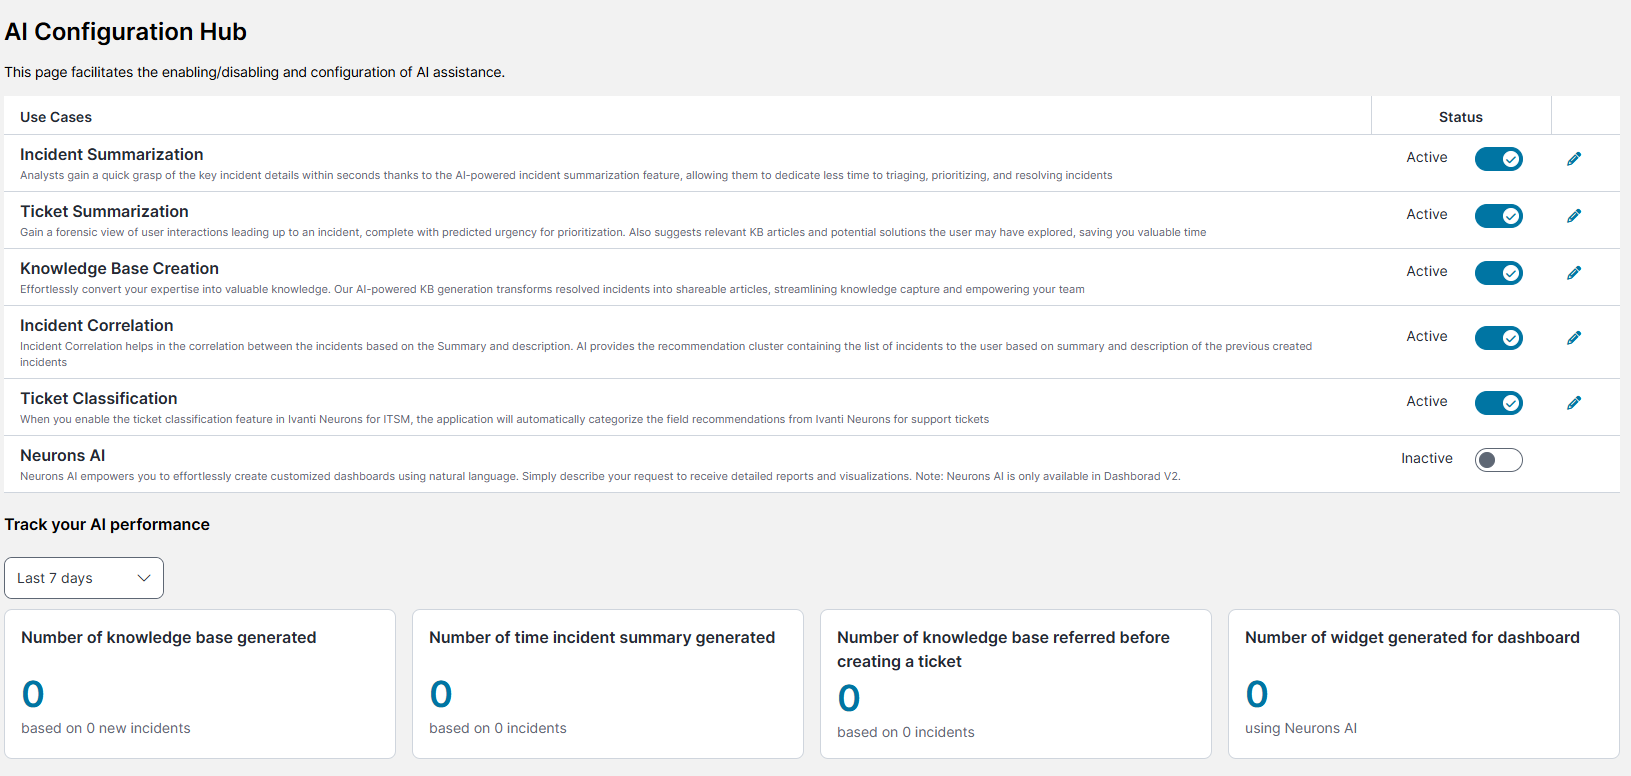
Incident Summarization
To enable the Incident Summarization capability, set Incident Summarization to Active using the toggle button.
For information on using the Incident Summarization capability, refer to Incident Summarization.
Customizing Incident Summarization
You can enable localization of AI content and edit/add fields to generate AI content.
1.Click the Edit icon ![]() beside the Incident Summarization option in the AI Configuration Hub page.
beside the Incident Summarization option in the AI Configuration Hub page.
2.Enable Localization:
•Set the Enable Localization option to Active using the toggle button.
When this option is selected, the AI content is generated in the selected locale of the application.
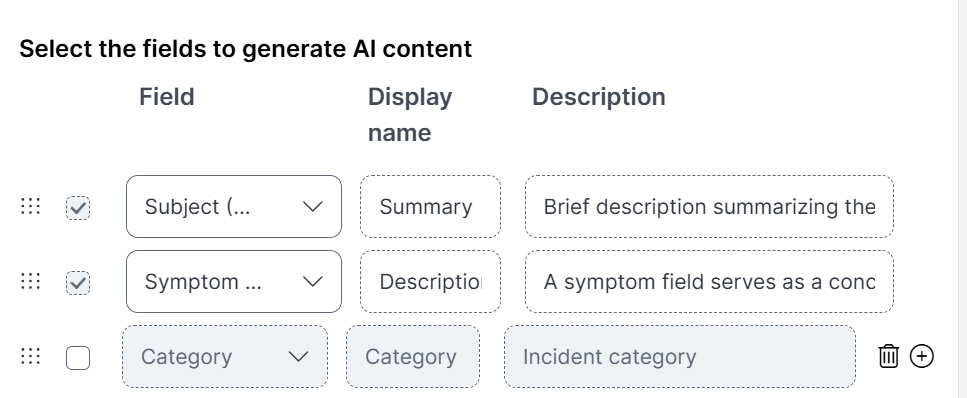
3. Customize fields used for generating the AI content:
| a. | Under the Select the fields to generate AI content section, enter the following details: |
•Field: Click the Field dropdown and select the field from the Business Object.
•Display Name: Enter the field's internal name (not the display name).
•Description: Enter details about what the field contains. For example, its purpose - to help AI understand the data in this field.
| b. | Optionally, click the Add icon |
| c. | Select or clear the checkbox to enable or disable an additional field. |
| d. | Click the Delete icon |
You can enable/disable and delete only the additional fields. The default fields cannot be disabled or deleted.
4.Click Save.
Customizing Fields
5.Click Save.
Ticket Summarization
To enable Ticket Summarization, set Ticket Summarization to Active using the toggle button.
Customize the Ticket Summarization Capability
1.Click the Edit icon ![]() beside Ticket Summarization.
beside Ticket Summarization.
The Ticket Summarization edit page is displayed.
2.Enable or disable the following features:
•Predict Urgency: Use the toggle button to enable or disable urgency prediction for incidents raised by Self Serviceusers.
•Show user interaction history to end user: Turn on/off the toggle button to show or hide the interaction history to the Self Service users. If you disable this option, the user interaction history is displayed only for the Service Desk Analyst team.
3.Click Back to exit.
Knowledge Base Creation
To enable Knowledge Base Creation, set Knowledge Base Creation to Active using the toggle button.
Customize the Knowledge Base Creation Capability
Click the Edit icon ![]() beside Knowledge Base Creation.
beside Knowledge Base Creation.
The Knowledge Base Creation edit page is displayed. The Knowledge Base Creation page has the following tabs:
Configuration
You can enable localization, set the temperature, and select/add fields to generate AI content.
1.Enable localization:
•Set the Enable Localization option to Active using the toggle button.
When this option is selected, the AI content is generated in the selected locale of the application.
2. Set the Temperature:
•Adjust the temperature by moving the Select the temperature slider to the left to decrease or to the right to increase the temperature. The range is 0 (lowest) to 100 (highest).
3.Customize fields used for generating the AI content:
| a. | Under the Select the fields to generate AI content section, enter the following details: |
•Field: Click the Field dropdown and select the field from the Business Object.
•Display Name: Enter the field's internal name (not the display name).
•Description: Enter details about what the field contains. For example, its purpose - to help AI understand the data in this field.
| b. | Optionally, click the Add icon |
| c. | Enable or disable the additional fields by selecting or clearing the checkbox beside the additional fields. |
| d. | Click the Delete icon |
You can enable/disable and delete only the additional fields. The default fields cannot be disabled or deleted.
4.Click Save.
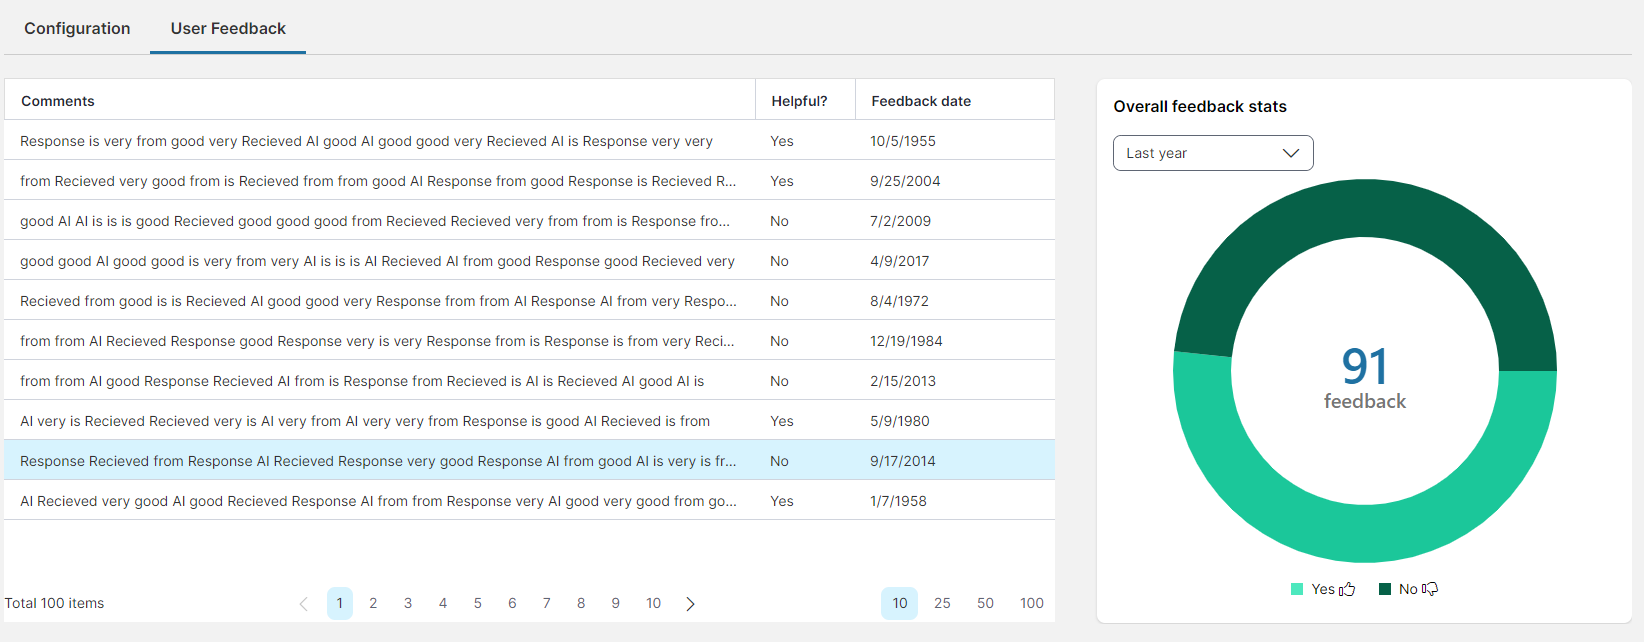
User Feedback
The User Feedback tab displays the feedback received in both grid and chart formats, allowing easy visualization and analysis of user responses over time.
Key elements of User Feedback:
•Feedback Grid: Displays individual comments along with attributes like helpfulness and feedback date, providing detailed insights into user sentiments and experiences.
•Overall Feedback Stats: A dynamic chart that reflects feedback trends over selectable time periods, helping to track changes in user satisfaction and identify areas for enhancement.
User Feedback
Incident Correlation
To enable the Incident Correlation capability, set Incident Correlation to Active using the toggle button.
Customize the Incident Correlation Capability
1.Click the Edit icon ![]() beside Incident Correlation.
beside Incident Correlation.
The Incident Correlation page is displayed.
2.Configure the field mappings to map the source or user-created field to the target field used by the Machine Learning service to cluster the Incidents.
3.Click Save to save the settings.
Ticket Classification
Refer Configure Ticket Classification using Neurons for ITSM AI Services for more information.
Neurons AI
To enable Neurons AI, set Neurons AI to Active using the toggle button.
With the Neurons AI feature, you can create customized, visually appealing reports and widgets in the application by entering your prompt in simple text-based input.
The Neurons AI feature is available only for customers using Dashboard V2.
Translation Service
The Translation Service feature converts all UI elements and user-generated content into the user's preferred language or locale. For example, in an Incident Summarization, if an end user located in Germany requests the summary in their local language (German), the Translation Service can perform the translation and deliver the output in that language.
User entered content and UI elements in Neurons for ITSM renders in German
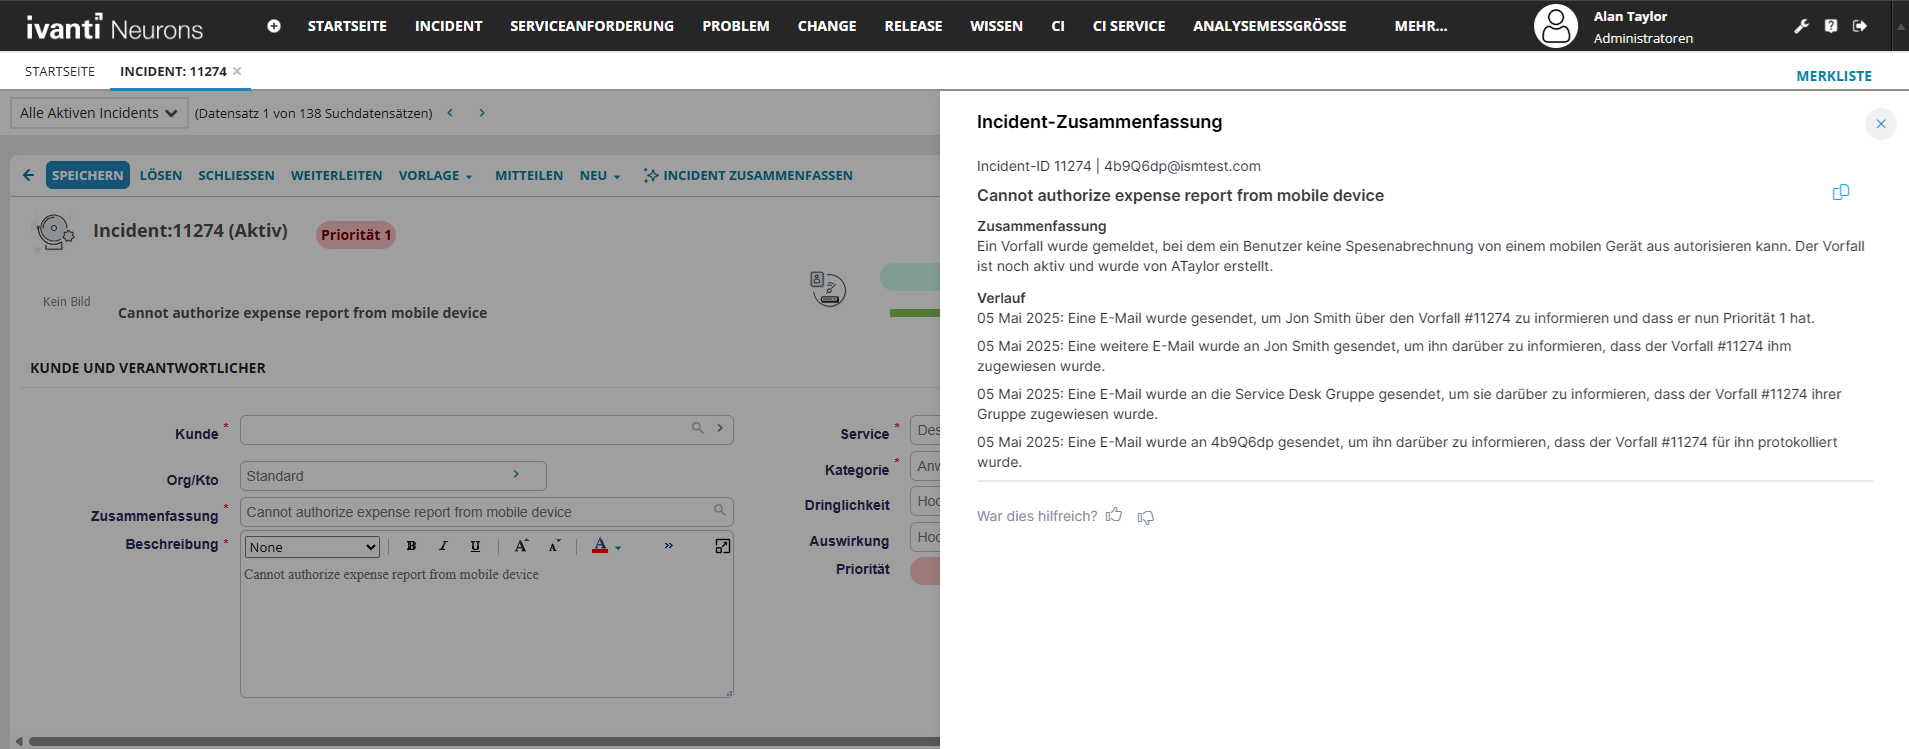
Refer Translation Service for more information.
Auto-Translation
The Auto-translation capability is an independent feature that enables AI-based translation of content based on user's selected locale. It functions in the following areas:
•Localization Workbench
•Field-Level Translation
Localization Workbench works with both Ivanti-hosted translation model and Custom Translation Model. However, the translation is limited to 20 strings per call for Ivanti-hosted translation model. If Custom translation model is configured, the translation capacity increases to 100 strings per call.
Refer Auto-Translation for more information.
Write Assist
The Write Assist feature provides AI-powered assistance for enhancing and generating content. It is accessible through AI Configuration Hub and includes two sub-features:
•Field-Level Write Assist
•Email Assist
Refer Write Assist for more information.
Track your AI Performance
This dashboard displays the number of incident summaries, knowledge articles, and widgets you created using the built-in AI capabilities within the selected time frame: Last 7 days, Last 30 days, or Last Year.
