Configure Ticket Classification using Neurons for ITSM AI Services
Role: Administrators.
Platform: SaaS only.
Minimum Version: Ivanti Neurons for ITSM 2025.3.
Feature Eligibility: Ivanti's AITSM capabilities are available to customers who have subscribed to Premium or Enterprise Premium license. To know your eligibility, reach out to your Ivanti Account Manager.
Prerequisites:
•Raise an IT ticket to Ivanti Operations to set the ITSMTCPredictions feature flag in ConfigDB to Unconditionally On. By default, it is in Disable state. For further help, contact Ivanti support.
•ITSMTCPredictions in Onconditionally On state - The Ticket Classification feature functions through ITSM AI services.
•ITSMTCPredictions in Disable state - The Ticket Classification feature functions through Ivanti Neurons.
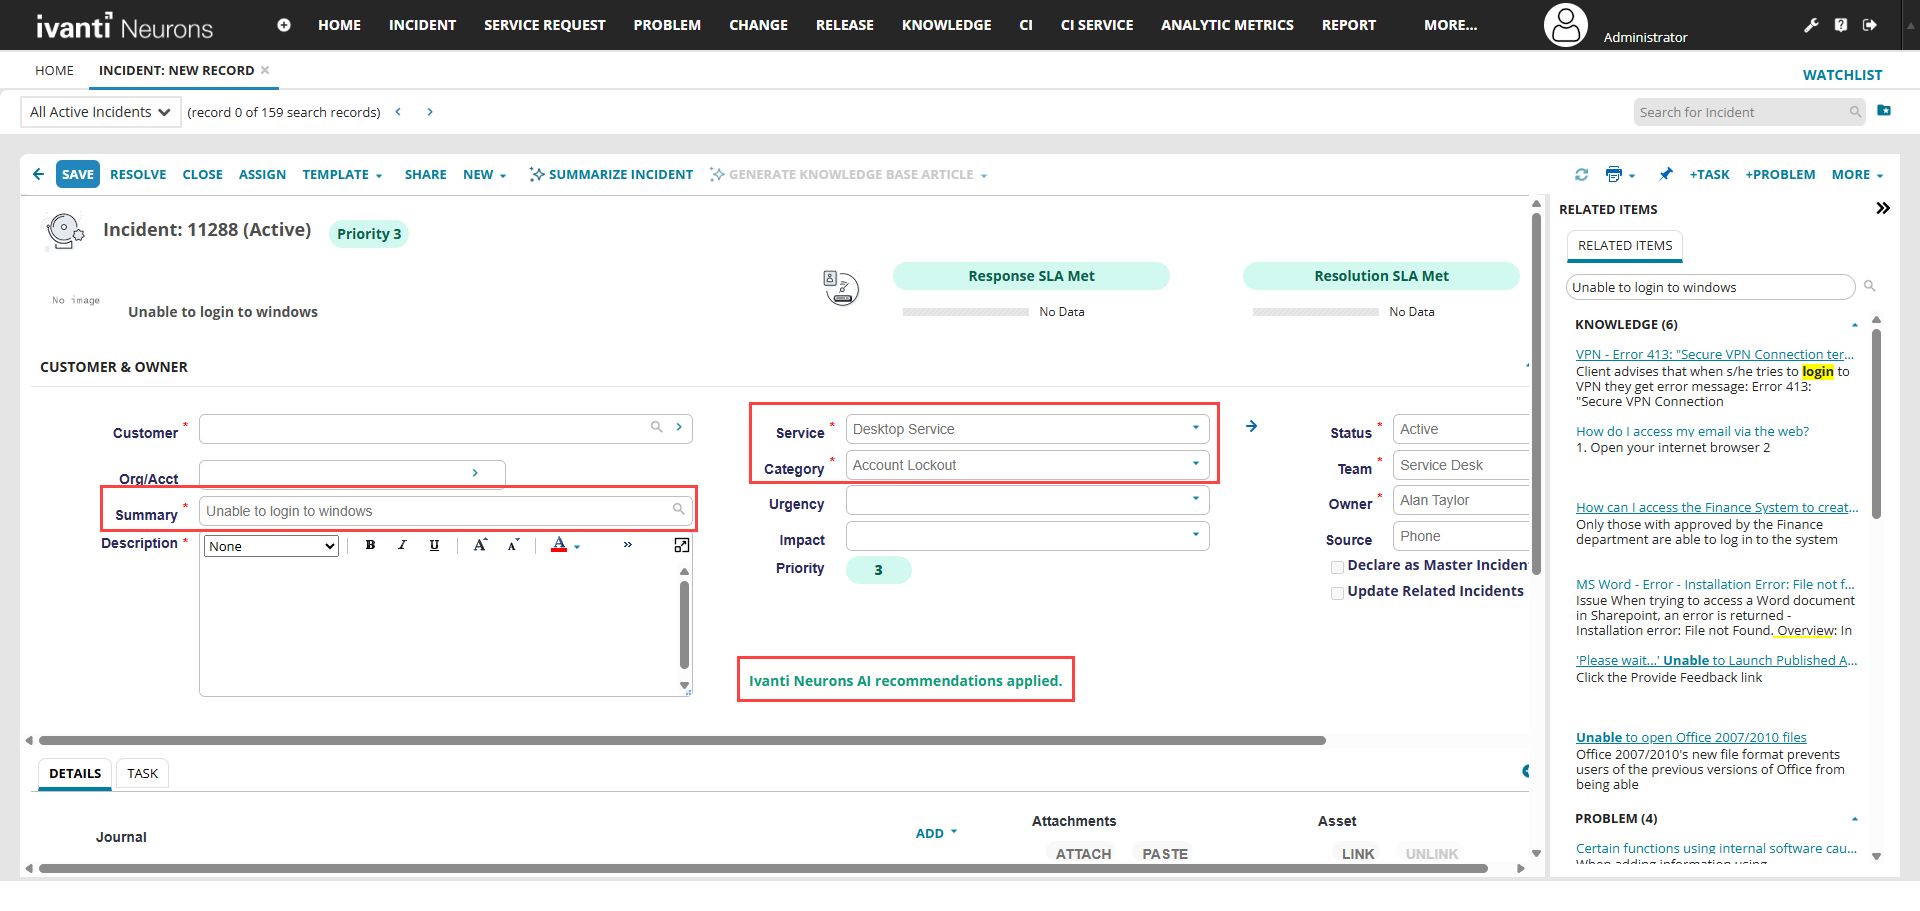
The Ticket Classification feature brings intelligence to your ITSM processes through IT support ticket classification powered by AI. This capability uses advanced models to deliver automatic ticket classification, ensuring that every service ticket is categorized accurately and efficiently without manual effort.
When you add a Summary while creating or editing an incident, the system predicts and automatically fills the related Service and Category fields using ITSM’s AI data model. Additionally, it provides Ivanti Neurons AI recommendations, helping analysts apply the most relevant classifications quickly. This automation reduces errors, speeds up ticket handling, and improves overall service desk productivity.
The application uses ITSM's AI data model to predict and automatically fill the related Service and Category fields when you add a Summary while creating or editing an incident and prompts Ivanti Neurons AI recommendations applied.
To learn more about Ticket Classification use cases, refer to the Using Ticket Classification guide.
To enable Ticket Classification
1.Log in to Neurons for ITSM as an Administrator.
2.Open the Configuration console > Build > AI Configuration Hub.
3.Use the active/Inactive toggle to set the Ticket Classification to Active.

To configure Ticket Classification
1.Log in to Neurons for ITSM as an Administrator.
2.Open the Configuration console > Build > AI Configuration Hub.
3.Select the Edit icon ![]() beside Ticket Classification.
beside Ticket Classification.
4.Select Add Model.

5.Enter the Name, Description, choose a Language, and upload the Training Data file. Ensure the file is in .csv format only.

You can optionally upload a Stop Words file to train the AI Model to ignore specific words during classification. Ensure the file is in .csv format.
Ensure that the .csv file you upload for Training Data and Stop Words should have only the Subject, Service, and Category headers. Here is the sample .csv file.
6.Select Save to save the model as draft or select Save and train to train the model instantly.
7.Select the Deploy icon ![]() to deploy the trained model once the model status change to Trained.
to deploy the trained model once the model status change to Trained.
![]()
You can have multiple AI models with Trained and Draft status, whereas only one model can be in Deployed status at once. So if you select Deploy ![]() icon to another model, the previously deployed model changes its status to Trained.
icon to another model, the previously deployed model changes its status to Trained.