Asset disposals
The Disposals workspace is used to manage the disposal of assets at the end of their lifecycle. This workspace displays a list of all disposals in the database and includes saved searches to narrow the list. A single disposal record can include one or more assets for disposal.
You can start the disposal process either from the Disposals workspace or from the Hardware Assets workspace by selecting one or more assets and clicking Create Disposal.
The following roles can access the Disposals workspace and perform disposal actions:
•Storage Manager
•Asset Manager
•Asset Administrator
These roles can create, link, and finalize disposals.
For details about deleting asset records from the ITAM database and tracking them in the Deleted Assets Audit workspace, see Hardware assets.
1.You can create an asset disposal either way:
•In home page, select Hardware Assets, and click Create Disposal.
•In home page, search Disposal and click New.
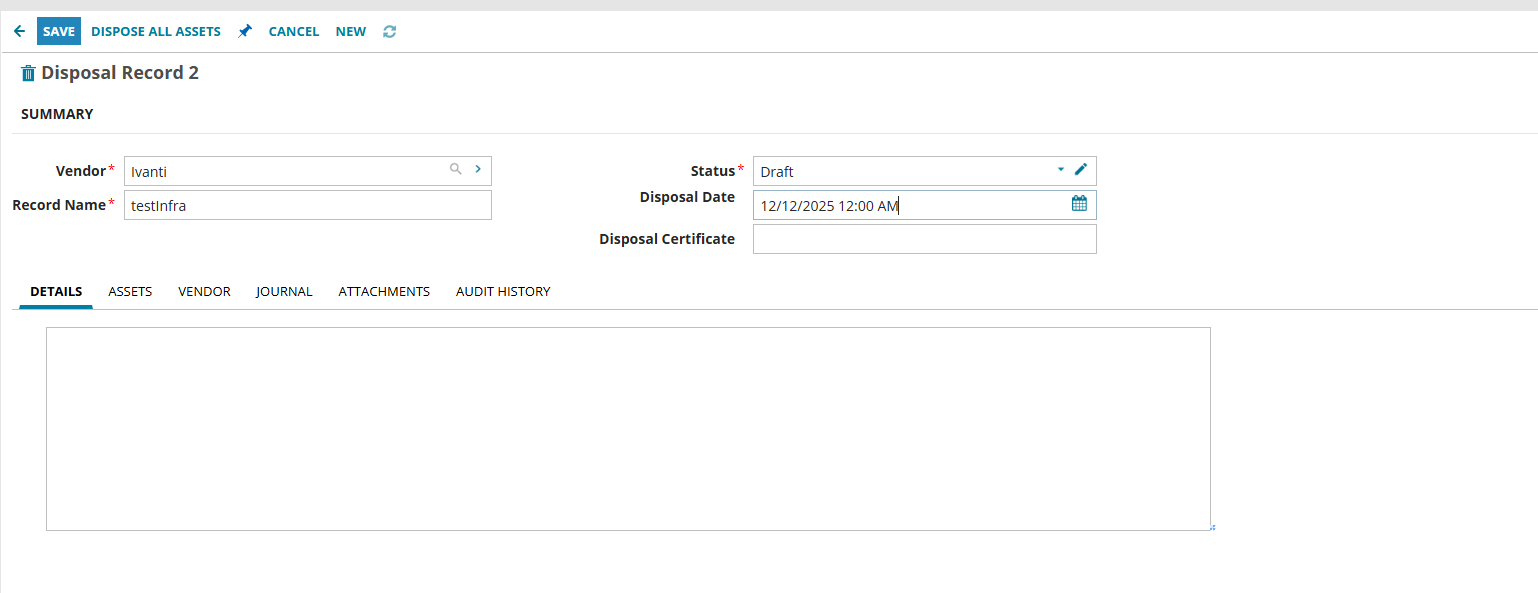
2.Select the Vendor handling the disposal, and enter the Record Name, this can be a summary description or a reference number.
3.Choose the Status from the dropdown. Set it to Draft when creating a new record.
4.If available, enter the Disposal Date, and Disposal Certificate then click Save.
5.Click the Assets tab and click Link.
The dialog lists available assets for disposal. Assets already in process do not appear.
6.Select the assets for disposal, and click Select. A Disposal tab is also added to the associated asset records, enabling you to track the disposal in the Hardware Assets workspace.
7.Click Save.
You can set the Status to Cancelled to cancel the disposal.
Once you have created the asset disposal record, you can return to the Assets tab and link and unlink further assets as required. The next stage is to finalize the disposal.
Before disposal, assets must be transferred to Temporary Storage for processing. Once moved, the status updates to Awaiting Disposal, preventing further assignment or movement.
1.From the Assets tab of the disposal, click link icon to link the assets. When linked, a corresponding Disposal tab appears on each asset record.
You can add multiple assets in a single disposal record.
2.Select the asset in the list, and click unlink icon to remove asset from disposal asset record.
3.Select the required assets and click Assign Temporary Storage.
4.Choose the Location and Storage Space and then click Ok.
The status of the linked assets changes to Awaiting Disposal, and they can no longer be assigned to users or transferred around your organization. Now you can prepare each asset for disposal if required.
5.From the Assets tab, select the assets and click Set Disposal State. Choose appropriate status and click Ok.
You can change the Disposal State on the Disposal tab on the asset record page. Use this status to monitor your internal disposal processes before the asset is removed for final disposal.
6.When disposal is complete, update the Disposal Date enter the Disposal Certificate, click Dispose, and set the status to Complete.
Assets are now marked as Disposed.
7.Complete the associated tabs as required:
•Details – Add important information to this record.
•Vendor – View or edit vendor information who are handling the disposal.
•Journal – Record additional notes.
•Attachments – Add certificates such as WEEE certificates, or URLs (include https://).
•Audit History – Automatically tracks changes to key attributes.
8.Click Save.
•Retired assets cannot be disposed without manual intervention.
•Changing storage assignments after an asset is assigned requires custom configuration.
•Vendor pickup scheduling has no built-in workflow.
•Transfer verification lacks a sign-off or approval process to confirm successful handover to vendors.