Getting Started
You will need to obtain several items in order to start using the Ivanti Neurons for RBVM/ASPM API. This guide will help you to complete the following tasks:
- Choose the correct URL to access your platform API
- Make sure that you have the privilege required to use an endpoint
- Generate an API token
- Find your client ID
API URL Structure
The platform instance where your client is located determines the endpoint URL structure. All URLs start with the root https://{platformId}.risksense.com/api/v1.
Replace {platformID} with the platform ID for your client. For example, users on https://platform-eu.risksense.com would visit https://platform-eu.risksense.com/doc/
Required Permissions
The Ivanti Neurons for RBVM/ASPM platform supports a privilege-based permissions structure. When the requesting user doesn't have permission to access an endpoint, the API will return a 419 error code.
{ "timestamp": "2021-03-30T16:47:30.648",
"status": 419,
"error": "InsufficientPrivileges",
"clientsMissingPrivileges": [ 656 ],
"missingPrivilege": "Assessment Control",
"method": "PUT",
"path": "/api/v1/client/656/assessment/12" }In the above example, the requesting user was denied access because they lacked the Assessment Control privilege. To overcome this, the requesting user needs to be assigned a role that grants the Assessment Control privilege.
For more information on how to find a role that bestows a specific privilege, visit the article on navigating roles and privileges.
Generating an API Token
In order to use the Ivanti Neurons for RBVM/ASPM API, you will need an API authorization token. Authorization tokens are generated in the Ivanti Neurons for RBVM/ASPM platform. Permissions to access Ivanti Neurons for RBVM/ASPM platform data are based on the permissions of the Ivanti Neurons for RBVM/ASPM user that generates the token.
The following steps will show you how to generate and manage API tokens.
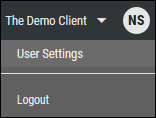
Navigate to your platform instance and log in. Once logged in, click your initials in the top-right corner of the screen and select User Settings.
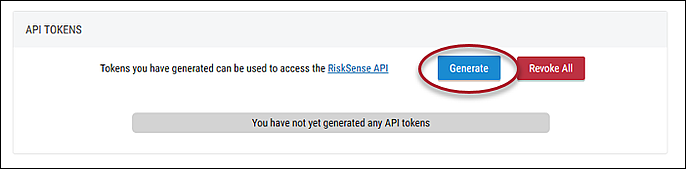
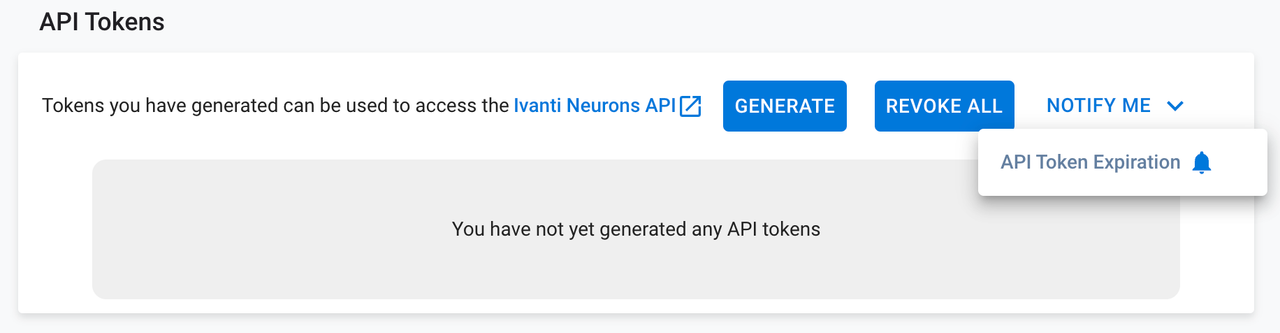
Once on the User Settings page, scroll down to the API Tokens section. This is where you can generate new tokens to use the Ivanti Neurons for RBVM/ASPM.

If you have already created API tokens in the past, their names are displayed here. You can rename or delete existing API tokens here, as well.
To generate a new token, click Generate.
When you click the Generate button, the following dialog box appears. This dialogue also tells informs you when the token will expire. Your organization sets the policy for token expiration. (For more information on this setting, visit the article on configuring the client setting for API token expiration.)
Token names may not contain spaces but may contain all alphanumeric characters and the following special characters:
- ^
- \
- -
- ,
- +
- $
After entering your token name, click Generate. Ivanti Neurons for RBVM/ASPM displays the following dialog box showing the newly generated API token.
This token will only be displayed once. Select and copy the API token to a secure location, so you can retrieve it later. Clicking the Clipboard icon to the right of the API token also copies the token to the clipboard as well.
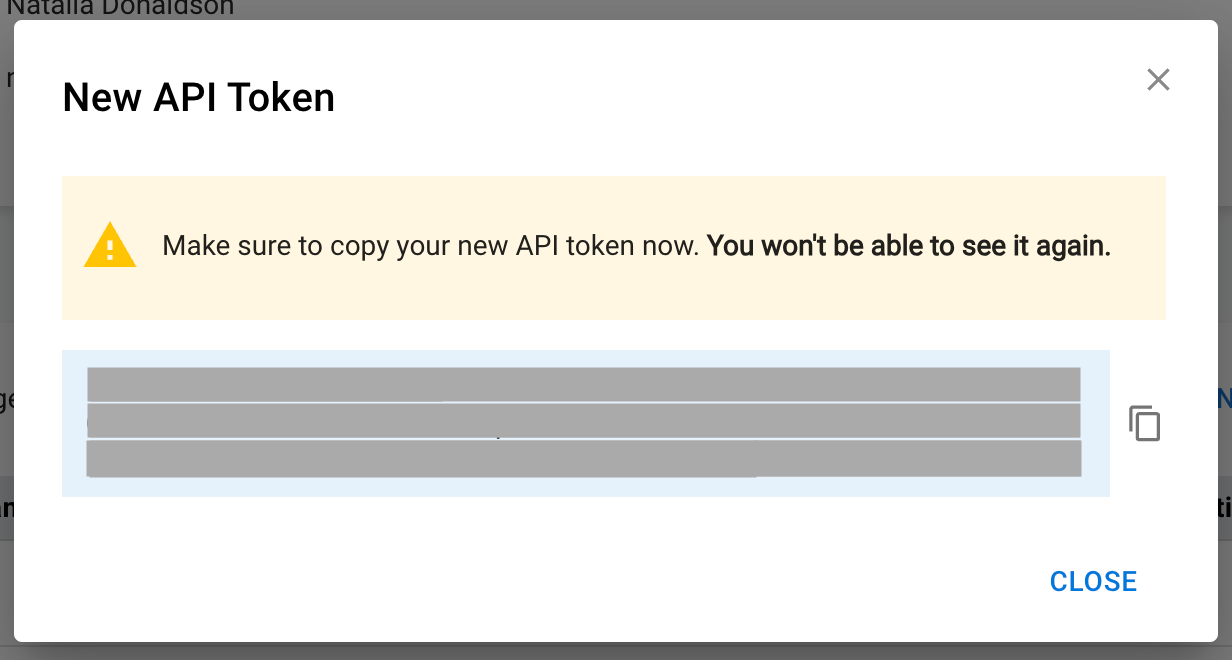
After copying the new token, click CLOSE to return to the User Settings page. This token can now be used to interact with the Ivanti Neurons for RBVM/ASPM REST API.
If you plan to use the token for automating routine tasks, you may want to set up a notification for API token expiration. You can receive notifications in platform, via email, or via Slack about tokens expiring up to 30 days in advance. By clicking the bell icon in the Notify Me menu, you can automatically enroll in the default in-platform notification.
Finding Your Client ID
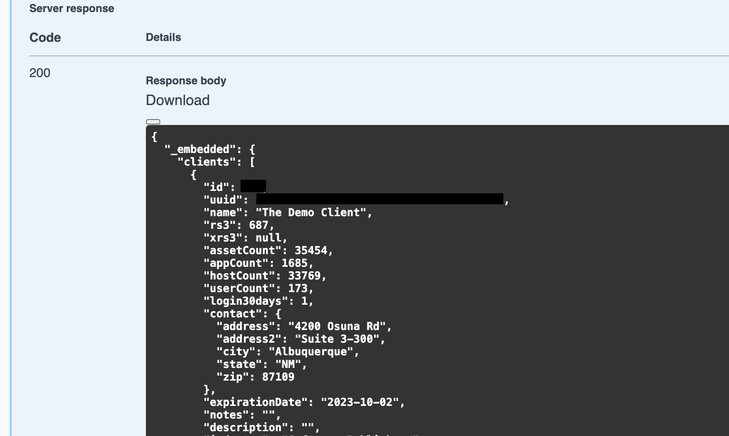
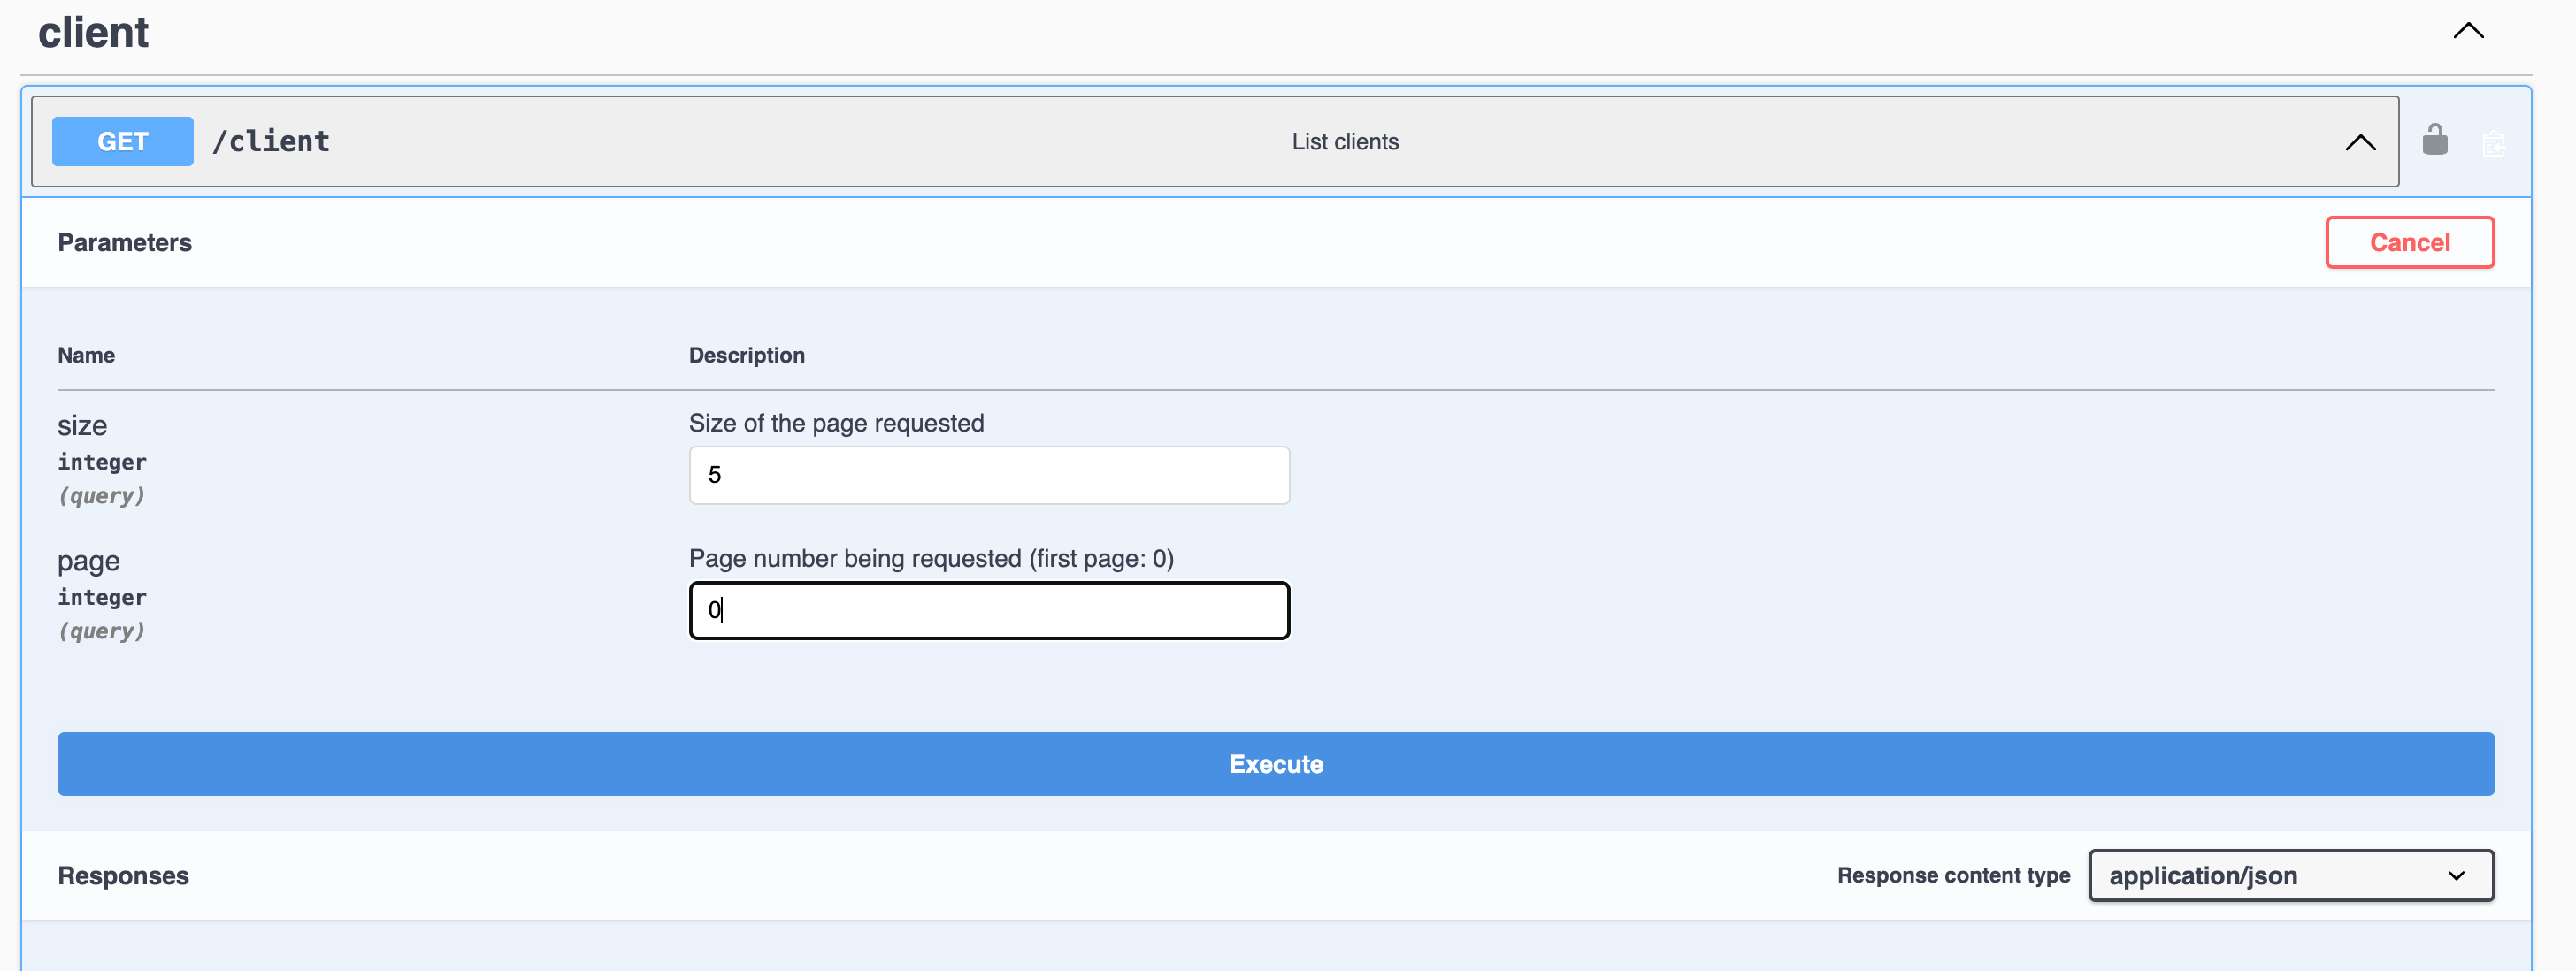
Most API requests require a client ID. The Knowledge Base has an article on finding your client ID through the platform UI. You can also retrieve the list of clients to which you are assigned through the endpoint https://{platformID}.risksense.com/api/v1/client.
Visit https://{platformID}.risksense.com/doc/ to try out this endpoint. After logging into the platform, open up the API documentation in a separate window.
Scroll down to endpoints listed under the client topic. Provide the size (the number of results to include in the search query). Set page to 0. Then click the Execute button.
Once execution finishes, you can view a sample CURL command based on your recent search query.
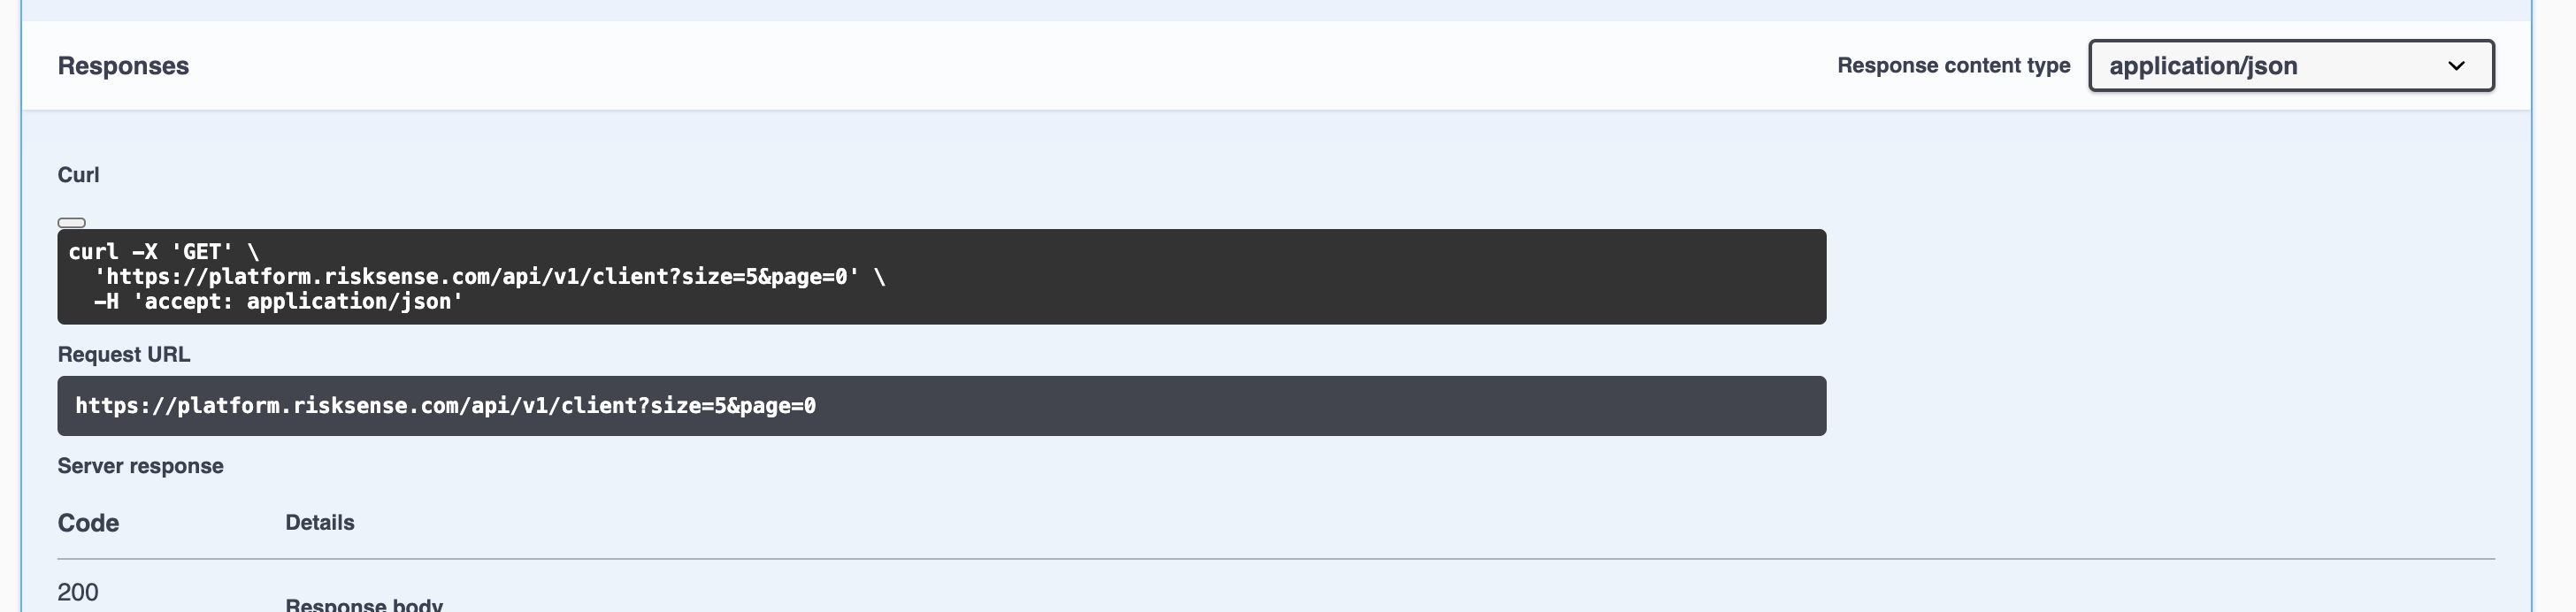
Finally, you can review the response code and the response.