Creating a Tag on the Tags Page
Summary: How to create a tag while on the Tags page.
To create a tag, you must have the IAM privilege Tag Modify.
Users can create a new tag from any of the list view pages or the Tags page. To create a tag from a list view page, see Creating a Tag from a List View Page.
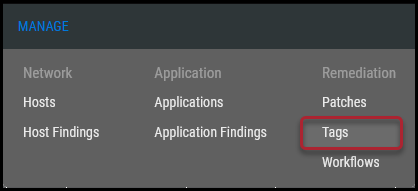
To create a tag, navigate to the Manage > Tags page.
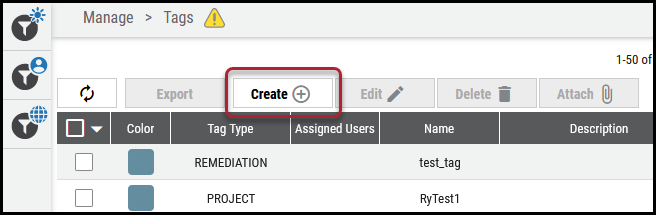
On the Tags page, click the Create button near the top of the page.
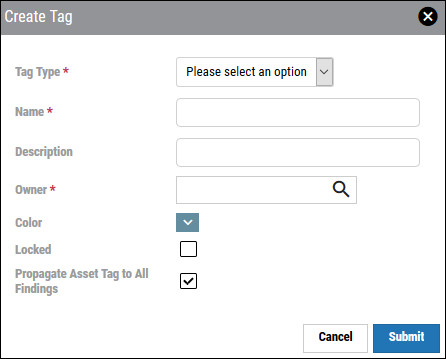
In the Create Tag window, fill out the fields with your tag information. Additional information about each field is provided below.
Project tags require more information than other tags. For more information regarding project tag fields, see Project Tags: Overview.
-
Tag Type: There are a variety of tag types to choose from (Compliance, Location, Custom, Remediation, People, Project, Scanner, PCI, and CMDB).
-
Name: Tag name.
-
Description: Optional tag description.
-
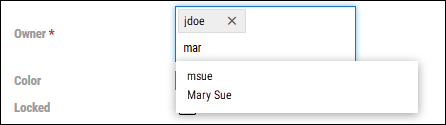
Owner: Generally, the user that created the tag, but others can be added or removed. Type in a user name, and when you see the user to add in the drop-down list, click their name. To remove a user, click the X next to their name.
-
Color: Assign a color to the tag for easy identification.
-
Locked: Tags can be locked so that no one else can edit their settings (checked) or unlocked (unchecked), allowing anyone to edit.
-
Propagate Asset Tag to All Findings: When applying tags to assets, checking this box ensures that all findings on that asset are also tagged. When applying tags to assets, unchecking this box propagate tags exclusively to assets.
Once completed, click Submit. The new tag is now available in the Tags drop-down menu and on the Tags page. You can now assign the tag to findings.