This is not the latest version of Identity Director documentation.View available documentation.
Add a Windows Authentication Provider as an Identity Provider
If you installed a Windows Authentication Provider separately, the following steps are necessary after installation, to add the Windows Authentication Provider as an Identity Provider in Identity Broker:
Step 1: Gather information
- Open a browser and go to the following URL: <Windows Authentication Provider HOSTNAME>/winauth/showconfig
Example, using data from Install the Windows Authentication Provider (optional):
server.mycompany.com/winauth/showconfig
This will offer to open or save the file showconfig.json - Open (or save and open) this file using, for example, Notepad.
- You need the data at Realm, IdpReplyUrl, and CertPublicKey.
This information is needed for the next step.
Step 2: Configure the Windows Authentication Provider in the Identity Broker Management Portal
With the information from Step 1: Gather information, you can configure the Windows Authentication Provider in Identity Broker.
On the Identity Providers page of the Management Portal, click Add.
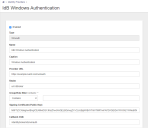
- On the New provider page that opens, at Type, select Windows Authentication.
- Specify the following fields:
- Name: Specify a friendly name for the Provider. This name will be displayed in the Identity Broker Management Portal.
If you want to assign the provider to an Identity Director Web Portal URL, the name cannot contain spaces. - Caption: Specify a caption for the button that is displayed to users when they select how they want to be authenticated. This selection will only be shown if more than one Identity Provider is configured in Identity Broker, and you did not assign the providers to specific Identity Director Web Portal URLs.
See Resulting behavior if configured correctly for more information.If applicable, the selection screen is displayed in between step 3 and 4 of the Authentication sequence.
- Provider URL: Specify the host and path where the Windows Authentication Provider is located.
Example: authserver.mycompany.com/winauth/
Note that the path after the hostname is case-sensitive and ends with a slash (/).This URL is used in step 4 and 5 of the Authentication sequence.
- Realm: From the Gather information step, copy the data at Realm.
Example: urn:idbroker - Group/Role filter (optional): Specify an expression that will be used to filter the groups that are returned from the Identity Broker to the Consumer. See Using Group/Role filters for Identity Providers.
- Signing Certificate (Public Key): From the Gather information step, copy the data at CertPublicKey.
- Callback Path: From the Gather information step, copy the data at IdpReplyUrl and remove the Identity Broker host. The remaining path is the Callback Path.
Example:
If the data at IdpReplyUrl is https://server.mycompany.com/identitybroker/ids/winauth, enter the value /identitybroker/ids/winauth for Callback Path.
Note that the Callback Path starts with a slash (/) and is case-sensitive.The Windows Authentication Provider redirects to this path on the Identity Broker in step 7 and 8 of the Authentication sequence.

- Name: Specify a friendly name for the Provider. This name will be displayed in the Identity Broker Management Portal.
- Save your changes.