Upgrade Procedure
Overview
This section describes how to upgrade to Security Controls 2026.1 from Security Controls 2022.2 or later.
- If you are taking this opportunity to move the console to a new machine and you want to perform the migration using the Migration Tool, see the Migration Tool User’s Guide before performing the upgrade.
- If you are taking this opportunity to also upgrade your operating system, you should do so on a new server rather than attempt an in-place upgrade of the operating system.
Before upgrading, read the appropriate sections of What's New? so you are aware of how the upgrade will affect your system. You also may want to make a note of all your current custom user settings as some are not preserved during the upgrade.
Be aware that after the upgrade of the console is complete, any agents that are installed on your target machines will be automatically upgraded the next time they check in with the console.
Before You Upgrade
- Free up unused space in the database that is used to store scan results and patch deployment results.
You can do this in SQL Server Management Studio by right-clicking the Protect database and selecting Tasks > Shrink > Database. - Create a backup of your current database using SQL Server Management Studio.
The database contains results from program operations and it also contains configuration information. Backing up your database is an important step. - If your database is in a SQL Server high availability group, it must be removed prior to upgrading.
The upgrade process will fail if the database is in a high availability group. - If your current console resides on a virtual machine, you should take a snapshot prior to the upgrade.
This is simply a precaution in the event there is a problem during the upgrade and you want to revert to your original environment.
Performing the Upgrade
If your console machine resides in a disconnected network, there are a few extra steps you must take in order to (a) download and install any missing prerequisite software and (b) download the product core files. For complete instructions, see a Performing a New Installation.
- Close all programs running on the console machine, including Security Controls.
- Download the Ivanti Security Controls 2026.1 executable file to your console machine using the following link:
- Begin the installation process using one of the following methods:
- Double-click the file named IvantiSecurityControls.exe
- Type the file name at a command prompt. Doing so enables you to use one or more command-line options. You should consider this method if you are upgrading a very large database. The DBCOMMANDTIMEOUT option is used to specify the SQL command timeout value during installation. The default value is 15 minutes per GB. The minimum timeout value is the greater of 15 minutes per GB or 1800 seconds (30 minutes). You should override the default value only if you expect the upgrade to take an exceptionally long time due to constrained resources.
- Respond to the dialog that asks if you want to continue with the upgrade.
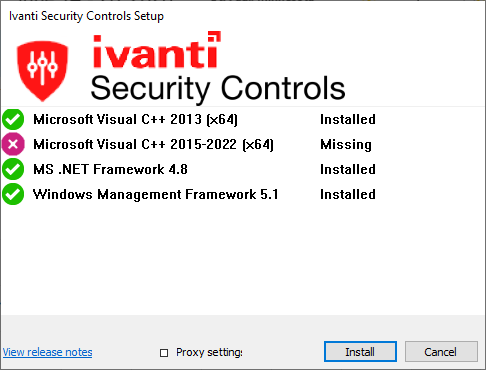
If you click Yes and your console machine is missing one or more prerequisites, a dialog appears listing the prerequisites. If you are not missing any prerequisites, skip the following step and proceed with the Welcome dialog. - Click Install to install any missing prerequisites.
The Setup Wizard may need to perform a reboot during this portion of the installation process. If a reboot is required, when the machine is restarted the Setup dialog will reappear. Simply click Install again to proceed with the upgrade.
The Welcome dialog is displayed. - Read the information on the Welcome dialog and then click Next.
The license agreement is displayed. You must accept the terms of the license agreement in order to install the program. - Enable the I accept the terms in the License Agreement check box and then click Next.
The Destination Folder dialog is displayed. - If you want to change the default location, click the browse button and choose a new location.
- Click Next.
The Ready to Install dialog is displayed. - To begin the installation, click Install.
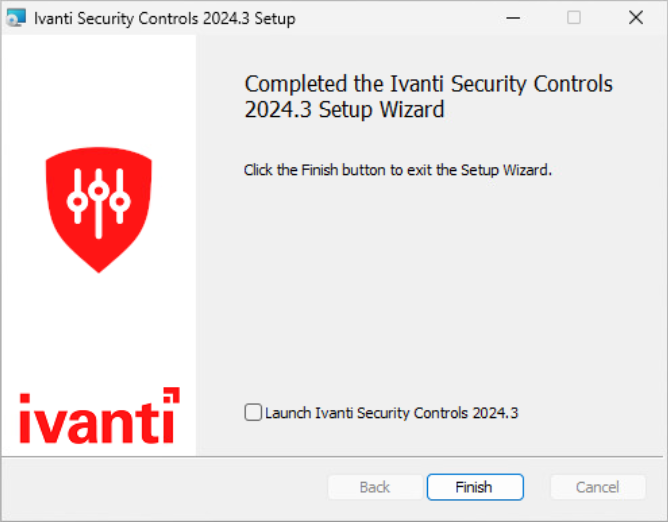
Your existing database is automatically upgraded. - On the Completed the Ivanti Security Controls Setup Wizard dialog, enable the Launch Ivanti Security Controls 2026.1 check box and then click Finish.
https://forums.ivanti.com/s/article/Ivanti-Security-Controls-Download
-OR-
For example, if you have a 4 GB database, to double the default timeout value from 3600 seconds (60 minutes) to 7200 seconds (120 minutes) you would type the following command:
IvantiSecurityControls /wi:"DBCOMMANDTIMEOUT=7200"
If you receive a prompt indicating that a restart is required, click OK and the installation process will automatically resume after the restart.
The core engines and definition files are updated and Security Controls is started.
After Upgrading
If you are upgrading from Security Controls 2024.1 or earlier and you use distribution servers, you MUST update the Linux engine installer on all distribution servers before creating or updating policies to include Linux patch groups. If this is not done, and a new policy is used with an old engine, scans will not work the old engine will interpret this policy to deploy all patches and not just the patches that were approved in the patch group.
If you are upgrading from Security Controls 2023.4.1 or earlier, we recommend you review the database connection encryption setting using the Database Setup Tool (see Set Advanced options - database connection encryption). With version 2024.1, new options for configuring the encryption of the connection between the console and SQL Server were added. The new options provide more security, but may need further configuration. The upgrade does not change this setting, leaving it at the least secure but most compatible setting.
What You May See the First Time Security Controls is Started
If you are upgrading from Security Controls 2019.3, the first time you launch a later version, a one-time notification is displayed that informs you about the Shared Credentials feature. This feature enables you to share credentials with one or more users. The notification also briefly describes the security precautions that are in place to keep all credentials safe. You can click the embedded help link for more information.
