Upgrade Tasks Performed on the Console
In order to complete the upgrade, the following tasks must be performed on the Ivanti Security Controls console.
Refresh Your License (Offline Consoles Only)
If your console is offline (it does not have an internet connection), in order to view and use the new features in Security Controls 2026.1, you must manually refresh your license. For information on activating a disconnected console, see Activating the Program.
If the console is online the license will be automatically refreshed during the upgrade process.
Initialize Users for Credential Sharing
Each user in your organization will be assigned a user certificate and a public/private key pair the first time they launch Security Controls after the upgrade. The certificate and keys are required in order for the users to participate in the Shared Credentials. Encourage each Security Controls user to launch the program as soon as reasonably possible.
The other option for getting users to be recognized by Security Controls is to issue a REST API request.
Review Credentials That are Shared with Background Services
Enabling a credential for use with background services is now performed on the new Share Credential dialog, rather than the Define Credential dialog. Any credential that was being shared with background tasks, agents and other features will be automatically converted to the new convention during the upgrade. You can access the Share Credential dialog by selecting Manage > Credentials and then clicking the Share button.
You should experience no interruption in service or scheduled background operations. If a background service is using credentials that for some reason cannot be decrypted, then the Credential Reset dialog will be displayed and that dialog can be used to recover from the situation.
For more information, see Shared Credentials.
Uninstall the Ivanti Scheduler from Your Target Machines
Use of the Ivanti Scheduler was discontinued in v2023.2. All scheduling on target machines is now performed using the Microsoft Scheduler. Once you are certain that all scheduled tasks using this scheduler have been run, it is recommended that you uninstall the Ivanti Scheduler from your target machines at your earliest convenience. This is strictly a house cleaning procedure and no harm will be done if the Ivanti Scheduler is not immediately removed following the upgrade.
With the deprecation of the Ivanti Scheduler, port 5120 is no longer required to be an allowed port in your firewall settings.
Confirm Your SSH Server Connection Setting
The SSH server connection option, which was introduced in v2022.4, specifies if SSH connections can be used when the console communicates with an endpoint. For security reasons, the default setting for this option is Block. For more detailed information, see the SSH Authentication topic.
Assign Groups in Machine View and Scan View
The Assigned Group column in Machine View and Scan View, which was introduced in v2020.1, enables you to group related machines, making it easier to perform agentless operations and generate reports on the machines. If you are upgrading from v2019.3, the values in this column will be empty immediately following the upgrade. Values will be automatically assigned during future scan operations that involve machine groups, or you can manually assign values using the Machine Properties dialog. For more information, see the Assigned Group column description.
Review Your Scheduled Tasks
Scheduled tasks are monitored and managed from two separate areas. You should review both scheduled tasks managers to verify that your existing tasks were properly ported.
- The Scheduled Console Tasks Manager provides one location to view tasks currently scheduled on the console such as patch scans, asset scans, patch deployments to the console machine, script execution and scheduled reports. To access this dialog, select Manage > Scheduled Console Tasks.
- The Scheduled Remote Tasks Manager provides one location from which to view power tasks and patch deployments tasks currently scheduled on your remote target machines. You access the Scheduled Remote Tasks Manager from Machine View by right-clicking on a machine and then selecting View scheduled tasks.
Synchronize Your Distribution Servers
You must update your distribution servers with the latest patches and/or scan engines and XML definition files contained on the console. This is particularly important if your agents use distribution servers to download these files. The distribution servers must be synchronized with the updated console files prior to the agents performing their check-in.
To synchronize your distribution servers:
- Select Help > Refresh files to make sure the console contains all the latest files.
- Select Tools > Options > Distribution Servers.
- In the top pane, select which distribution server you want to synchronize with the console.
- In the Add scheduled sync box in the top pane, select the component you want to synchronize.
- Click Add scheduled sync.
- Specify when you want the synchronization to occur and then click Save.
- In the Schedule automatic synchronization pane, select the scheduled synchronization entry.
- Click Run now.
Don’t worry if the agents happen to check in before you have finished synchronizing the distribution servers. The agents will be updated the next time a scheduled task is run or the agent updates its binaries.
Assign Aliases to the Console
This task is necessary if one or more of the following conditions apply:
- You have assigned the console machine to a new domain
- You have given the console a new common name or IP address
- You manually installed agents and they use an IP address to communicate with the console
Under these conditions, you must use the Console Alias Editor tool to identify the old console names or addresses as trusted aliases. If you don’t, when an agent checks in with the Security Controls console or when an agentless machine attempts to send patch deployment status messages to the console, they will not be able to verify that the machine they contacted is a trusted machine.
- Select Tools > Console alias editor.
The Console Alias Editor dialog is displayed. It will contain the names and IP addresses currently used to identify the console machine. - Type the names and/or IP addresses that you want to use as an alias for the console machine.
You can specify IP addresses using either an IPv4 or IPv6 format. - Click Update.
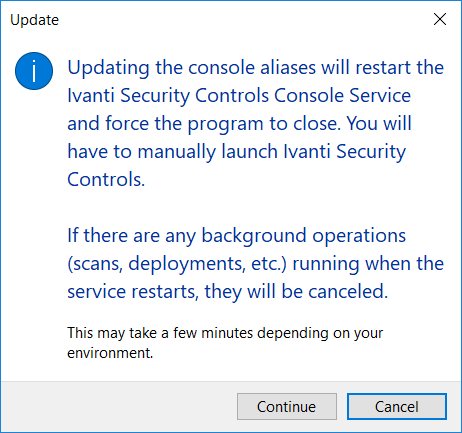
- Click either Continue or Cancel.
If you click Continue, both the console service and the Security Controls program will be automatically restarted; this is necessary in order to update the console aliases list. If you click Cancel, the console aliases list will not be updated.
IMPORTANT! The agents will not recognize a new alias until after they check in with the restarted console. The check-in must be initiated by an agent either manually using the agent client program or via a scheduled check in; a check-in command issued from the console to an agent will not update the console certificate on the agent machine.
Check Your Custom User Settings
The following custom user settings are not preserved during the upgrade.
- Tools > Options > Display tab:
- Recent item (days)
- Show only items created by me
- Show patch content updates on main page
- Show informational items in patch scan results
- Show product levels in View -> Windows Patches
- Tools > Options > Notifications and Warnings tab:
- Warn before scheduling deployments
- Close Refresh Files when finished
- Warn if Protect Cloud sync is not enabled on this console
- Warn before opening 7 or more bulletins
- Tools > Options > Logging tab:
- Diagnostic patch scanning
- Deployment Tracker:
- Update speed
- Days to show
- Show failures
- Show in progress
- Show successfully completed
- ESXi Hypervisor Bulletins tab:
- Only show latest
- Event History
- Limit results to previous (days)
- ITScripts Results View
- Results since
If You Use the CHM Version of the Help
The CHM version of the Security Controls help is no longer included with the installation package. If you use the CHM file, you will need to follow the instructions for downloading and configuring the 2026.1 version of the file.
If You Use an Agent on the Console
If you have an agent installed on the Security Controls console, you should manually reinstall that agent. This should be done in order to ensure that the console agent is properly upgraded with the new agent certificate. No actions are required for agents that are installed on target machines.