Creating Workflows from a Findings List View
Summary: How to create a new workflow from a findings list view (i.e., Host Findings or Application Findings) in Ivanti Neurons RBVM/ASPM/VULN KB.
Workflows can be created from two locations in Ivanti Neurons RBVM/ASPM/VULN KB: the Workflows page and the findings pages (i.e., Host Findings or Application Findings).
When creating a workflow from a list view in Neurons RBVM/ASPM/VULN KB, make sure you know which findings you plan to add to the workflow. If you are unsure of what findings to add to a workflow, create a workflow from the Workflows page. This way, you can add findings to the workflow at a later date.
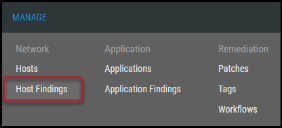
To create a new workflow from a findings page, navigate to either the Manage > Host Findings or Manage > Application Findings pages. This example will show you how to create a workflow from the Manage > Host Findings page.
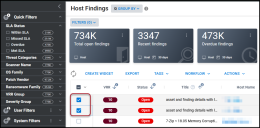
On the Host Findings page, select the finding(s) to add to the workflow by clicking the check box in the page’s first column. You may select several vulnerabilities at a time to add to the workflow.
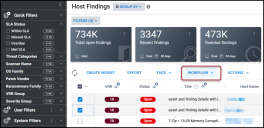
Click the Workflow button.
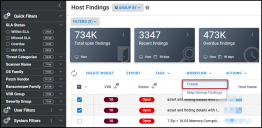
In the Workflow drop-down menu, click Create.
In the Create Workflow window, fill out the following fields.
-
Workflow Type: Type of workflow to create. Select from Acceptance, False Positive, Severity Change, or Remediation.
-
Name: Workflow name.
-
Scope Override Authorization: Allow findings to be added/removed from the workflow. Select from None or Authorized.
By selecting None, no additional findings can be added to the workflow.
-
Compensating Control: Select the compensating control from the drop-down list.
-
Expiration Date: Date workflow expires. All workflows require an expiration date.
-
Reason: Reason why workflow is submitted.
-
Description: Workflow description.
-
Attachment: Attach supporting evidence to the workflow.
Once complete, click Request. Your new workflow now appears on the Workflows page.


