Groups Page: Overview
Summary: A high-level overview of the Groups page in Ivanti Neurons.
The Groups page allows a user to create organizational (and permission-based) folders within Ivanti Neurons. By default, Ivanti Neurons places all new assets into the Default Group. Ivanti Neurons recommends creating several groups to move assets into, leaving the Default Group as a place to quickly find new hosts/assets as they are scanned and surfaced in Ivanti Neurons. You can create groups based on asset type, location, team, etc. Assets can belong to multiple groups.
Who can use the Groups page?
The ability to view the Groups page is available to users with the Core Read IAM privilege. The ability to create, modify, delete groups and view all groups regardless of membership is housed in the following IAM privilege:
-
Group Control: Create, modify, and delete groups. Can view all groups regardless of their group membership.
This privilege is provided in the Administrator and Data Manager Foundational Roles and the Group Owner Supplemental Role. It can also be added to a custom IAM role.
Overview
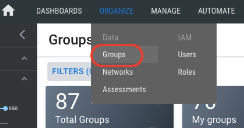
Navigate to the Organize > Groups page.
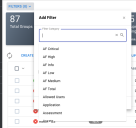
Filters: As with other pages in Ivanti Neurons, you can apply filters to the Groups page.
Key Performance Indicator (KPI) Bar: This section provides quick KPI metrics based on your current view. These metrics can change based on applied filters. You can configure each KPI title or swap between KPIs through the options menu on each card.
Quick Filters: Explore useful filters for prioritizing and managing asset groups.
Refresh: Click to refresh the page to view any changes made.
Create: This menu gives you the options to create a widget or to create a view based on current list view settings. For more information, view documentation for user widgets or saved views.
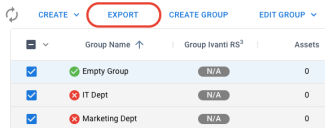
Export: Export row information for the selected group(s).
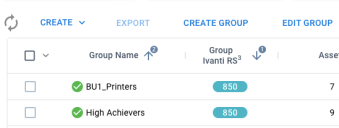
Create Group: Click to create a new group. For more information, see Creating a Group.
Edit Group: Click to edit either the selected group's name and description or the group’s custom properties. For more information on changing the name and description, see Editing a Group. For more information on custom group properties, see Editing Custom Group Properties.
Delete Group(s): Click to delete the selected groups. For more information, see Deleting a Group.
Assign to Users: After selecting one or more groups, you can assign users to them. After assigning users to groups, that assignee can see the group and its corresponding hosts/findings.
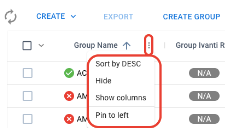
Column Settings Drop-Down List: Clicking the dots near a column heading opens the column settings. From this menu, you can change the sort, add fields to the sort, and add/remove columns from the list view.
Single Column Sort: Click a column to sort your groups using that column’s data. Click the column again to change the sort from ascending to descending.
Multi-Column Sort: Simultaneously press the “Control” button on your keyboard and click a column to add a second-level sort. This page supports up to 3 sort columns, with column “1” having the highest precedence.
