Creating templates
A template is a series of actions or building blocks to be applied to the device in a particular order. A template can have one or many actions. You can change the task order in a template. The action sequence can be changed where the action makes sense, but can't be changed where it does not make sense (for example, you can't place a post-OS-specific action before the installation of the OS).
Templates that you create through the Capture Template and Deploy Template toolbar options are pre-populated with default actions the template needs to work. No additional customization is necessary and you can immediately use a template after you create it. Of course, you can still customize these templates for your environment and needs, if necessary.
Use the Empty template toolbar option if you want to start a new template with nothing preconfigured.
- Click Tools > Provisioning > OS provisioning.
- Under the Provisioning templates group, select either the Public or My templates folder.
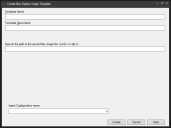
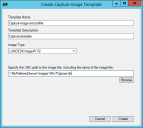
- On the toolbar, click New Template > Capture Template.
- In the Template name box, type a descriptive name.
- In the Template description box, type a description. The Name and Description are displayed in columns in the list of templates.
- Select the Image type that you want to create.
- Specify the UNC file path on a Management Suite preferred server where the image will be stored. The preferred server credentials must allow read/write.
- Click Create.
- Click Tools > Provisioning > OS provisioning.
- Under the Provisioning templates group, select either the Public or My templates folder.
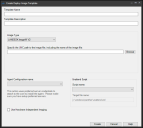
- On the toolbar, click New Template > Deploy Template.

- In the Template name box, type a descriptive name.
- In the Template description box, type a description. The Name and Description are displayed in columns in the list of templates.
- Select the Image type that you will use for deployment.
- Specify the UNC file path on a Management Suite preferred server where the image will be stored. The preferred server credentials must allow read/write.
- Select the Agent Configuration name that you want installed on the destination device.
- Select the unattended installation Script name you want used during the OS installation and the target path and filename for the script on the destination device.
- If you want to use hardware-independent imaging for driver installation, select that option.
- Click Create.
To change template properties, double-click the template or right-click the template and select Properties.
- Click Tools > Provisioning > OS provisioning.
- Under the Provisioning templates group, select either the Public or My templates folder.
- On the toolbar, click New template > Mac Deploy Template.

-
In the Template name box, type a descriptive name.
-
In the Template description box, type a description. The Name and Description are displayed in columns in the list of templates.
- Enter the smb:// or afp:// path for the Mac image file. UNC paths aren't supported with Macs.
- In the Agent Configuration name drop-down, select the name of the configuration you wish to use. You can create your own agent setting configurations which will also display here. Or you can select the Default Mac Configuration option, which includes predefined actions the follow the process of erasing the device partition, installing a new operating system image, and installing mapped software.
- Click Tools > Provisioning > OS provisioning.
- Under the Provisioning templates group, select either the Public or My templates folder.
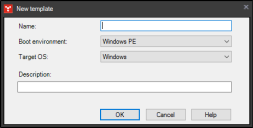
- On the toolbar, click New template > Empty Template.

- In the Name box, type a descriptive name.
- Select the Boot environment you want, either Windows PE, macOS, or bootix Linux. The bootix option requires that you already have a working bootix configuration in your environment.
- Select the Target OS you want, either Windows, Linux, or macOS.
- In the template Description box, type a description. The Name and Description are displayed in columns in the list of templates.
- Click OK and the new empty template you created will appear in the list. Double-click it to edit it.
