Configuring the Preview panel
You can configure the appearance of the data that appears in the Preview panel.
To configure the Preview panel:
- Open the required query.
- Right-click the required attribute on the Preview tab, then click Properties.
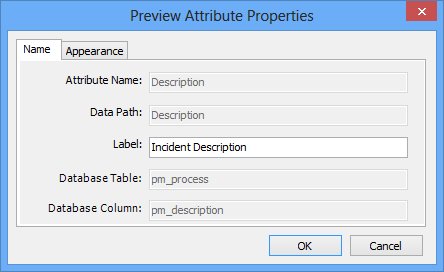
The Preview Attribute Properties dialog appears.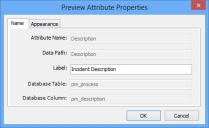
- In the Label box, type the text that you want to appear as the title of the row.
- Click the Appearance tab.
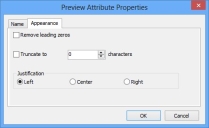
- Set the required values:
Remove leading zeros – removes the leading zeros from attributes such as the Incident ID.
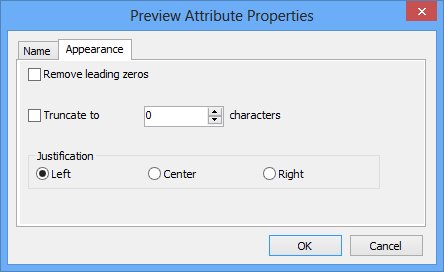
If you remove the leading zeros, your Process IDs may vary in length, for example, 1, 10, 111. The Process ID is treated as a string rather than as a number, so you cannot sort numerically. However, if your Process IDs are all of the same length, then sorting will appear numerically.
Truncate to a specific number of characters – limits the amount of data that appears in the Preview panel. For example, you may want to limit the Description to 256 characters.
Justification – aligns the data either to the Left, Center or Right of the Preview panel.
- Click OK.
- If required, change the order of the attributes by clicking the Up or Down buttons o the right of the Preview tab.
If you want to check the appearance of the data in the Preview panel, click Test Query. A set of data from your database appears on the Attributes & Preview page. To view the data in the Preview panel, select an item in the list panel. To end the test and return to the Query and Report Designer, click End Test.
- Save the changes you have made, then click Finish.