Actions
Actions enable you to progress a process or add further information to a process. For example, you can add notes to a process to specify further information by clicking the Add Note action. The Actions that you specify appear in the Actions list in the workspace when a user gets to that specific stage in the process.
You can also create actions in Process Designer to associate with windows so that the required information is specified, such as with the Complete Mandatory Data action used on the Full Incident process. For more information about the Full Incident process, see the Service Desk Prebuilt Content guide. For more information about creating actions in Process Designer, see Creating a new action.
You can also use related actions to run actions on one or more related processes. For example, from a Change, you can use a related action to progress an attached Problem to a new status or to add a note to all attached Incidents. For information about related actions, see Running actions on related processes.
Managing actions
When you create a collection relationship between two business objects, you need to create a new action to enable you to create instances of the collection object.
If you are using parent-child linking, then you can specify whether the action will be added to the parent or child object. For example, if you want any notes added to a parent Incident to be added to its child Incidents, then you would specify that the action of Add Note is propagated to its children.
To manage actions:
- Open the required business object.
- Click the relevant collection attribute, then on the Actions list, click Manage Actions.
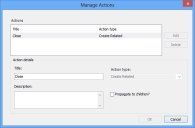
The Manage Actions dialog appears.
- Click Add to add an action.
- Make the required changes, and if you want to propagate the action to related child items, then select the Propagate to Children check box.
You can use the Description box to specify a concise tooltip that appears when a user holds their mouse over the action in the Actions list.
- Click OK.
Enabling and disabling custom CI actions
If you create a collection and corresponding action for a CI, then that action is available whenever you open the window for the CI. This is fine for Service Desk implementations, but for Asset Manager implementations – where you can design specific processes for your CIs – you might want to stop this action from always appearing, so that it appears only at the statuses that you have specified.
By default, these actions are always available. You can disable them using Configuration Center.
To disable custom CI actions:
- In Configuration Center, open the required instance.
- Alongside each Web Access application, click Edit.
The Edit Application dialog for Web Access appears. - Set Enable Custom CI Actions to False, then click OK.
The actions are disabled in Web Access. - Alongside each Framework application, click Edit.
The Edit Application dialog for the Framework appears. - Set Enable Custom CI Actions to False, then click OK.
The actions are disabled in Console and Workspaces.
Make sure you set the same value for all of the Web Access and Framework applications in an instance to prevent different behaviors in different clients.
