Filters
You can create a special type of query called a filter query. Whereas standard queries are used to display lists of information from your database, filter queries can be used to:
- reduce the values available to users in certain places
- display a list that is filtered on a value that is determined automatically at runtime
For example, two options for adding a tab to the Incident window to display the notes that have been added to an incident are:
- as a collection, which would show ALL of the notes that have been added to the incident, or
- as a filter that displays only those notes that were added to the incident by the user who raised the incident.
For more information about adding tabs such as these to a window, see Collections.
The table below highlights the main differences between standard queries and filter queries:
|
Standard queries |
Filter queries |
|---|---|
|
The filter criteria that you select originate from the business object that the query is based on. |
You can select the object from which to choose your filter criteria. |
|
Criteria must be set to absolute values: these are either set at design-time or set at run-time by prompting the user for the required value. |
Criteria can either be set to an absolute value or a runtime value. |
|
Can include grouping. |
Cannot include grouping. |
Typical uses for filter queries include:
- to filter data on related objects in Object Designer
- as tabs on window designs to provide lists of information related to an attribute on the window
For more information about filtering data on related objects in Object Designer, see Data filtering.
The procedure below describes how to create a filter that you can add as a tab on the Incident window to show only those notes for the incident where the raise user is the same as that for the incident. There are two conditions for this filter:
- the Incident on the Note object Is Equal To the Incident displayed on the window
- the Raise User on the Note object Is Equal To the Raise User on the Incident object
Initially, the filter selects all notes in the Incident Management module. The first condition then filters for those notes added to the selected incident, and the second condition filters for those notes that have the same raise user as the incident.
To create a filter:
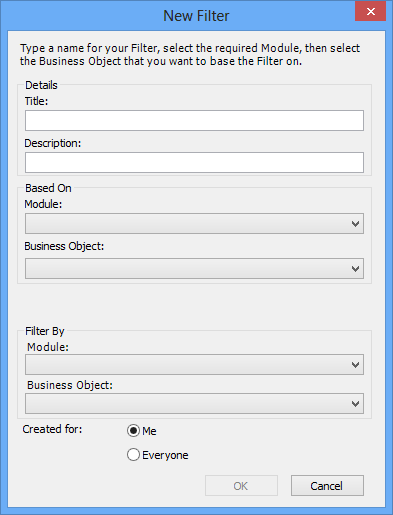
- In the Actions list of Query and Report Designer, click New Filter.
The New Filter dialog appears.
- Type a Title and Description for the filter.
- In the Based On group, select the Module and Business Object that contains the data that you want to appear in the list.
In our example, select Incident Management and Note – we want to see a list of information about the notes. - In the Filter By group, select the Module and Business Object for the object that contains the value that you want the list to be filtered by. This will be the object that the window is based on.
In our example, select Incident Management and Incident – we want to filter by the Incident and the value for the Raise User on the incident. - Select the Everyone option button, then click OK.
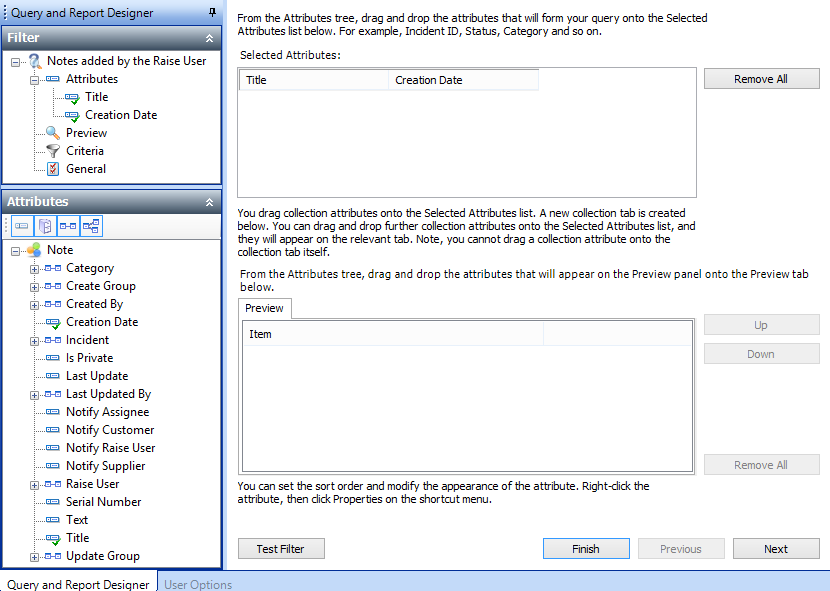
The Filter Designer appears; this is very similar to the standard Query and Report Designer.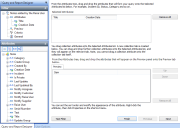
- Add the attributes that you want to appear in the list, then click Next.
The Criteria page appears. If we do not set any criteria, the filter will display ALL notes in the Incident Management module. - From the Attributes tree, drag the attribute for the first filter criterion onto the Current Criteria list.
First, we want to display only those notes linked to the displayed Incident,so drag the Incident relationship ( ) onto the Current Criteria list.
The Criteria dialog appears. We want to use the current Incident, so we need to specify a runtime value, not an absolute value.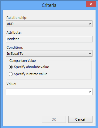
- Click Specify runtime value.
The Criteria dialog updates.
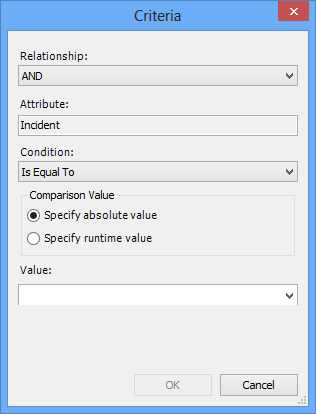
Remember that the values available from this dialog are based on Incident Management\Incident – which is the value that we want to filter by, so we do not need to make a selection. We want to filter by the top-level value: Incident.
- Click OK.
The Current Criteria list updates to show Incident Is Equal To (Incident). That is, the Incident on the Note matches the Incident displayed in the window. - From the Attributes tree, drag the next attribute on which you want to base the criteria onto the Current Criteria list.
In our example, we want to use the Raise User attribute.
The Criteria dialog appears.
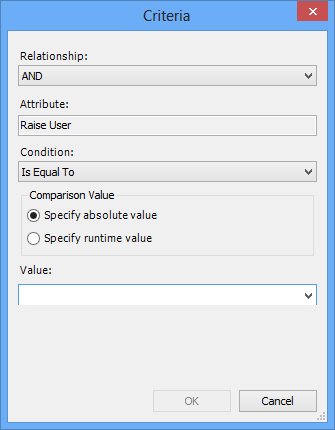
Notice that the Criteria dialog is different from previously, because you are filtering by an attribute on Incident, rather than by Incident itself.
- In the Comparison Value group, select Specify runtime value.
The Value control changes from a list box that enables you to specify an absolute value, to a tree that enables you to specify a value that will be determined at runtime. The values available in this tree are taken from the object that you selected in the Filter By group on the New Filter dialog.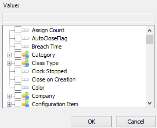
- In the Value tree, select the attribute that you want to use the runtime value of to match the filter condition, then click OK.
In our example, we want to use the Raise User attribute.
The Current Criteria list updates.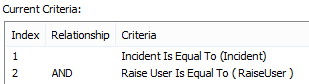
- Click
 , then click Finish.
In our example, the filter criteria read Incident Is Equal To (Incident) and Raise User Is Equal To ( Raise User ). Because the filter was based on Incident Management\Note, but filtered by Incident Management\Incident, these criteria are true when the Incident on the Note matches the Incident displayed in the window and when the Raise User on the Note matches the Raise User on the current Incident.
Adding this filter to an Incident window using the Query control (see Adding queries to a window) creates a tab beneath the window that lists all of the notes attached to the incident that have the same Raise User value as the incident.