Displaying images on windows
To enhance the appearance of your windows, you can add images to them. For example, you may want to add images of your staff to the user window.
You can also add static images to a window, which help users to quickly identify the type of window they are looking at. For example, you could add different images to the different windows in the Configuration Item module, so that each Printer window would have an image of a printer on it, each Workstation window would have a workstation image, and so on.
For information about this, see Adding static images to a window.
Firstly, you need to create the required attribute using the Object Designer, and then add that attribute to the window using the Window Manager component.
To configure the required business object and window:
- In Object Designer, open the required business object, for example, Analyst.
- On the Actions list, click New Attribute.
- Name the attribute as required, for example, Image, and in the Properties grid, alongside the Data Type list, select Attachment.
- Alongside the Attachment Type property, select Image.
- Click
 .
. - Start the Window Manager component and open the required window. Following the example above, the Analyst window.
- On the Attributes tree locate the Image attribute that you have just created, and add it to the window.
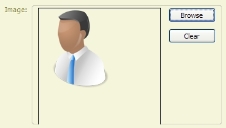
The image control is added to the window. It has a group box, along with a Browse and Clear buttons. - Click
 .
.
Once the Image control has been added to a window, when that window is opened in the workspace, users can add images as required.
The following procedure describes how to add an image to the Analyst window once the Analyst business object and window has been configured as described above.
To add an image to a window:
- Open the required window, for example, the required Analyst window.
- In the Image group box, click Browse.
The Open dialog appears. - Select the required image, then click Open.
The image is added to the window.
- Click
 .
.
To remove the image, click the Clear button.