Making windows available to Web Access
You can make individual windows available to Web Access, or make several available at one time.
Design Transfer does not maintain the availability of window designs for Web Access. If you import a window using Design Transfer, you will need to make it available to Web Access.
To make a single window available to Web Access:
- Make sure that the System Setting Web Access URL is set to match the URL for your Web Access installation.
This is used when you test the Web Access version of a window. - In the Business Objects tree of Window Manager, open the window design that you want to make available to Web Access.
- In the Actions list, click View in Web Access.
The window appears as it would in Web Access.
When you first start viewing Web Access windows, you need to complete your Web Access log in details
- Make any required changes to the window definition.
- When you are happy with the appearance of the window in Web Access, in the Actions list, click Make available in Web Access.
The window is made available to Web Access, and its icon changes from to
to  to indicate that the window definition is available in both types of window.
 - If you want to make the window the default window for Web Access, in the Actions list, click Set as Default Web Access.
A red checkmark is added to the icon for Default Web Access windows.
If you want to make the window the default window for Console, in the Actions list, click Set as Default.
A green checkmark is added to the icon for Default Console windows.
To make multiple windows available to Web Access:
We recommend that you view the individual windows in Web Access and make any final changes to them using Window Manager before following this procedure.
Do not enable all of the windows for Web Access in one go, because this can cause "duplicate entry" errors. Instead, enable only the required default windows, and then repeat the procedure for any further windows.
- In Window Manager, click Modules at the top of the Business Objects tree.
- In the Actions list, click Enable Windows for Web Access.
The Enable Windows for Web Access dialog appears.
- Expand the Modules tree and select the check boxes for the windows that you want to make available to Web Access.
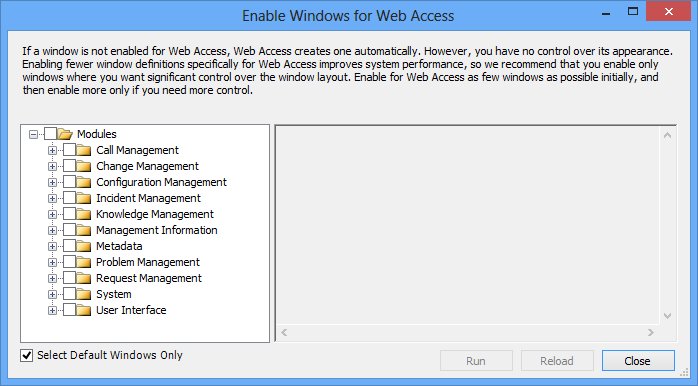
When you select a check box on the modules tree, all of the check boxes for the child branches are also selected. For example, if you select the top-level Modules check box, then all of the tree is selected.
The Select Default Windows Only check box enables you to limit the windows selected to only those marked as the default for the business object.
- When you have selected the windows you want to make available to Web Access, click Run.
The windows are made available to Web Access, and progress information is given. - Click Close.
If you want to make more windows available to Web Access, click Reload to redisplay the list of windows.