Configuration item types
You can create different configuration item types, for example PC and printer. You can then create individual configuration items (CIs) that are specific instances of these configuration item types, such as PC001, PC002, Development printer, Sales printer and so on.
Creating new CI types
Before you can create CIs, you need to create the appropriate CI types. For example, you could create a CI type called Tablet, under which you can then create the individual Tablet CIs such as Tablet001, Tablet002, and so on.
You create new CI types by creating new business objects under Configuration Management\Configuration Item in Object Designer. You can then create attributes to record the required data about the CI and create windows for them using Window Manager.
Creating objects for CI types under the Configuration Item business object means that these business objects inherit the attributes of the Configuration Item business object. This means that all attributes on the CI object are also available to the different CI type objects.
For more information about designing business objects and windows, see Object Designer and Window Manager.
If you have an existing configuration management database, you can import CIs into your Service Desk and Asset Manager database from your configuration management database. For information about importing CIs, see Data Import.
To create a new CI type using the Object Creation Wizard:
- Start the Object Designer component.
- On the Business Objects tree, expand the Configuration Management folder, then select the Configuration Item business object.
- On the Actions list, click Object Creation Wizard.
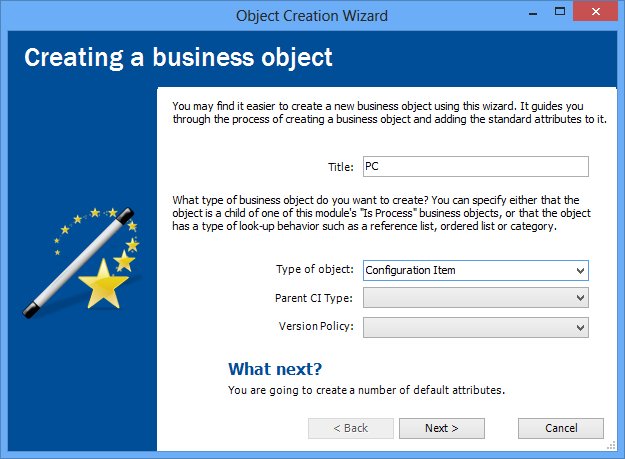
The Object Creation Wizard starts. - In the Title box, type the name of the CI type, for example, PC.
- In the Type of object list, select Configuration Item.
Two more lists appear.
- In the Parent CI Type list, select the object that you want to use as the parent for the new object.
- In the Version Policy list, select the required option for version controlling the CI type: None, Automatic or Managed.
Automatic – the version number automatically increments if you update a CI. This is particularly useful if you import your CIs from an external source regularly, such as from a desktop management system. A new version is created only if changes have been made to a CI.
Managed – the version number increments as a result of a Change process. You create a future version of a CI and when the change is approved, you can make the future version the current version.
For information about version control, see Version control.
If the parent object you choose has a Version Policy set for it, then the new object will inherit the parent's Version Policy, and the Version Policy list box is disabled.
- Click Next.
The Adding default attributes page appears.
A number of attributes are inherited from the parent CI and are grayed out. You can choose to modify the other attributes as required.
- Click Next.
The Set Object Privileges page appears.
To enable users to create CIs, you need to specify the privilege settings for the business object. Privileges are applied to Groups and Roles, and users are then linked to those groups and/or roles.
- In the Privilege Settings group box, select the required privileges, for example, All, then click Next.
The Apply Privileges to Groups page appears. - Select the Group Type, for example, Support Group, and then in the Available Groups list, select the required group(s), and click
 .
.
The groups are added to the Selected Groups list. - Click Next.
The Apply Privileges to Roles page appears. - In the Available Roles list, select the roles that you want to be able to create and maintain CIs, then click .
The roles are added to the Selected Roles list - Click Next, then click Finish.
The business object for the CI type is created. - Add further attributes and collections if required.
For information about creating attributes and collections, and for details about attribute properties, see Object Designer.
- Click
 .
.
You now need to create a window for the new CI type, and then you can create or import the required CIs.