Configuring the exception reports
After you have created a data connection to your discovery tool, and configured your CIs to use managed version control, you can configure the exception reports.
To set up an exception report:
- Start the Schedule Manager component, and display the CI Exception Management tree.

- Click the Schedules folder at the top of the tree, then in the Actions list, click New Exception Schedule.
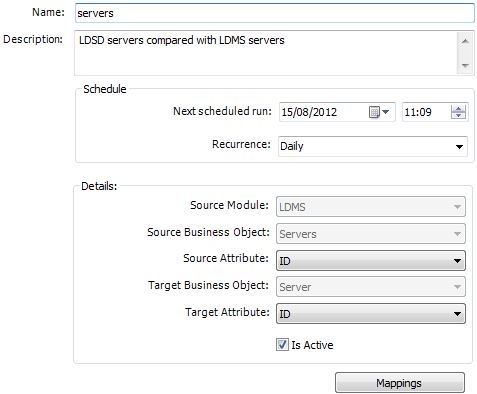
The schedule dialog appears. - Type a Name and Description for the Exception Report.
- In the Schedules group box, specify when you want the exception report to run, and its Recurrence.
- In the Details group box, complete the following fields:
Source Module – the module that was created when you created the data connection to your discovery tool. This is the name of the data connection.
Source Business Object – the connection type that you created for your discovery tool.
Source Attribute – the attribute from the data connection that you want to use to identify individual records from the discovery tool.
Target Business Object – the CI business object that you want to compare the discovered value with. Only CI Types that have managed version control enabled appear in this list.
Target Attribute – the attribute on the CI that matches the attribute from the discovery tool that you set as the Source Attribute.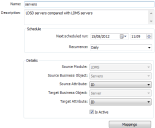
- Click Mappings.
The Mapping dialog appears, which enables you to map the discovered attributes to the corresponding attributes in Service Desk or Asset Manager that have managed version control enabled.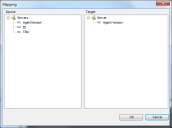
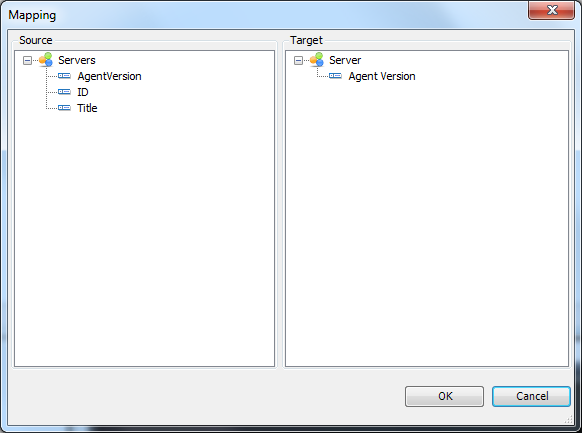
The attributes that appear in the Source list are all the attributes that you made available when you created the data connection type. The attributes that appear in the Target list are the attributes that have version control enabled for the CI.
- Drag the required attribute from the Source list to the matching attribute in the Target list, then click OK.
The exception report is configured, and is generated by the Background Service according to the schedule you have set.