Adding a filter to the data you import
You may not want to import all of the available data. If this is so, then you can create a query to filter out the information that you do want to import. This is known as a filter.
To add a new filter:
- Start Data Import.
- Open the relevant Import Configuration.
- In the Source group box, select the required filter from the list. If the required filter does not exist, click [New].
The New Filter dialog appears. - Type an appropriate Filter Name, then click OK.
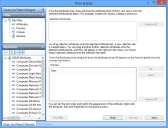
The Filter Builder starts.
- From the Attributes tree, drag the required attributes onto the Selected Attributes list.
- Specify the required criteria, then click Finish.
For information about creating queries/filters, see the Designer Guide.