Inbound e-mail user settings
The User Settings window enables you to set up how Mail manages unknown senders of inbound e-mails, and your response to them.
Senders of e-mails are identified by matching their e-mail address with e-mail addresses specified for user accounts in your database. If the sender is unknown, you can automatically create users of a specific type and role, then send a response to inform the sender that they are now a user of the system.
If the name for an automatically created user would be longer than 64 characters, it is truncated to 64 characters.
Alternatively, you can clear the Automatically create a new User if sent from an unknown sender check box, which will automatically generate an Invalid User reply message if the sender does not exist in the database.
To automatically create users of a specific type and role, using inbound e-mail:
- On the E-mail Setup tree, expand the Inbound E-mail folder, then double-click User Settings.
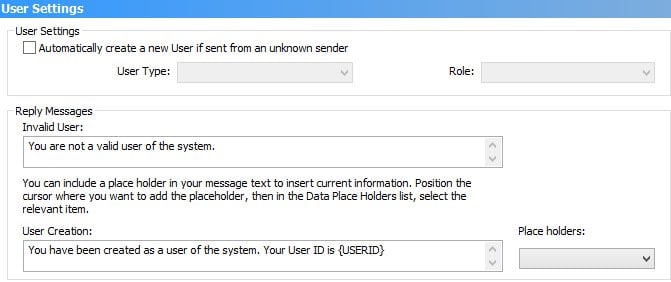
The User Settings window appears. - In the User Settings group box, select the Automatically create a new User if sent from an unknown sender check box if you want to automatically create a user using inbound e-mail.
Clear the check box if you do not want to create users using inbound e-mail.
- Select the relevant User Type and Role.
Mail will assign all automatically created users the selected user type and role.
Users of type Contact must have a Primary Group set using the Administration component before they can log incidents or other processes.
- Click
 to save your new settings.
As with Action Settings, you can use place holders to customize the reply messages sent when a user is automatically created or fails to create.
To set up reply messages for user settings:
- On the E-mail Setup tree, expand the Inbound E-mail folder, then click User Settings.
The User Settings window appears. - In the Reply Messages group box, type the messages that you want to send when the system cannot create a user, or when the user is successfully created.
These messages are sent to all inbound e-mails, regardless of mail box. - Include place holders where necessary.
- Click to save the reply messages.
The new settings are put into effect on any incoming e-mail from this point onwards.