Noticeboards
Using the Noticeboard Category and Noticeboard Item objects in the System Management module, you can create noticeboards for Web Access that you can use to display messages to all Web Desk and Self Service users, as appropriate. Noticeboards are queries against the Noticeboard Item, displayed using a report template in Web Access.
For more information using report templates, see Viewing queries as reports. For information about designing report templates, see Creating report templates for Web Access and Workspaces.
By associating different Noticeboard Categories with different Noticeboard Items, you can associate different images with different categories of notice.
Alternatively, you could create a number of different noticeboards by filtering the query results list by the Noticeboard Category.
Users with the appropriate privilege for Noticeboard Item under System\Non-Process Related Objects can create and view items on a noticeboard.
You create Noticeboard Categories using the Categories tree of the Administration component of the Ivanti Console, under the System branch.
To create a noticeboard:
- In Web Access, create a query for the System\Noticeboard Item object, and add it to the shortcut bar.
For more information about creating queries in Web Access, see Adding queries to the shortcut bar.
- In the title bar for the query, click
 , then click View as Report.
The Select Report Template dialog appears.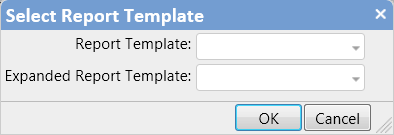
- Apply the appropriate report template to the query, then click OK.
If required, you can use the Prevent launch action on the menu to stop users from opening Noticeboard Items from the query results.
- Right-click the shortcut for the query, then click Replace this shortcut with current page.
The shortcut is replaced.
Now that you have a noticeboard query to display your notices, you can create the notices. You might first need to add a shortcut to the shortcut bar to enable you to create notices.
To add a New notice shortcut to the shortcut bar:
- Right-click the shortcut bar, then click Add process or object shortcut.
The Create process dialog appears. - In the Shortcut title box, type Create notice, and select the Add to shortcut bar? and As system shortcut? check boxes.
- In the Module list, select System.
- In the Object list, select Noticeboard Item.
- Leave the other fields blank, and click OK.
The Create notice shortcut is added to the shortcut bar.
To create a notice for Web Access:
- In the Web Access shortcut bar, click the Create notice shortcut that you added above.
The Noticeboard Item window appears. - Complete the fields as required.
- Select the Category that matches the noticeboard that you want the notice to appear on, then click Save and close.