Changing the Self Service toolbar and group images
The toolbar buttons and the icons that are available to use when you add a new group to the Self Service navigation bar are edited in a similar way. Both use a single graphic file that comprises a strip of icons that is 24 pixels high and a multiple of 24 pixels long. You can use images that are in either GIF or PNG format.
The icons on the toolbar image strip are in a set order, with Self Service determining which image to display for which button by its location in the image strip.
A typical toolbar strip is of the form:

with the icons in the order: Home, Mail, Print, Preferences, System preferences, Help, Change password, Log off, and Switch to Self Service.
A typical group images strip is of the form:

For the group images strip, you need to create two strips for each color scheme – one for the selected groups and one for the unselected groups.
To use different image strips in a color scheme:
- From the System preferences page, open the Color Schemes page, then edit the required Custom Scheme.
- On the Header and frame page, click New alongside the Toolbar button images list.
The New Web Image page appears.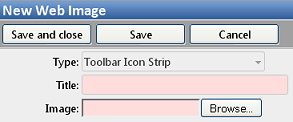
- Type a Title for the strip, then click Browse.
The File Upload dialog appears. - Browse to and select your new image strip, then click Open.
The path to the image is added to the Image box. - Click Save and close.
The New Web Image page closes. - On the Header and frame page, select the new image strip in the Toolbar button images list.
The toolbar in the preview area updates. - Similarly, add new Group images and Selected group images on the Navigation bar page, then select them, and save the changes.