MSDN inventory
To add MSDN inventory in License Optimizer:
1.Import, or manually create, named user accounts for users with MSDN subscriptions.
You can import named user accounts using the Data Import functionality, see Importing data.
You can create named user accounts manually from the Named User Management page, see Named User Management.
The next step is to associate named user accounts to OSIs. You must link named user accounts that have MSDN subscriptions with the OSIs that they are using. This usually relates to OSIs in development environments.
2.In the data grid. click the Named User account you want to edit.
The Edit User Details dialog appears.
3.Click the OSIs tab.
The list of all OSIs associated with the named user account appears.
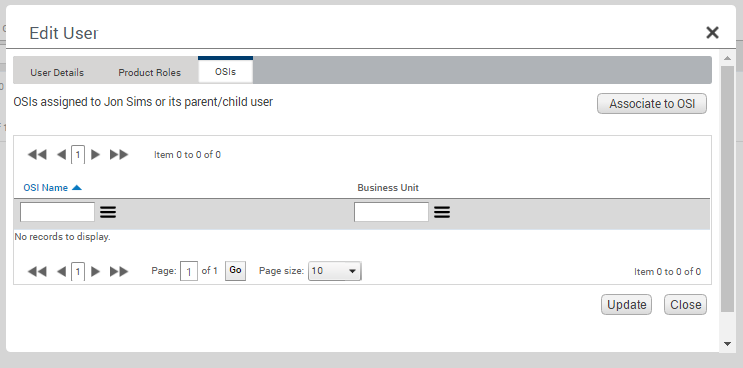
4.Click the Associate to OSI button.
The Select OSI dialog appears.

This dialog enables you to search for and select the OSI that they wish to assign to the user record.
5.Select the check box to the left of the required OSIs in the data grid, then click Select button to assign the OSIs.
The Edit User dialog returns.
6.Click Update to save the record.
7.You can now assign user(s) to MSDN license(s) using the Edit License page. For more information, see Editing licenses.
When a license record is created with the product value set to Visual Studio with MSDN, the metric is automatically set to Microsoft – MSDN/Developer and a Search User button appears on the Edit License page on the right-side of the Coverage section.
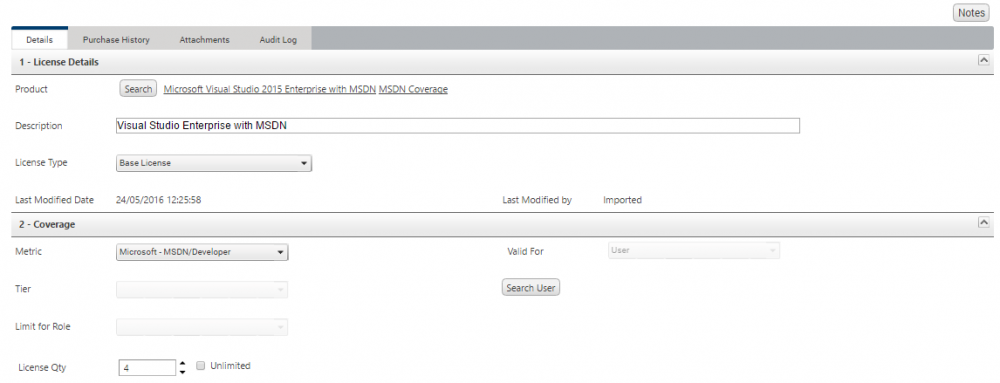
8.Click the Search User button.
The Select User dialog appears.
9.Select the check box to the left of the required named user account(s) from the data grid displayed on the dialog, using the search, filtering, and sorting functionality.
You may select only a number of named user accounts equal to (or less than) the license quantity. For the example shown in the screenshot above, the license quantity is 4 so you may select only four named user accounts.
10.When you have selected the required named user accounts, click Select to confirm the selection(s).
After the selected named user accounts have been confirmed, the Edit License page returns.
11.Click Save or Save and Close.
The updates to the license record are saved.
You may now run a reconciliation. During the reconciliation, License Optimizer works through each OSI associated to a named user account that has been linked to a MSDN license – all Microsoft products included in a MSDN subscription will be covered by the MSDN license.