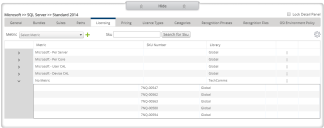
Software Library page: Licensing tab
The Licensing tab for a software title on the Software Library page displays the metrics and SKUs associated with the selected item. License Optimizer provides a number of default metrics, or you can create your own.
For more information on metrics, see Previous Reconciliations.
To add a metric to a product:
1.Select the required metric from the Metric drop-down list, then click  .
.
The metric appears in the Added Metrics list.
2.Use the  icon to drag the metrics in the Added Metric list to the priority order that you want to use them in during reconciliation, or click
 ![]() alongside a metric to remove it from a product.
alongside a metric to remove it from a product.
SKUs and Prices
A SKU (stock keeping unit) is a unique identifier that vendors may apply to their product licenses. You can use SKUs in License Optimizer to link licenses to metrics and pricing, and to make adding new licenses easier.
To add a SKU to a metric:
1. Click Add SKU from the gears menu on the Licensing tab.
The Add SKU dialog appears.
2.Select the required Metric, SKU Number, and enter a Description.
3.If required, add the following values:
•License Agreement – the name of the license agreement, linked to the vendor
•Pack Size – the number of licenses in the SKU
•Cores (Microsoft only) – the number of processor cores covered by the license
•License Type – select from Base, Upgrade, or Maintenance
4.Click Save.
The SKU is added to the selected item and you are prompted to add pricing for the SKU.
5.Click Yes.
The Add Price dialog appears.
6.Select a Price List to add the new price to, and specify the new Price, then click Add.
The new price is linked with the entered SKU and metric for the selected product.
Click  to the left of a metric to see its SKUs.
Click ![]() alongside a SKU to delete it, or double-click it to edit it or its associated prices.
alongside a SKU to delete it, or double-click it to edit it or its associated prices.

