Preferences
The Preferences page enables you to:
- Configure your account
- Adjust log-in settings
- Manage alerts
To access the Preferences page, click Preferences under Administration on the menu bar.
The Preferences page comprises three tabs:
This tab enables you to set:
- Whether to use the new menu or the classic menu
- Personal details (First name, Surname, Currency, Language)
- Password
- Secret question and answer that are used if you lose your password
This tab enables you to select the License Optimizer page that is shown when you log in.
Selecting the Tutorial Page check box displays the Estate Overview dashboard when you log in.
This tab enables you to configure automated alerts that e-mail you (and/or other identified people) about changes within License Optimizer, and displays a grid that lists all existing alerts. You can configure alerts to alert about changes related to:
- Compliance
- Entitlement
- Hardware Count
- Liability
- Shortfall
- Surplus
- Unapproved Installs
For more information on grids, see Viewing pages of data.
To delete an alert, click ![]() alongside it. To edit an alert, select it in the data grid, then click Edit Alert on the gears menu.
alongside it. To edit an alert, select it in the data grid, then click Edit Alert on the gears menu.
To add a new alert:
1.Click Add Alert on the gears menu.
The Add Alert dialog appears.
2.Type an Alert Name, set the Status to Active or Inactive, and set the Alert Type to one of Compliance, Entitlement, Hardware Count, Liability, Shortfall, Surplus, or Unapproved Installs.
The dialog updates with additional fields, depending on the Alert Type selected.
3.In the Email Alerts to box, type the email address of a recipient, then click Add Email ID.
The address is added to the list.
4.Add further email addresses as required.
You can remove email addresses from the alert by selecting them in the list, then clicking ![]() .
.
5.In the Conditions... control, set the percentage change in the Alert Type that you want to trigger the alert.
The Conditions section varies depending on the Alert Type selected. If you set the Alert Type to Compliance, you can set the change in the compliance percentage that triggers the alert OR the upper and lower limits that trigger the alert.
You can now specify whether the alert covers all business units, or is restricted to specific business units.
6.In the Business Unit section, click either All Business Units, or Select Business Units.
If you click Select Business Units, a Select button appears, which you can click to specify which business unit(s) the alert applies to.
You can now specify whether the alert covers all vendors, or is restricted to specific vendors.
7.In the Vendor section, click either All Vendors, or Select Vendors and then specify which vendor(s) the alert applies to.
The Vendor section does not appear if you set the Alert Type to Hardware Count.
8.When you have configured the alert as required, click Save.
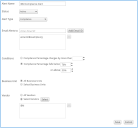
In the example below, an alert has been configured to monitor compliance for the IBM vendor across all business units. The alert triggers if the compliance percentage falls below 76% or goes above 95%, in which case it sends an e-mail to the e-mail address listed in the e-mail address list.
