What users see after they login
Depending on the user portal role enabled, device users may have a different view of the user portal.
Welcome menu
The Welcome menu is in the top-right of the user portal. From this menu, you can perform the following actions:
- View Activity - View a list of all device activity. See If Register Device role is enabled.
- Helpdesk - Configure the help desk contact information to display in the user portal. See Configuring help desk contact information.
- Settings - View user portal settings.
- Sign Out - Sign out of the self-service user portal.
If Register Device role is enabled
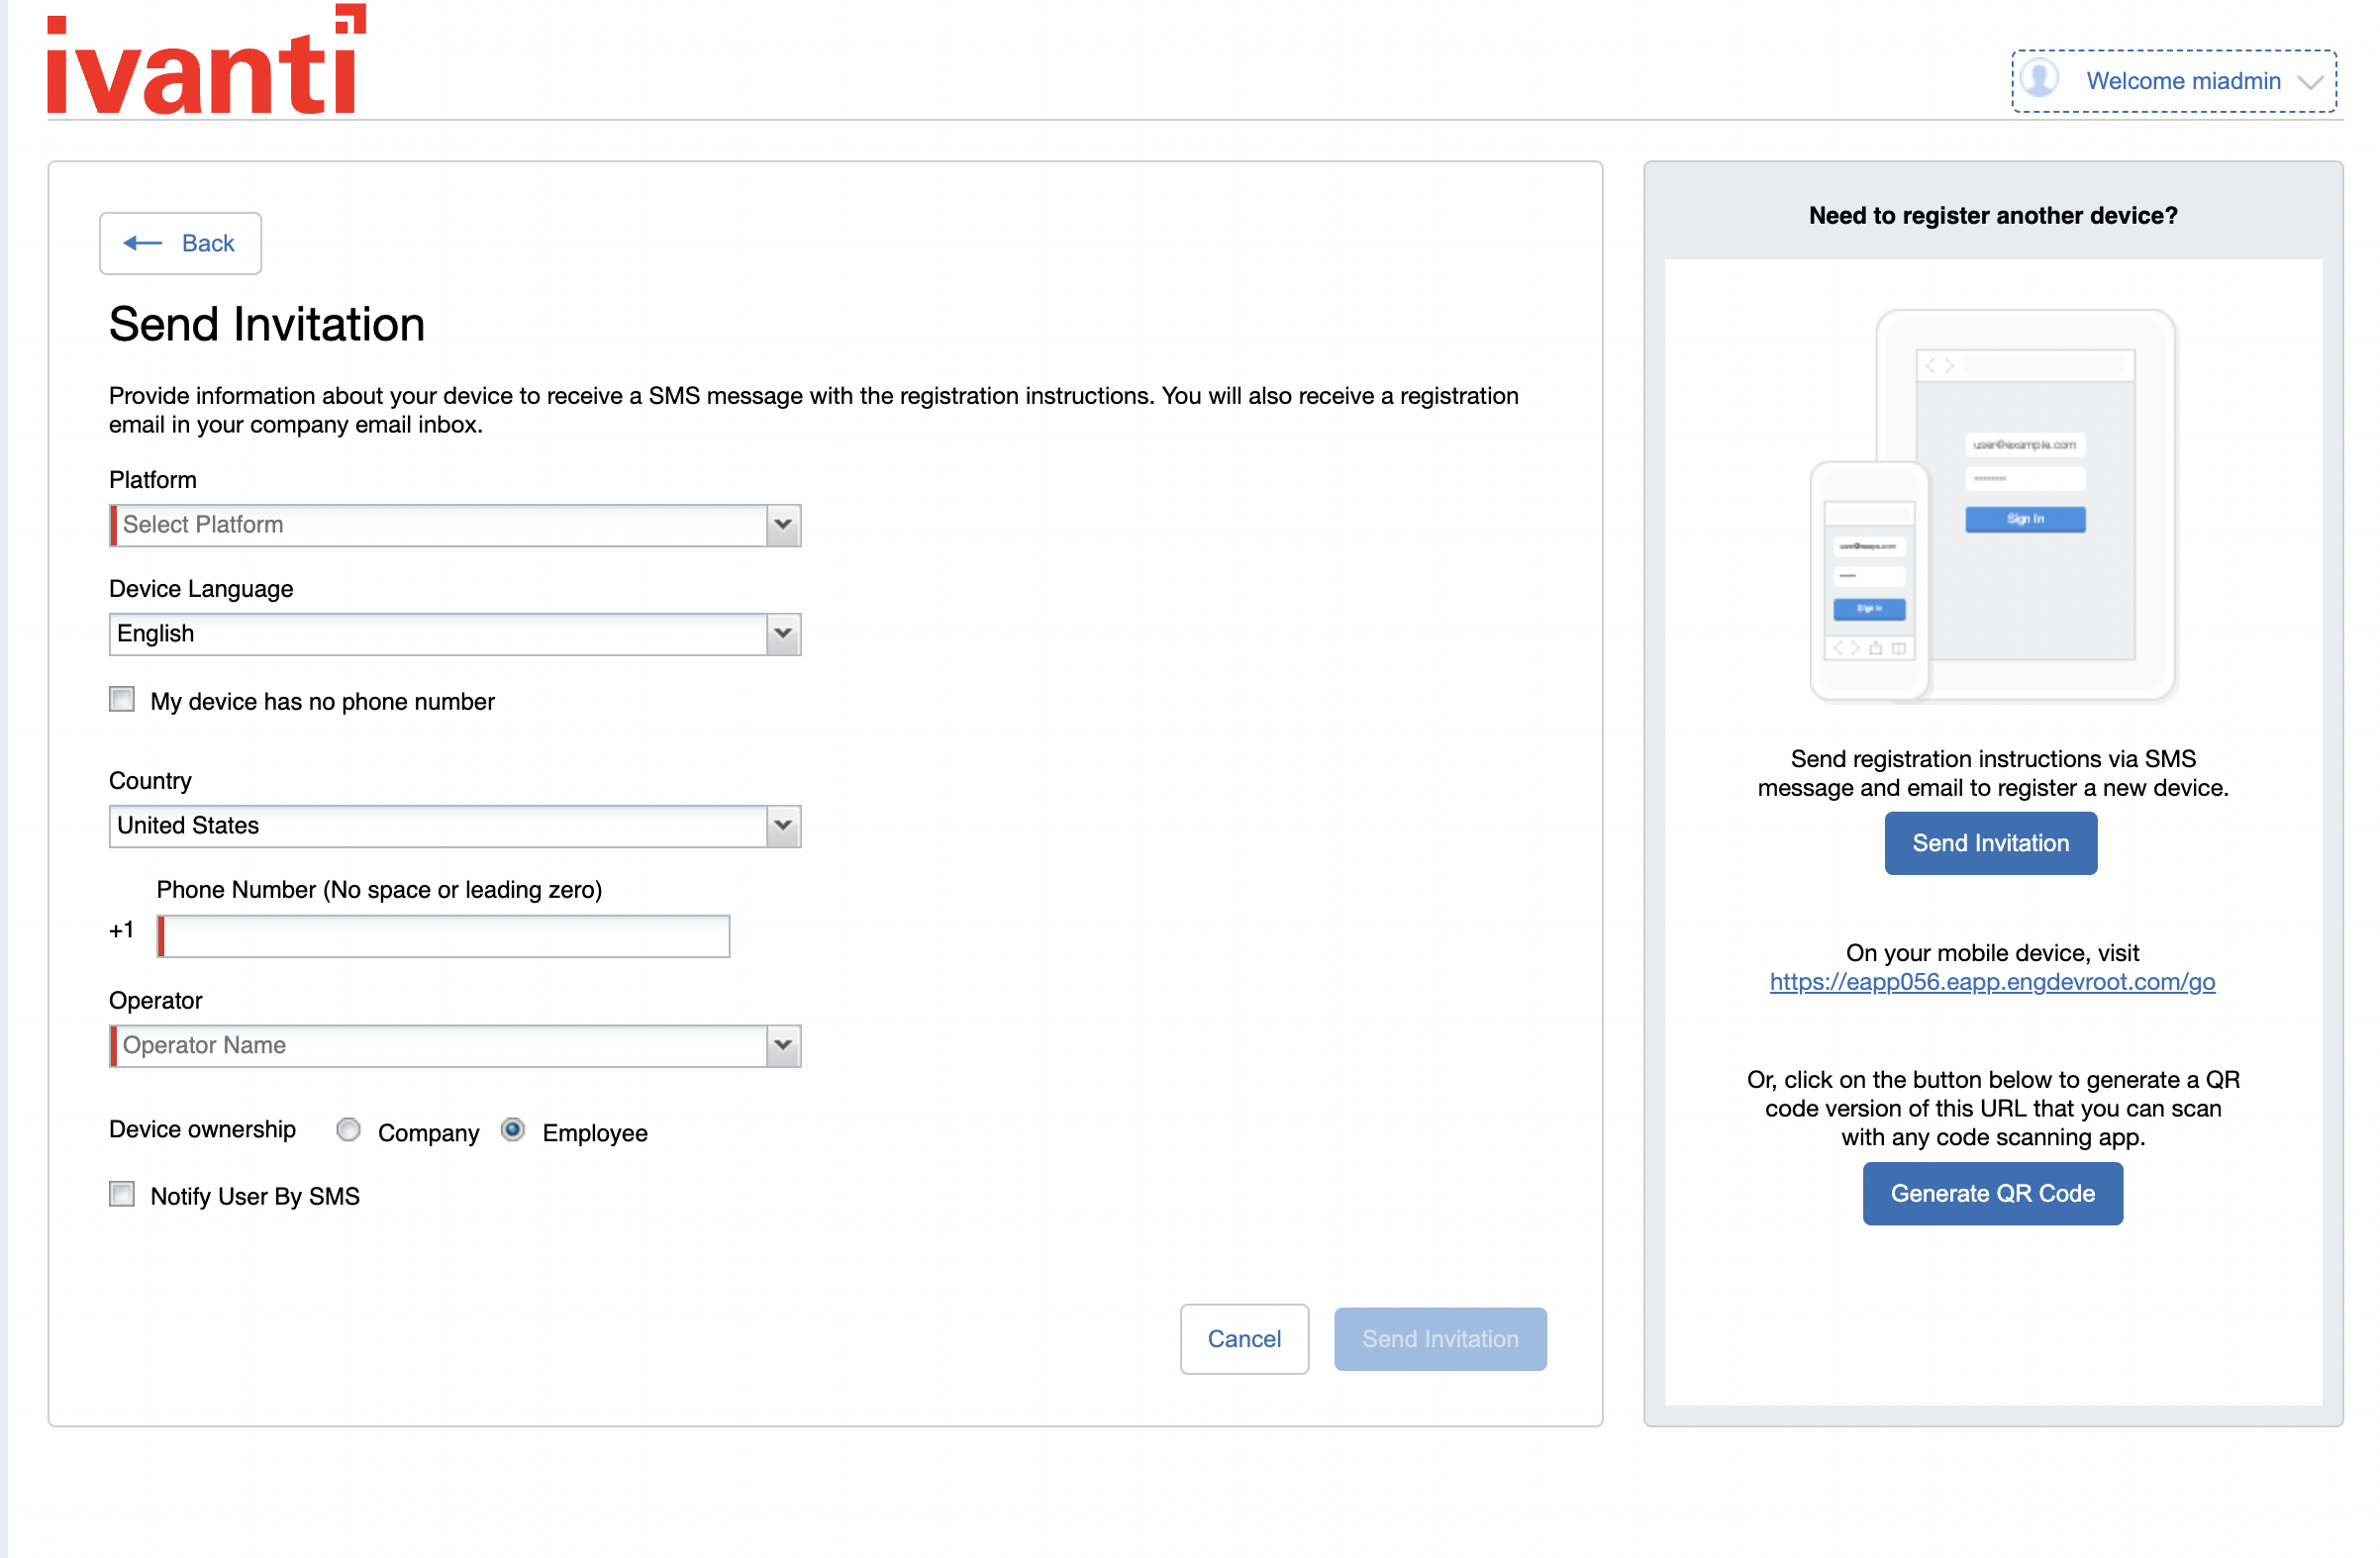
If the Register Device role is enabled, device users will be able to send an invitation from the user portal to register their device.
Figure 1. Send invitation to register
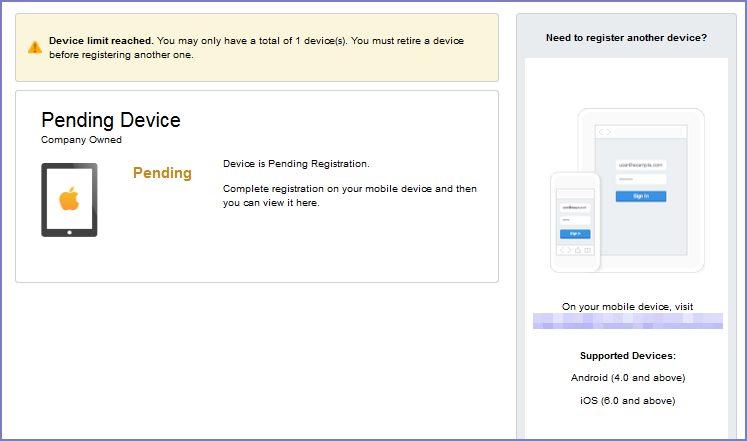
After the invitation is sent, the device status is seen as Pending.
Figure 2. Registration pending for device
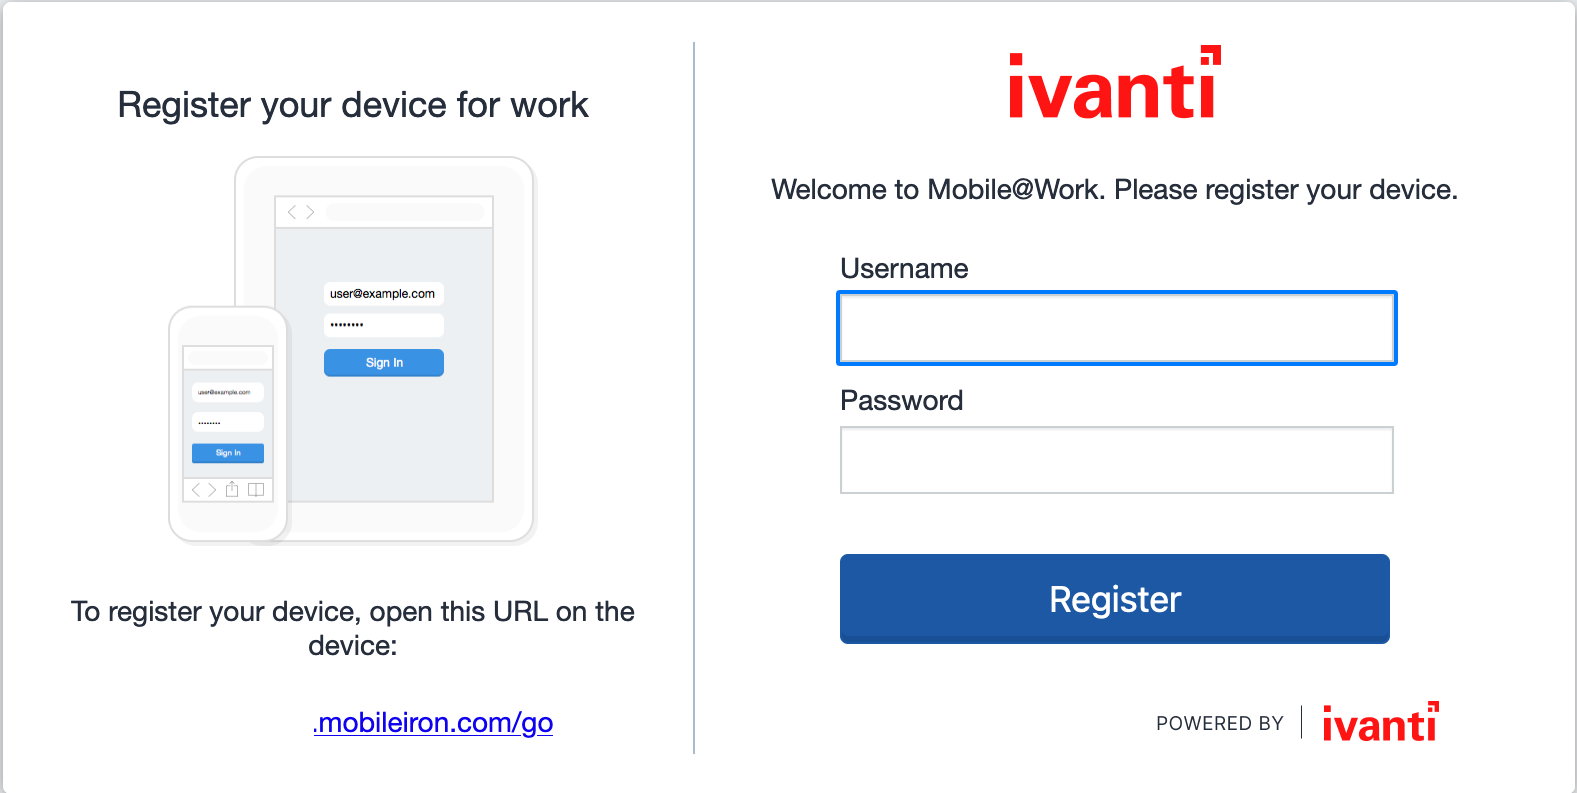
Device users can complete the registration on their mobile device at https://<EPMM_Server_FQDN>/go.
Figure 3. Complete device registration
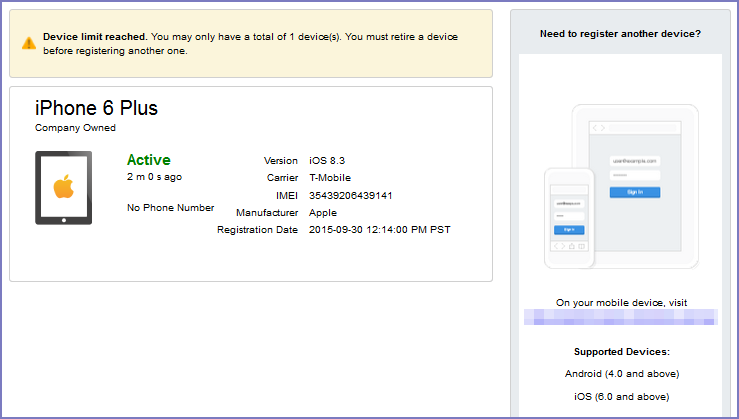
After registration is completed on the mobile device, the status for the device is changed to Active.
Figure 4. Active device status
Registration instructions
For Windows devices, users can follow the instructions provided in the user portal and in the email sent to the device user to register the device with Ivanti EPMM.
If PIN-based registration is enabled
If PIN-based registration is enabled, device users will see Request Registration PIN.
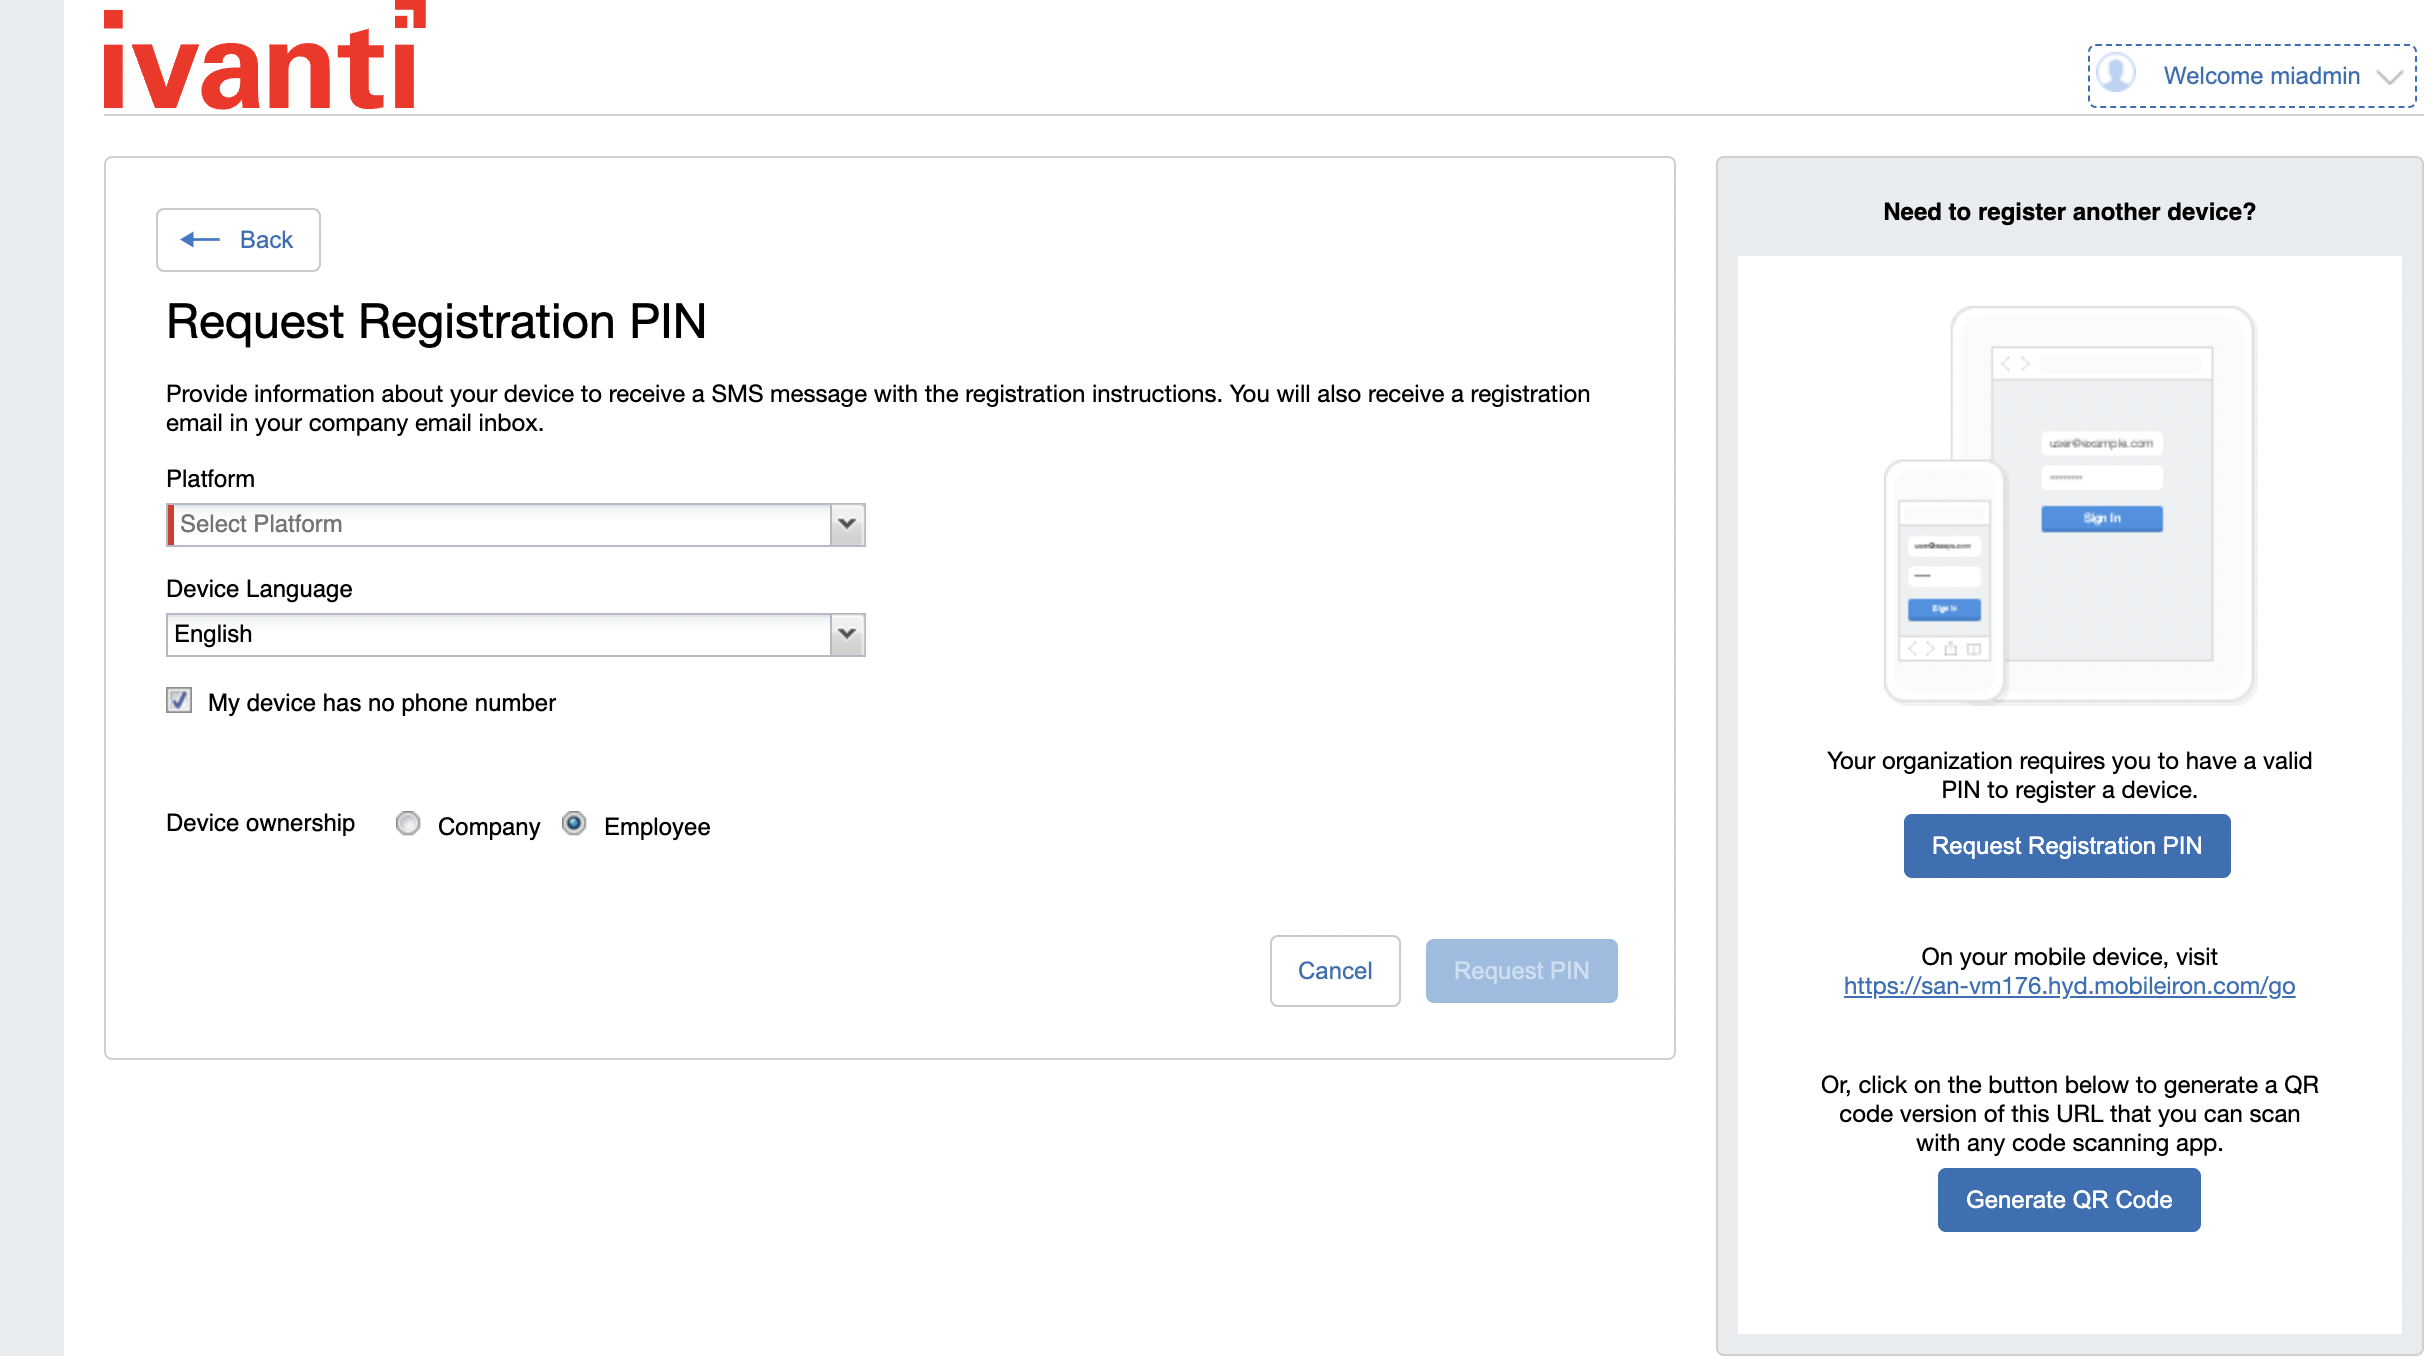
Selecting Request PIN allows device users to send an invitation for registration as well as generate a PIN.
Figure 5. Registration with pin
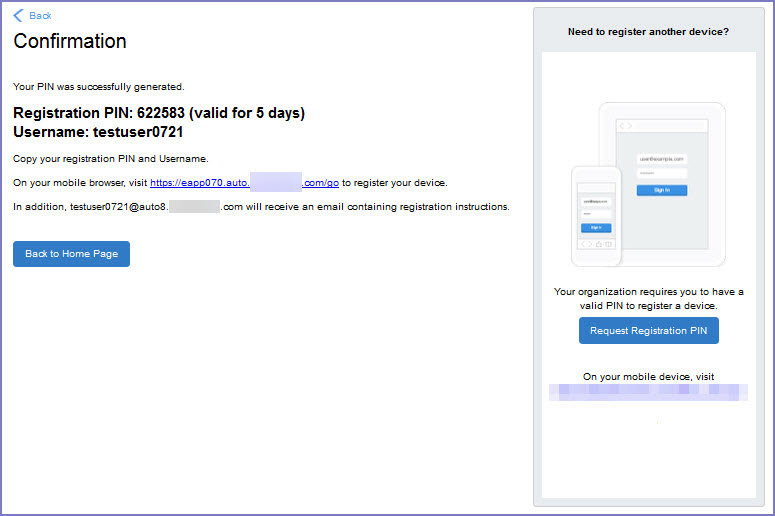
Device users can complete the registration on their mobile device at https://<EPMM_Server_FQDN>/go. They will have to enter the PIN if prompted.
If QR-code registration is enabled
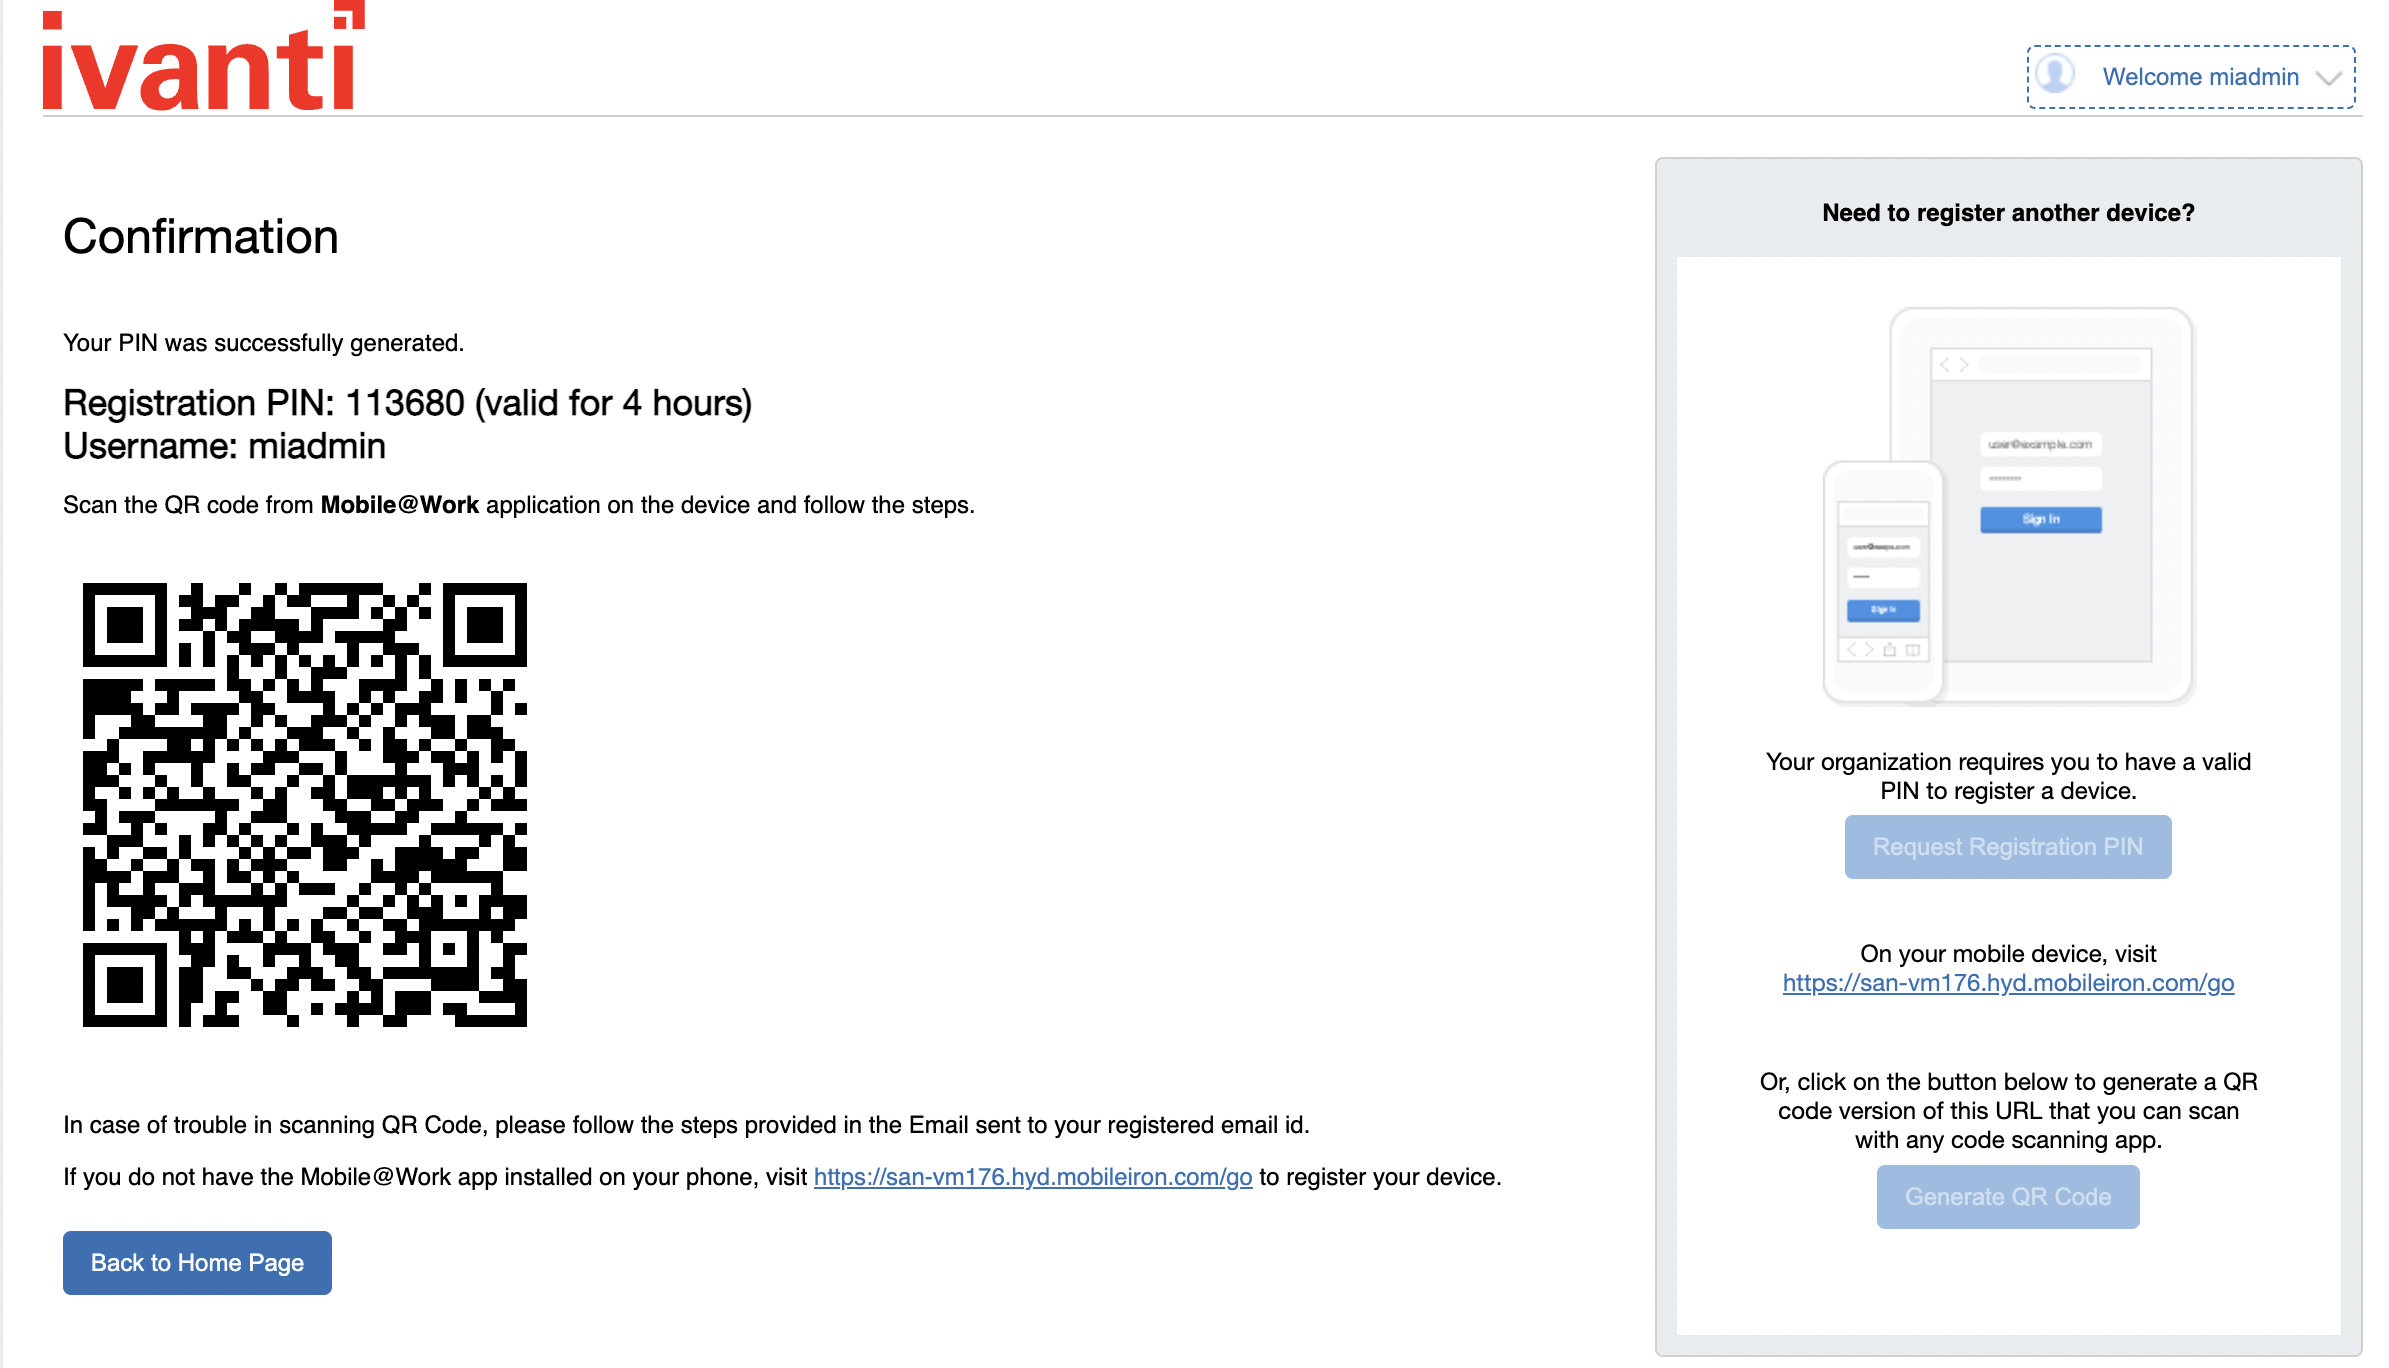
If Quick Response (QR) code-based registration is enabled, device users will see Generate QR Code. Selecting Generate QR Code allows device users to complete the device registration process.
When users log into the Self-service portal (SSP) home page, they can select one of two registration buttons:
- Send Invitation – Receive registration information by SMS message and email.
- Generate QR Code – Scan to be redirected to the appropriate registration page.
Users scan the QR code and are redirected to a browser to enter their pin or password:
- iOS users: Once authenticated, iReg profile installation starts, completing device registration.
- Android users: Once authenticated, the user is redirected to Google Play to download the registration app. Users open the app to complete device registration.
Figure 6. Registration with QR code
If Change Device Ownership role is enabled
If the Change Device Ownership role is enabled, device users will see the option to change the device ownership.
Figure 7. Change device ownership option
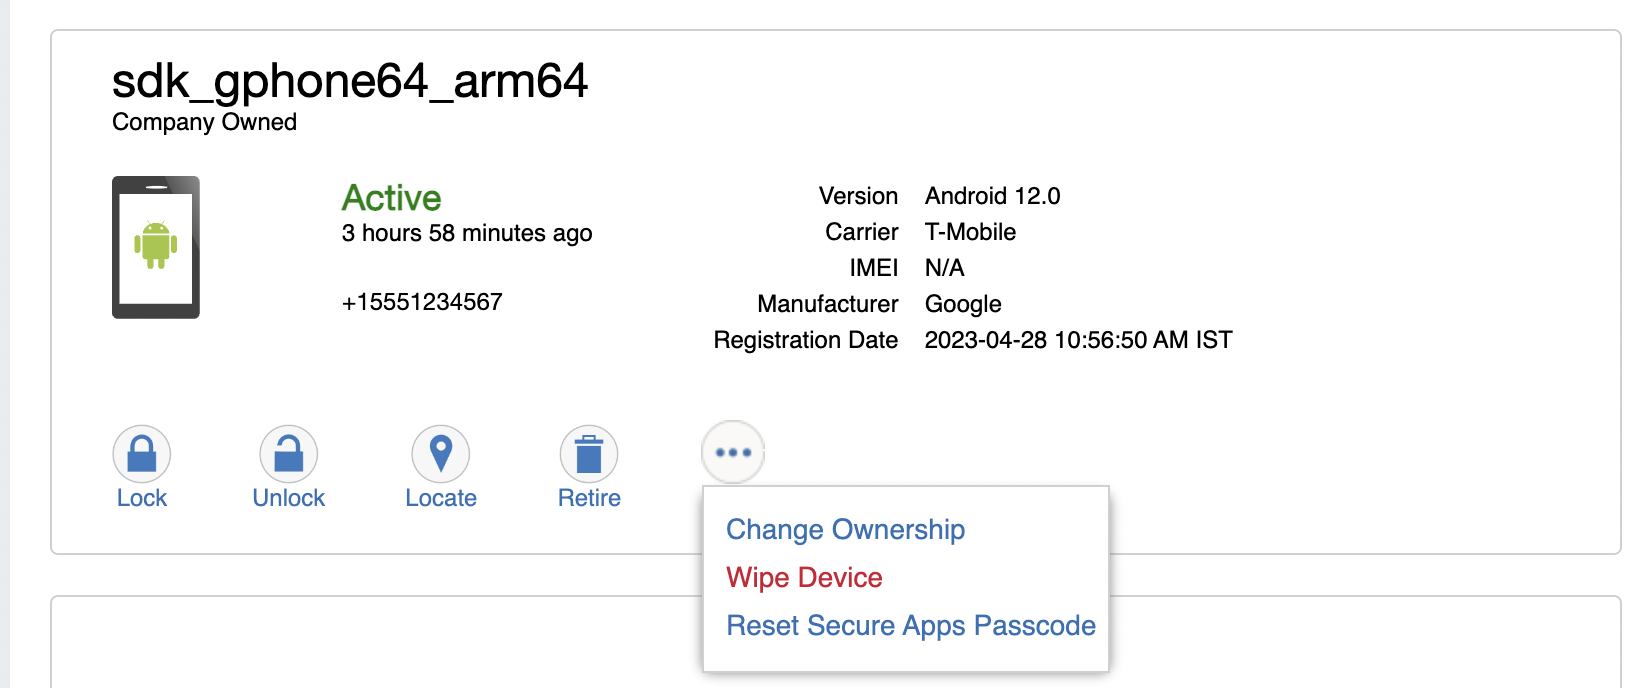
Selecting Change Ownership allows the user to change the device ownership.
Figure 8. change device ownership settings

If Default ownership for devices is enabled for Device users
If your device administrator has enabled Default ownership for devices registered at the user self-service portal for Employees, you can modify the default ownership for the device, from Employee to Company and back. By default, that information is not editable by the device user. For information about the administrator settings on the Registration page, see "Understanding the Registration page" in the Devices chapter of Getting Started with Ivanti EPMM.
Procedure
What client users see after registering their device
The user portal displays:
- Icons for each device management action the user is allowed to perform.
- User and device information, including:
- Device type (iPod touch, 4th gen in the example)
- Status (Active, for example)
- Last check-in (example, 2 hours ago)
- Phone number
- OS and version (to 3 digits, iOS 7.1.1, for example)
- Carrier (for example, AT&T)
- Manufacturer
- Date the device was registered with Ivanti EPMM
- Accounts settings and certificates uploaded by the device user.
- Helpdesk contact information configured by the Ivanti EPMM administrator.
Figure 9. User portal showing user's device information
