Active Logon Policy for Office 365
A passive logon policy (passive or modern authentication) is configured by default for Office 365 federated pairs. If your Office 365 email application does not support passive authentication, use the Active Logon Policy option to assign a separate conditional policy to authenticate the active authentication (ActiveAuth) traffic for the Office 365 federated pair. The Active Logon Policy option becomes available after the Office 365 federated pair is created.
Passive authentication is based on a browser-based connection to Office 365, which supports redirects. The following describe the federated authentication flow with passive authentication:
- The user-agent (browser) connects to Office 365.
- Office 365 responds with a 301 redirect to the identity provider.
- The user-agent follows the redirect to the identity provider.
-
The identity provider presents a login form for end users to enter their credentials.
The credentials can be in the form of user name and password, certificate, or another alternative method.
- The identity provider generates a response that contains an authentication Assertion and a browser-based mechanism, either redirect or JavaScript, to auto-submit the Assertion to Office 365.
- The user-agent uses the browser-based mechanism to submit the Assertion to Office 365.
- Office 365 validates the Assertion, thus allowing the user to log in.
Active authentication does not support browser-based connection to Office 365. Therefore, it does not
- support 301 redirects
- render HTML or form-based entry
- do JavaScript-based automatic form submission.
The federated authentication flow for active authentication is as follows:
- Users enter their account credentials in the email application.
- The email application sends the user credentials to Office 365.
- Office 365 forwards the user credentials to the identity provider.
- The identity provider returns an Assertion in the response to Office 365.
- Office 365 validates the Assertion allowing the user to log in.
For an Office 365 federated pair configured in Ivanti Access, if there are no policies assigned to ActiveAuth traffic, the ActiveAuth traffic is bypassed and no rules are evaluated. If you are using email applications that support only active authentication, to allow these applications to authenticate with Office 365, assign an Active Logon policy to the Office 365 federated pair. See Office 365 settings.
Native iOS clients, Android email clients, and Email+ use active authentication.
When you assign a policy from the Active Logon Policy drop-down, the conditional rules in the assigned policy are evaluated for ActiveAuth traffic. The following conditional rules are not applicable to ActiveAuth traffic:
•Trusted App and Device Rule
•Ivanti Tunnel Rule
• Multi-Factor Authentication
•Android for Work Registration
•iOS Native Email OAuth
•Desktop Trust Rule
Assigning an active logon policy
The option to assign a policy for active logon is available in Profile > Federated Pairs, in the listing for the Office 365 federated pair.
Before you begin
Ensure that you have created a separate conditional policy to use for ActiveAuth traffic. When you create a conditional policy, the policy becomes available in the Active Logon Policy drop down when you are assigning the policy. To create a conditional policy, see Conditional Access.
Ivanti recommends that you configure a separate conditional policy for Active Logon.
Procedure
| 1. | In Ivanti Access, go to Profile > Federated Pairs. |
| 2. | In the listing for the Office 365 federated pair, click  . . |
The Assign Policy window opens.
Figure 1. Assign logon policy
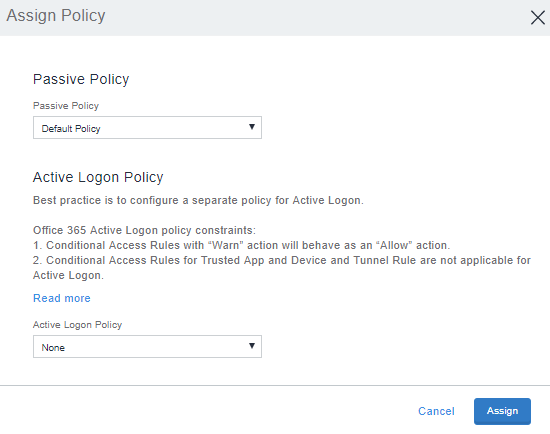
| 3. | Select the policy from the following options: |
Passive Policy: Select the Passive policy from the drop-down list for browser-based solution.
Active Logon Policy: Select the Active Logon policy from the drop-down list for client-based solution.
Select None from Active Logon drop down list, if you do not want Active Authentication traffic to evaluate any policy's rule condition.
| 4. | Click Assign. |