Populating the iOS and macOS App Catalogs
You can search for iOS apps on the Apple App Store and add them to the App Catalog. You can also add your own in-house apps for iOS and macOS.
You can add apps to the App Catalog as follows:
- Search for and import App Store apps for iOS.
Manually importing iOS apps from the Apple App Store - Use the app wizard to add apps from the iOS and macOS App Store.
Using the wizard to import iOS apps from the Apple App Store - Add in-house apps for iOS and macOS.
See Using the wizard to add an in-house iOS or macOS app to the App Catalog and Using the wizard to add an in-house macOS bundled app to the App Catalog. - Populating the iOS and macOS App Catalogs
You can also remove iOS and macOS apps from the App Catalog, as described in this section.
Before you begin populating the App Catalog with in-house apps, you may find it useful to understand provisioning profiles, which allow apps to function (see Provisioning profiles for in-house iOS apps).
macOS apps
Currently, Apple does not support managed applications on macOS devices. You can, however, distribute Apple Licenses, macOS apps, in-house macOS apps, and web applications to macOS devices.
- App Management Action Workflows
- Working with web applications for iOS and macOS
- Using Apple Licenses
- Using the wizard to add an in-house iOS or macOS app to the App Catalog
Provisioning profiles for in-house iOS apps
You can distinguish app-specific provisioning profiles from wildcard provisioning profiles by examining the application identifier key value in the provisioning profile. App-specific provisioning profiles indicate the app in particular, whereas wildcard provisioning profiles have an asterisk, indicating a match with more than one app.
For example, the following application identifier key value indicates the provisioning profile is specific to an app signed by example.com:
<key>application-identifier</key>
<string>A1B2C3D4E5.com.example.webcontainer</string>
Conversely, the following application identifier key value indicates the provisioning profile is a wildcard profile, matching more than one app:
<key>application-identifier</key>
<string>A1B2C3D4E5.*</string>
When adding in-house iOS apps to the App Catalog, the UI will indicate if the provisioning profile is expired, and therefore needs replacing.
If you need to update the provisioning profile for an app, keep in mind the following rules:
Table 1. Provisioning profile Types for apps
|
Provisioning profile type |
Action
|
Result
|
|
App-specific |
Update expired profile |
Profile updated |
|
Wildcard (*) |
Update expired profile |
New provisioning profile added |
|
App-specific |
New profile uploaded to replace expired profile |
MobileIron Core removes the label from the app used with the expired provisioning profile (using a daily background job configured in the common.properties file). |
|
Wildcard (*) |
Profile matches an app name or UUID |
Existing provisioning profile is attached to the app, and labels applied to the profile are also applied to the app. |
|
Wildcard (*) |
Profile does not match an app name or UUID
|
MobileIron Core adds a new provisioning profile to the app, and applies to the app those labels applied to the profile. |
For information about adding iOS app provisioning profiles to MobileIron Core using the Admin Portal, see “Provisioning profile settings” in the chapter “Managing Device Settings with Configurations” in the MobileIron Core Device Management Guide for iOS and macOS Devices.
Manually importing iOS apps from the Apple App Store
You can manually import iOS from the Apple App Store directly into the App Catalog on MobileIron Core using Quick Import. This import configures the app with default app settings. You can later edit the app settings.
Procedure
- In the Admin Portal, go to Apps > App Catalog.
- Click the Quick Import button.
- Select iOS from the drop-down.
- In the Application Name field, enter search text.
iTunes matches the text against app names, app IDs, app authors, and app descriptions. - From the App Store drop-down list, select the country for the App Store you want to search.
- In the Limit field, enter the number of entries you want to retrieve.
To improve search performance, the default is set to 50. You can enter a number between 0 and 200. - Click Search.
The matching apps displays.
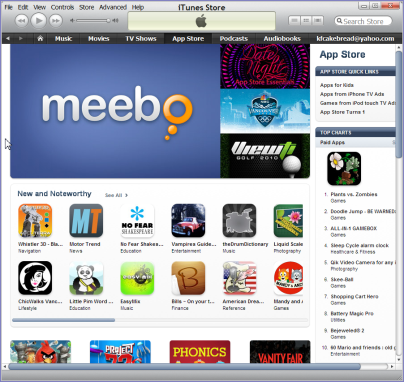
Figure 1. Search Results in App Store Search

- Click the Import or Re-import link for an app to import the relevant information.
Import indicates an app that does not yet exist in the App Catalog.
Re-import indicates an app that exists in the App Catalog, which can be re-imported. A newer version may, or may not be available from the Apple App store.
| NOTE: | You can import or update more than one app from the search results. Alternatively, you can run another search in the same dialog and import additional apps that way. |
- Close the dialog box by clicking OK.
The app displays in the App Catalog. - Click the application name to view the app details.
- Click Edit to change the app settings.
- Make any necessary changes to the default settings. The settings are described in detail in Using the wizard to import iOS apps from the Apple App Store.
| NOTE: | When you import recommended apps from the Apple App Store that use licenses, clear the This App Store App is Free check box. This allows the device user to successfully download the app user licenses. |
- To apply a category, see Creating or changing a category for iOS and macOS apps.
- To set per app VPN priority, see earlier in this section.
| NOTE: | Per app VPN settings are not supported for iOS apps when Core is configured for MAM-only iOS devices. |
- To set managed app configurations, modify the default configuration settings as required by your environment. This section displays only for apps which support managed app configuration. Optionally, click Add+ to create alternative configuration settings with different values to apply to different devices based on labels.
See Managed App Configuration settings for iOS apps in the App Catalog.
| NOTE: | Managed app configuration settings are not supported for iOS apps when Core is configured for MAM-only iOS devices. |
- Click Save.
- Click the Back to list link to return to the App Catalog.
- Select the app.
-
Click Actions > Apply To Label to set a label to the app in Apps@Work for devices associated with the label you select.
Using the wizard to import iOS apps from the Apple App Store
Using the wizard to import iOS apps from the Apple App Store
You can use the Add App Wizard to import and configure iOS App Store apps in the App Catalog (rather than accept the default app settings). When the wizard finishes running, the apps are ready to be applied to labels and sent to Apps@Work as necessary.
| NOTE: | Although some settings listed here are supported by macOS apps, you cannot import public macOS apps directly into the App Catalog. Instead, use Apple Licenses to import macOS-licensed apps into Core. You can also import in-house apps for macOS. However, you can still edit certain settings for macOS apps in Core that are managed by Apple Licenses. These settings are noted in the following procedure. |
Procedure
- In the Admin Portal, go to Apps > App Catalog.
- Select iOS from the Platform list.
- Click Add+.
- Click iTunes.
- To search for an app to import:
- Enter the name of the app or its iTunes ID. See Getting the iTunes app ID for detailed instructions for getting the ID.
- From the App Store drop-down list, select the App Store country.
- Enter a limit for the number of search results (50 by default).
- Click Search.
- Select the app from the search results list.
- Click Next.
- Use the following guidelines to complete this screen:
|
Item |
Description |
||||||||||||||||||
|
Application Name |
Required. Shows the name of the app. You can edit this field only if you opted to manually provide all app details. The app name can be up to 255 characters long. |
||||||||||||||||||
|
Min. OS Version |
Indicates the minimum version of iOS the app can support. This field is only displayed if the .ipa file of the app you are importing includes a minimum OS version number. Required.
|
||||||||||||||||||
|
Developer |
Shows the name of the app developer. You can edit this field only if you opted to manually provide all app details. |
||||||||||||||||||
|
Description |
Enter any additional text that helps describe what the app is for. |
||||||||||||||||||
|
iPad Only |
Indicates whether the app is designed only for iPads. This ensures that the app is not displayed in Apps@Work for other iOS devices. You can edit this field only if you opted to manually provide all app details.
|
||||||||||||||||||
|
Select one or more categories to display this app in a category tab in Apps@Work or add a new category.
|
- Click Next.
- Use the following guidelines to complete this screen:
|
Item |
Description |
|||
|
Apps@Work Catalog |
||||
|
This is a Free App |
Selected by default, this indicates free recommended Apple App Store apps. iOS allows Managed App features to be applied to free apps and apps purchased with Apple License credits, but not to apps paid for by the user. Specifying whether the app is free ensures successful download of apps that require user payment.
|
|||
|
Hide this App from the Apps@Work catalog |
Select to prevent this app from being displayed in Apps@Work. For example, you might want to hide apps that will be installed upon registration anyway. Hiding a mandatory app reduces clutter in Apps@Work, leaving device users with a concise menu of the approved apps they might find useful. |
|||
|
Allow conversion of apps from unmanaged to managed in Apps@Work (iOS 9 or later). |
Select if you want to allow the app to be converted from an unmanaged app to an iOS managed app in Apps@Work on devices running iOS 9 through the most recently released version as supported by MobileIron. The unmanaged app will not require uninstallation, as it will be converted directly to an iOS managed app.
|
|||
|
Select if you want to highlight this app in the Featured apps list. |
||||
|
Select to add the app to the featured banner at the top of the Apps@Work home screen on devices. When clicking the banner, device users see the details of the featured app. Add as many apps as you like to the featured banner, but the featured banner will only display the five most recent apps added to the featured banner. Apps in the featured banner are rotated every five seconds. |
||||
- Click Next.
-
Use the following guidelines to complete this screen:
|
Item |
Description |
||||||||||||
|
Per App VPN Settings |
|||||||||||||
|
Per App VPN by Label Only |
Select to assign the device a VPN configuration by device label. Otherwise, de-select this option and prioritize the VPN configurations listed below. This feature is not currently supported on macOS devices. |
||||||||||||
|
VPN selection |
In the left-hand column, select the VPN setting you created for per app VPN, and click the right arrow to move it to the set of selected VPNs in the right-hand column. If the app will use MobileIron Tunnel, select the MobileIron Tunnel VPN setting you created. You can select multiple per app VPN settings. To reorder the selected per app VPN configurations in the right-hand column, use the up and down arrows to sort the names in the list. See VPN settings in the MobileIron Core Device Management Guide for iOS and macOS Devices for information on creating a per app VPN or MobileIron Tunnel VPN setting. This feature is not currently supported on macOS devices.
|
||||||||||||
|
License Required |
Per-App VPN is supported only in iOS 7.0 and later and macOS 10.9 and later. Per-App VPN type IKEv2 (for iOS) is only supported in iOS 9.0 and above. |
||||||||||||
|
Managed App Settings |
|||||||||||||
|
Prevent backup of the app data |
Select to ensure that iTunes will not attempt to back up possibly sensitive data associated with the given app.
|
||||||||||||
|
Remove app when device is quarantined or signed out |
Select to enable configured compliance actions to remove the app if a policy violation results in a quarantined device or the device signs out in multi-user mode. To enable this feature, you must also configure a corresponding compliance action, and security policy with that compliance action selected. Once the device is no longer quarantined, the app can be downloaded again. Note The Following:
For more information, see "Using Secure Sign-In and Sign-Out" in the MobileIron Core Device Management Guide for iOS and macOS Devices. |
||||||||||||
|
Send installation request or send convert unmanaged to managed app request (iOS 9 and later) on device registration or sign-in. |
Select this option so that after device registration is complete, or after a user signs in on a multi-user device:
To allow conversion to an iOS managed app, select the option Allow conversion of apps from unmanaged to managed in Apps@Work (iOS 9 or later) in the Apps@Work Catalog section of the app’s settings This setting is not selected by default. Note The Following:
|
||||||||||||
|
Send installation or convert unmanaged to managed app request to quarantined devices |
Select this option to enable the following on quarantined devices:
Note The Following:
|
||||||||||||
|
Enforce conversion from unmanaged to managed app (iOS 9 or later) |
Every hour, Core reviews the all the devices that had last checked-in for any unmanaged apps and, if applicable, sends the unmanaged to managed app conversion request to that device. If there is an unmanaged app installed on the device, device users will not immediately get the prompt for change management. Also applicable if the app is unmanaged on an iOS 9 and later device and the app is enabled to allow conversion. |
||||||||||||
|
Advanced Settings |
|||||||||||||
|
Remove app when MDM profile is removed |
Select this option to remove this app from the device when the MDM profile is removed from the device.
|
||||||||||||
|
Update app when new version is available |
Select one or both of the following fields to enable updating the app when a new version is available:
|
||||||||||||
|
Managed App Configurations |
|||||||||||||
|
|
This section displays only for apps that support managed app configuration. Modify the default configuration settings as required by your environment. Optionally, click Add+ to create alternative configuration settings with different values to apply to different devices based on labels. See Managed App Configuration settings for iOS apps in the App Catalog.
|
||||||||||||
- Click Finish.
The app displays in the App Catalog. - Associate the app with a label to list the app on iOS devices.
| • | Changing iOS and macOS app information |
| • | Changing the iOS or macOS app icon and screenshots |
| • | Creating or changing a category for iOS and macOS apps |
Next steps
Continue on to Making iOS and macOS apps available to users in Apps@Work.
Getting the iTunes app ID
To manually configure a managed app in the Add App Wizard, you must supply the ID for the app as defined in iTunes. However, IDs are not always readily available.
Procedure
- Open iTunes.
- Navigate to the iTunes Store.
- Navigate to the App Store.
- Locate the app you want to configure.
- Open a text editor.
- Right-click the app icon, and select Copy Link.
- For example, using Firefox, you can right-click on the icon and select Copy Link.
- Paste the link into the text editor.
- In the below example, the URL was pasted into Notepad. The application ID (selected) comprises the digits following “id” and before “?mt=8”.

Using the wizard to add an in-house iOS or macOS app to the App Catalog
You can use the Add App Wizard to import into the App Catalog in-house iOS and macOS apps developed by your organization. An enterprise-level Apple Developer account is required for developing in-house iOS and macOS apps.
Each in-house app for iOS must be no larger than 5 GB. Individual downloads of iOS in-house apps over 3G are generally limited to 20 MB per device. Use Wi-Fi to download larger in-house apps.
| IMPORTANT: | When developing an in-house iOS app to be used with Core, you must include the following keys in the info .plist file for the in-house app: |
- CFBundleName or CFBundleDisplayName
- CFBundleIdentifier
- CFBundleExecutable
- CFBundleVersion
- CFBundleShortVersionString
If you are adding a new version of an existing app, see Populating the iOS and macOS App Catalogs.
Procedure
- In the Admin Portal, go to Apps > App Catalog.
- Select iOS or macOS from the Platform list.
- Click Add+.
- The Add App Wizard opens.
- Click In-House.
- Next to Upload In-House App, click Browse and navigate to the in-house iOS or macOS app (.ipa or .app) you want to upload.
-
Click Next.
|
Item |
Description |
||||||||||||||||||
|
Application Name |
Displays the app name defined for the app bundle (up to 255 characters long). App names longer than 255 characters will be truncated when displayed on the device.
|
||||||||||||||||||
|
Min. OS Version |
Displays the minimum iOS version on which the in-house app can run. This value cannot be edited. For iOS apps only. |
||||||||||||||||||
|
Display Version |
Shows the version number displayed to users. The value of this field is a number with or without a period. This value cannot be edited. |
||||||||||||||||||
|
Code Version |
Displays the version of the app. This value cannot be edited. This value is not displayed for macOS in-house apps. |
||||||||||||||||||
|
Developer |
Enter the name of the app developer. |
||||||||||||||||||
|
Description |
Enter any additional text that describes the app. |
||||||||||||||||||
|
iPad Only |
Select if the app is designed only for iPads. This ensures that the app is not displayed in Apps@Work for other iOS devices. For iOS apps only. |
||||||||||||||||||
|
Provisioning Profile |
Shows the identifier for the provisioning profile incorporated in the bundle, and the expiration date of the provisioning profile. This value cannot be edited when adding a new app. You can only upload a current profile when editing an app with an expired provisioning profile that you have previously added to the App Catalog. To upload a current provisioning profile, you must complete the process of adding the app to the App Catalog, and then edit the app. The Provisioning Profile Status column in the App Catalog shows a red warning icon to indicate that the provisioning profile of a given managed app is expired, or otherwise invalid. If the provisioning profile is expired, you can upload a new profile as follows:
For more information about provisioning profiles, see Provisioning profiles for in-house iOS apps. For iOS apps only. |
||||||||||||||||||
|
Select one or more categories if you would like this app to be displayed in a specific group of apps on the device or add a new category:
See Creating or changing a category for iOS and macOS apps for more information. |
- Click Next.
- Use the following guidelines to complete this screen:
|
Item |
Description |
|||
|
Apps@Work Catalog |
||||
|
Hide this App from the Apps@Work catalog |
Select to prevent this app from being displayed in Apps@Work. For example, you might want to hide apps that will be installed upon registration anyway. Hiding a mandatory app reduces clutter in Apps@Work, leaving device users with a concise menu of the approved apps they might find useful. |
|||
|
Allow conversion of apps from unmanaged to managed in Apps@Work (iOS 9 or later). |
Select if you want to allow the app to be converted from an unmanaged app to an iOS managed app in Apps@Work on devices running iOS 9 through the most recently released version as supported by MobileIron. The unmanaged app will not require uninstallation, as it will be converted directly to an iOS managed app. For iOS apps only.
|
|||
|
Feature this App in the Apps@Work Catalog |
Selected by default, this check box indicates this app will be highlighted in the Featured Apps list. |
|||
|
Featured Banner |
Select to add the app to the featured banner at the top of the Apps@Work home screen on devices. When clicking the banner, device users see the details of the featured app. Add as many apps as you like to the featured banner, but the featured banner will only display the five most recent apps added to the featured banner. Apps in the featured banner are rotated every five seconds. |
|||
|
Allow app downloads over insecure networks |
Select this if you are providing an Override URL (next field) that uses the HTTP URL scheme instead of HTTPS. Override URLs are intended for use behind a firewall, using a trusted and secure internal network. Before you use an HTTP URL, make sure you understand the risks of using an insecure connection. |
|||
|
Override URL |
If you are using an alternate source for downloading in-house apps, enter that URL here. The URL must point to the in-house app in its alternate location. Override URLs are intended for use behind a firewall, using a trusted and secure internal network. Manual synchronization is required with the alternate HTTP server on which app are stored. See Override for in-house app URLs for the requirements for this configuration before using it. |
|||
|
Icon and Screenshots |
||||
|
App Icon |
Required. The app icon is automatically extracted from the IPA file. The file must be in PNG format. Click Replace Icon to replace the icon. |
|||
|
iPhone Screenshots |
Click Upload to add a an iPhone screenshot. Select up to twelve optional screenshots to display for the app. Screenshots must be in JPG, PNG, or GIF format, with a minimum size of 320x480 pixels or 480x320 pixels, and a maximum size of 4096x4096 pixels. Click Remove to delete a screenshot.
|
|||
|
iPad Screenshots |
Click Upload to add a screenshot. Select up to twelve optional screenshots to display for the app. Screenshots must be in JPG, PNG, or GIF format. Each file must have a minimum size of 1024x768 or 768x1024 pixels, and a maximum size of 4096x4096 pixels. Click Remove to delete a screenshot.
|
|||
- Click Next.
- Use the following guidelines to complete this page:
|
Item |
Description |
||||||||||||
|
Select to require data protection to install this app. For iOS apps only. Note The Following:
|
|||||||||||||
|
Per App VPN Settings |
|||||||||||||
|
Per App VPN by Label Only |
This feature requires a separate MobileIron license, and is not supported on macOS devices. In the left-hand column, select the VPN setting you created for per app VPN, and click the right arrow to move it to the set of selected VPNs in the right-hand column. If the app will use MobileIron Tunnel, select the MobileIron Tunnel VPN setting you created. You can select multiple per app VPN settings. To reorder the selected per app VPN configurations in the right-hand column, use the up and down arrows to sort the names in the list. See VPN settings in the MobileIron Core Device Management Guide for iOS and macOS Devices for information on creating a per app VPN or MobileIron Tunnel VPN setting.
|
||||||||||||
|
License Required |
Per-App VPN is supported only in iOS 7.0 and later and macOS 10.9 and later. Per-App VPN type IKEv2 (for iOS) is only supported in iOS 9.0 and above. |
||||||||||||
|
Managed App Settings |
|||||||||||||
|
Prevent backup of the app data |
Select to ensure that iTunes will not attempt to back up possibly sensitive data associated with the given app. No further action is necessary to apply this restriction. For iOS apps only.
|
||||||||||||
|
Remove app when device is quarantined or signed out |
Select to enable configured compliance actions to remove the app if a policy violation results in a quarantined device or the device signs out in multi-user mode. To enable this feature, you must also configure a corresponding compliance action, and security policy with that compliance action selected. Once the device is no longer quarantined, the app can be downloaded again. For iOS apps only. Note The Following:
|
||||||||||||
|
Send installation request or send convert unmanaged to managed app request (iOS 9 and later) on device registration or sign-in. |
Select this option so that after device registration is complete, or after a user signs in on a multi-user device:
To allow conversion to an iOS managed app, also select the option Allow conversion of apps from unmanaged to managed in Apps@Work (iOS 9 or later) in the Apps@Work Catalog section of the app’s settings. This setting is not selected by default. For iOS apps only.
|
||||||||||||
|
Send installation or convert unmanaged to managed app request to quarantined devices |
Select this option to enable the following on quarantined devices:
For iOS apps only. Note The Following:
|
||||||||||||
|
Enforce conversion from unmanaged to managed app (iOS 9 or later) |
Upon device check-in, send installation request to convert unmanaged to managed app. Also applicable if the app is unmanaged on an iOS 9 and later device and the app is enabled to allow conversion. |
||||||||||||
|
Advanced Settings |
|||||||||||||
|
Remove app when MDM profile is removed |
Select this option to remove this app from the device when the MDM profile is removed from the device. For iOS apps only.
|
||||||||||||
- Click Finish.
The app displays in the App Catalog.
The provisioning profile for the app is also stored on Core and displays in the Policies & Configs > Configurations page. It is displayed for viewing only, and is automatically deleted from Core if the app is deleted from Core. - Select the app in the App Catalog.
- Click Actions > Apply to Label, and select the appropriate labels to make this app available to device users.
| NOTE: | You can edit the app’s settings at any time. Select the app in the App Catalog, and click Edit. |
Next steps
Making iOS and macOS apps available to users in Apps@Work
- developing in-house iOS apps, see the Apple enterprise developer site at
- https://developer.apple.com/enterprise/
- building, signing, uploading, installing, and launching in-house apps, see this knowledge base article:
- https://community.mobileiron.com/docs/DOC-2073
Using the wizard to add an in-house macOS bundled app to the App Catalog
You can use the Add App Wizard to import into the App Catalog signed, in-house, bundled macOS apps. An enterprise-level Apple Developer account is required for developing in-house macOS apps.
If you are adding a new version of an existing app, see Populating the iOS and macOS App Catalogs.
Procedure
- In the Admin Portal, go to Apps > App Catalog.
- Select macOS from the Platform list.
- Click Add+.
- The Add App Wizard opens.
- Click In-House.
- Click Browse and navigate to the in-house bundled macOS app you want to upload.
- Click Next.
|
Item |
Description |
||||||||||||||||||
|
Application Name |
Displays the app name defined for the app bundle (up to 255 characters long). App names longer than 255 characters will be truncated when displayed on the device.
|
||||||||||||||||||
|
Display Version |
Shows the version number displayed to users. The value of this field is a number with or without a period. This value cannot be edited. |
||||||||||||||||||
|
Developer |
Enter the name of the app developer. |
||||||||||||||||||
|
Description |
Enter any additional text that describes the app. |
||||||||||||||||||
|
Select one or more categories if you would like this app to be displayed in a specific group of apps on the device.
See Creating or changing a category for iOS and macOS apps for more information. |
- Click Next.
- Use the following guidelines to complete this screen:
|
Item |
Description |
|
Apps@Work Catalog |
|
|
Hide this App from the Apps@Work catalog |
Select to prevent this app from being displayed in Apps@Work. For example, you might want to hide apps that will be installed upon registration anyway. Hiding a mandatory app reduces clutter in Apps@Work, leaving device users with a concise menu of the approved apps they might find useful. |
|
Feature this App in the Apps@Work Catalog |
Select if you want to highlight this app in the Featured apps list. |
|
Featured Banner |
Select to add the app to the featured banner at the top of the Apps@Work home screen on devices. When clicking the banner, device users see the details of the featured app. Add as many apps as you like to the featured banner, but the featured banner will only display the five most recent apps added to the featured banner. Apps in the featured banner are rotated every five seconds. |
|
Allow app downloads over insecure networks |
Select this if you are providing an Override URL (next field) that uses the HTTP URL scheme instead of HTTPS. Override URLs are intended for use behind a firewall, using a trusted and secure internal network. Before you use an HTTP URL, make sure you understand the risks of using an insecure connection. |
|
Override URL |
If you are using an alternate source for downloading in-house apps, enter that URL here. The URL must point to the in-house app in its alternate location. Override URLs are intended for use behind a firewall, using a trusted and secure internal network. Manual synchronization is required with the alternate HTTP server on which app are stored. See Override for in-house app URLs for the requirements for this configuration before using it. |
|
Icon and Screenshots |
|
|
App Icon |
Required. The app icon is automatically extracted from the IPA file. The file must be in PNG format. Click Replace Icon to replace the icon. |
|
Screenshots |
Select up to twelve optional screenshots to display for the app. Screenshots must be in JPG, PNG, or GIF format. Each file must have a minimum size of 1024x768 or 768x1024 pixels, and a maximum size of 4096x4096 pixels. Click Upload to add a screenshot. |
- Click Next.
-
Use the following guidelines to complete this page:
Item
Description
Send installation request on device registration
Select this option to prompt macOS device users to install this app after device registration is complete.
NOTE: If using Mobile@Work 1.4 for macOS, it is recommended you select this check box. Per App VPN Settings
Per App VPN by Label Only
This feature requires a separate MobileIron license.
In the left-hand column, select the VPN setting you created for per app VPN, and click the right arrow to move it to the set of selected VPNs in the right-hand column. If the app will use MobileIron Tunnel, select the MobileIron Tunnel VPN setting you created. You can select multiple per app VPN settings.
To reorder the selected per app VPN configurations in the right-hand column, use the up and down arrows to sort the names in the list.
See VPN settings in the MobileIron Core Device Management Guide for iOS and macOS Devicesfor information on creating a per app VPN or MobileIron Tunnel VPN setting.
-
Click Finish.
The app bundle displays in the App Catalog.
-
Associate the app with a label to list the app on macOS devices.
NOTE: In the Apply to Labels dialog box, select the check box next to the app's name. Click in the Mandatoryfield, a drop-down displays. Selecting Yesmakes the selected app mandatory; leaving it to the default No makes the app optional.
Next steps
Making iOS and macOS apps available to users in Apps@Work
App Management Action Workflows
Adding new versions of an existing iOS or macOS app
When uploading a newer version of an app, an extra page opens to allow you to select whether to keep the app's old version information or to adopt the information from the app's new version. This feature is applicable to iOS and macOS in-house / private / self-hosted apps.
Procedure
-
In the App Catalog, click the Add+ button.
The Add App Wizard opens.
- Click In-House.
- Click Browse and navigate to the in-house iOS or bundled macOS app you want to upload.
-
Click Next.
The An earlier version of this App exists page opens.
-
Select an option:
- Another version of this App was previously uploaded. Reuse its description, icon and screenshot(s). If the Description, Icon or Screenshot fields of the new app are empty, then the system will populate those fields with information from the previous app version (default).
- Upload a new description, icon or screen shot. Information related to the Description, Icon or Screenshot fields of the new App will be utilized. If those fields are empty, nothing will be copied from the previous app version.
-
Click Next and finish configuring the new version of your app (see Using the wizard to add an in-house iOS or macOS app to the App Catalog.)
Once finished, the new version displays in the App Catalog.