Deploying on Azure
•Prerequisites and System Requirements on Azure
•Deploying Ivanti Connect Secure on Azure Marketplace
•Upload ICS Appliance Image to Storage Account
•Upload Azure Resource Manager Template to Gallery
•ICS Virtual Machine Deployment
Prerequisites and System Requirements on Azure
To deploy the Ivanti Connect Secure Virtual Appliance on Azure custom deployment, you need the following:
•A Microsoft Azure account
•Access to the Microsoft Azure portal (https://portal.azure.com)
•Ivanti Connect Secure Virtual Appliance Image (.vhd file).
•Azure Resource Manager template (ARM template)
Supported Platform Systems
This section helps you in choosing the instance types that should be deployed with Ivanti Connect Secure.
 25.1.1.0
•ISA4000-V
•ISA6000-V
•ISA8000-V
25.1.3.0
•ISA4500-V
•ISA6500-V
•ISA8500-V
For more details, see ISA VA Supported Platforms.
Deploying Ivanti Connect Secure on Azure Marketplace
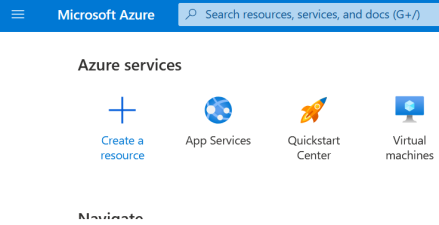
1.Log into Azure portal and navigate to Azure Marketplace by clicking Create a resource.
2.Search with keyword Ivanti Connect Secure-25.x.

Azure Marketplace contains the following two Ivanti Connect Secure SKUs:
•Ivanti Connect Secure-25.x-BYOL 2 NIC
•Ivanti Connect Secure-25.x-BYOL 3 NIC
3.Select Ivanti Connect Secure-25.x-BYOL 2 NIC and click Create. In this section, 2-NICs model is chosen as example.
Basic Configuration
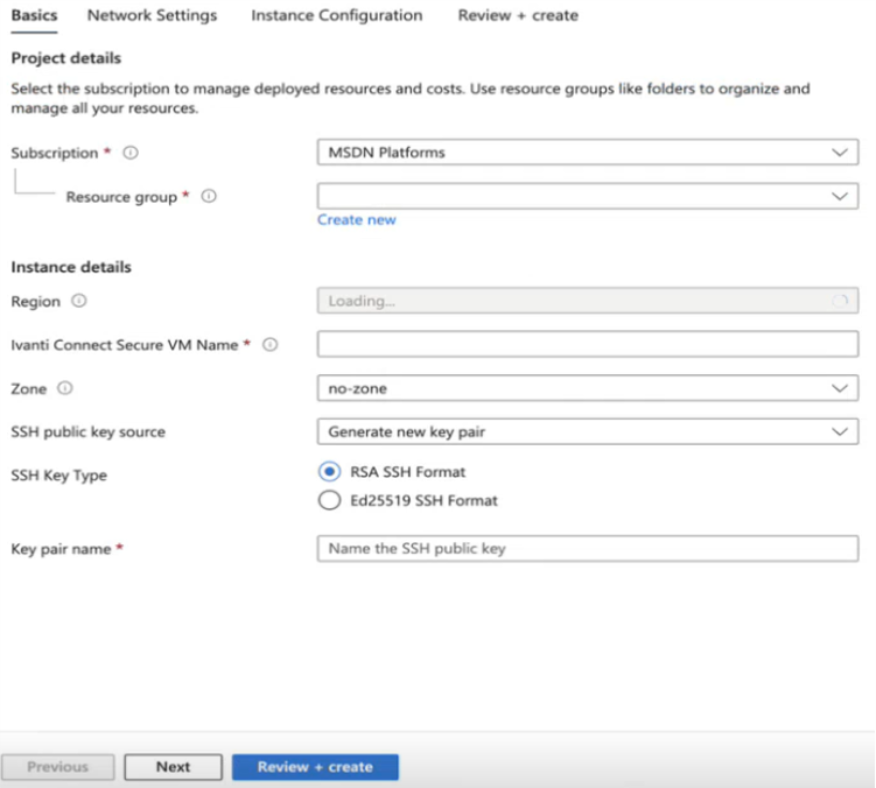
4.In the Basic Configuration step, enter the following parameters and click Next : Network Settings:
•Select the Region and Zone
•VM name: Name of the Ivanti Connect Secure to be deployed. Virtual name can be only lower-case letters and numbers, and must be 1-9 characters long.
•SSH public key: Copy and paste an RSA public key in the single-line format or the multi-line PEM format. This key is used to access ICS via SSH. The SSH keys are generated using ssh-keygen on Linux and OS X, or PuTTyGen on Windows. For details about generating the SSH key pairs, refer:
For Windows: https://docs.microsoft.com/en-us/azure/virtual-machines/linux/ssh-from-windows
For MacOS and Linux: https://docs.microsoft.com/en-us/azure/virtual-machines/linux/mac-create-ssh-keys
Without providing the SSH key, an error is displayed during deployment.
•Resource group: Name of the resource group to be deployed.
Network Settings
5.In the Network Settings configuration step, enter the following parameters and click Next: Instance Configuration
•Virtual Network:
•Select an existing virtual network from the list or
•Create a new virtual network. Specify the virtual network name and the address space.
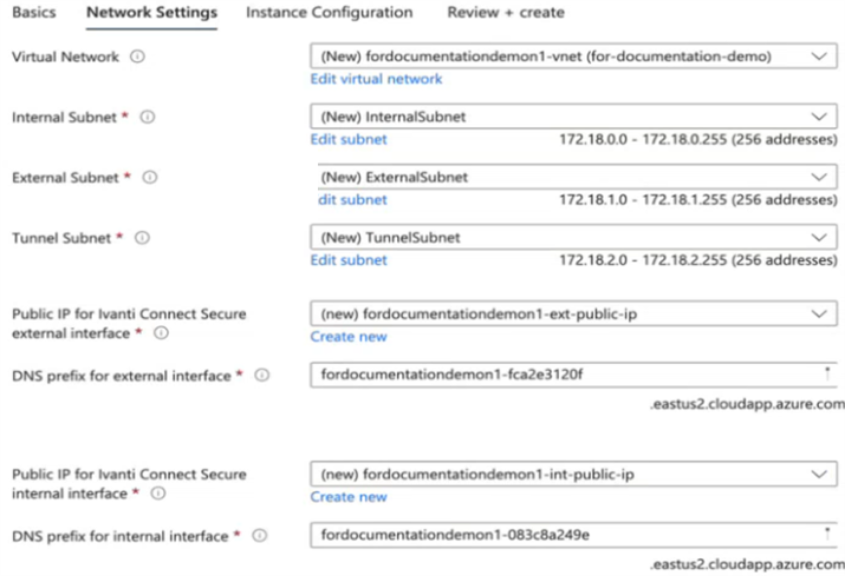
•Subnets: Four subnets – external, internal, management and tunnel subnets - are auto-populated with names and address prefix values. Make any changes if required.
•Public IP name and DNS prefix for the External and Management interfaces are auto-populated. Make any changes if required.
In a 2-NICs model, Public IP name and DNS prefix name for the External and Internal interfaces are auto-populated
Instance Configuration
6.In the Instance Configuration step, enter the following parameters:
•Ivanti Connect Secure VM Size: Specify the size of VM. By default, 1x Standard_D8s_v6 is set for 3-NICs model and 1x Standard_D4s_v6 is set for 2-NICs model.
•Diagnostic storage account: Storage account for the Virtual Machine’s diagnostics
•Ivanti Connect Secure Version: Enter the version
•Ivanti Connect Secure admin and Password: Enter the admin credentials. Password should be minimum of 12-character length. Special characters are not allowed in the password.
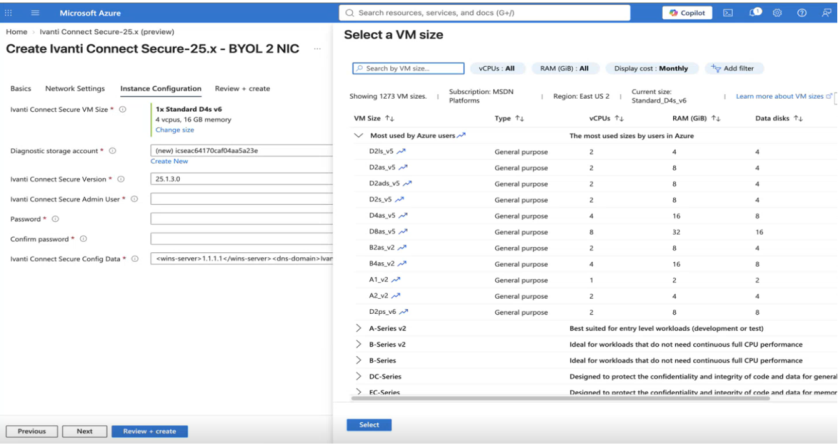
Summary Step
7.In the Summary step, once the final validation is complete, click Create.
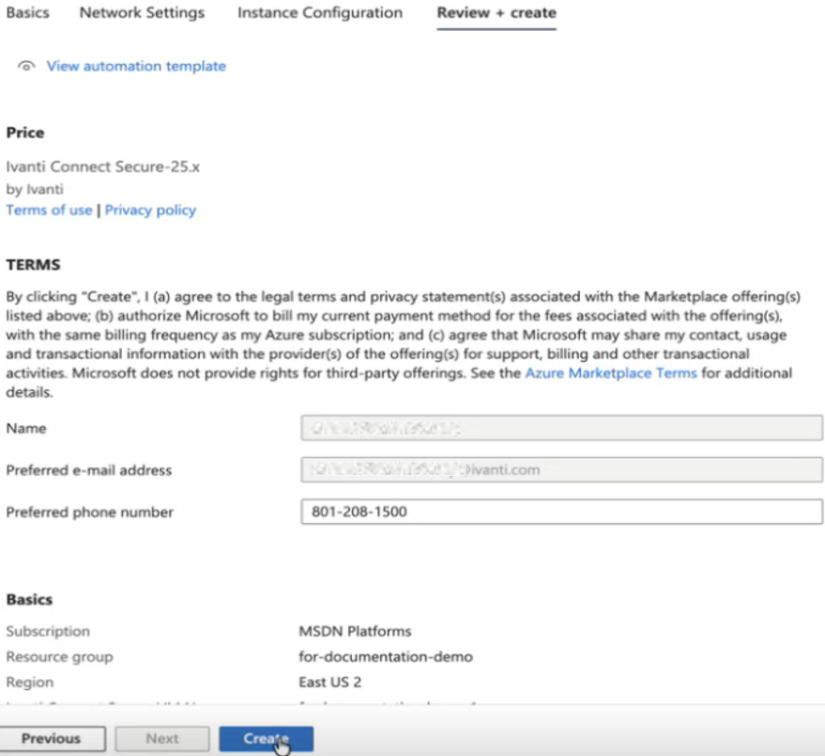
8.The deployment process takes around five minutes. Use Refresh to see the status..
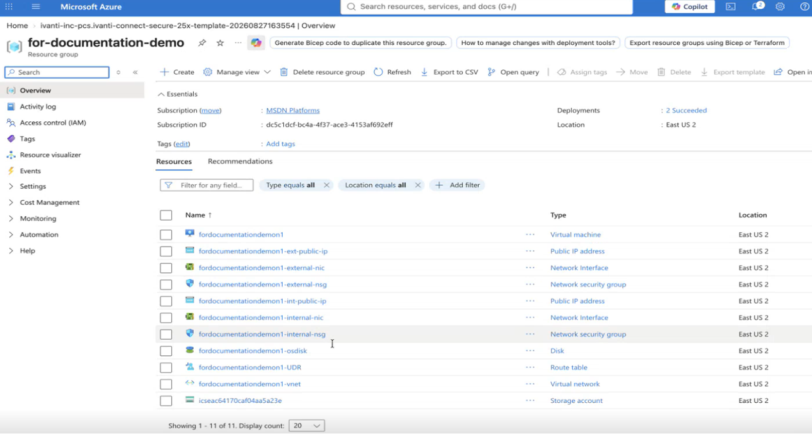
For L3 connectivity, make sure that "<ICS VM name>-UDR" is properly associated with the subnet where Backend/Protected resources are connected. For example:
- If ICS internal, external and management interfaces are connected to subnet1, subnet2 and subnet3 respectively and Backend/Protected resources are in subnet5, then we need to associate <ICS VM name>-UDR to subnet5.
- If Backend/Protected resources are in Datacenter or in different virtual network, then associate <ICS VM name>-UDR to GatewaySubnet.
9. Once the deployment is complete, the Notifications panel shows Deployment succeeded.
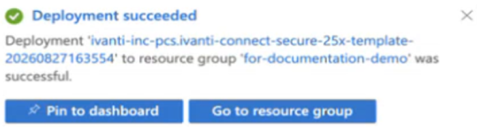
10.Click Go to resource group. The page shows the created VM instance and other supported files.
Enabling Secure Boot
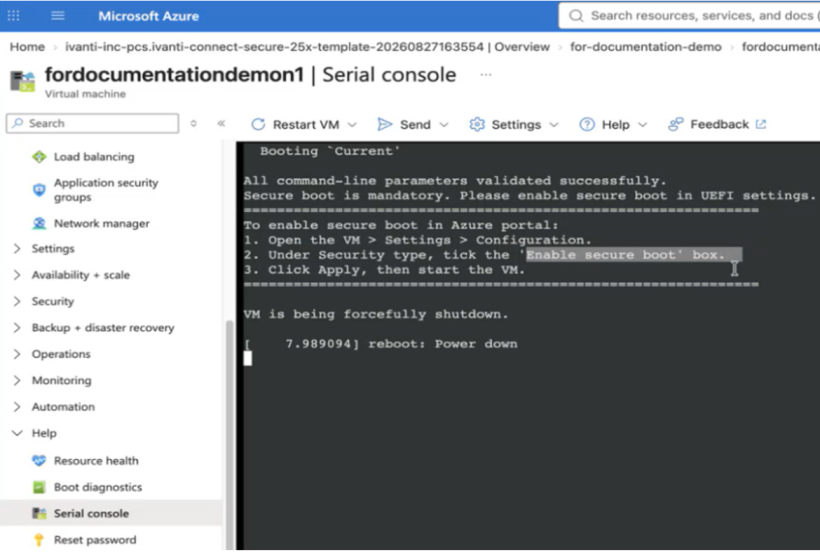
11.Select Help > Serial Console. After validating the command line parameters, VM is forcibly shut down.
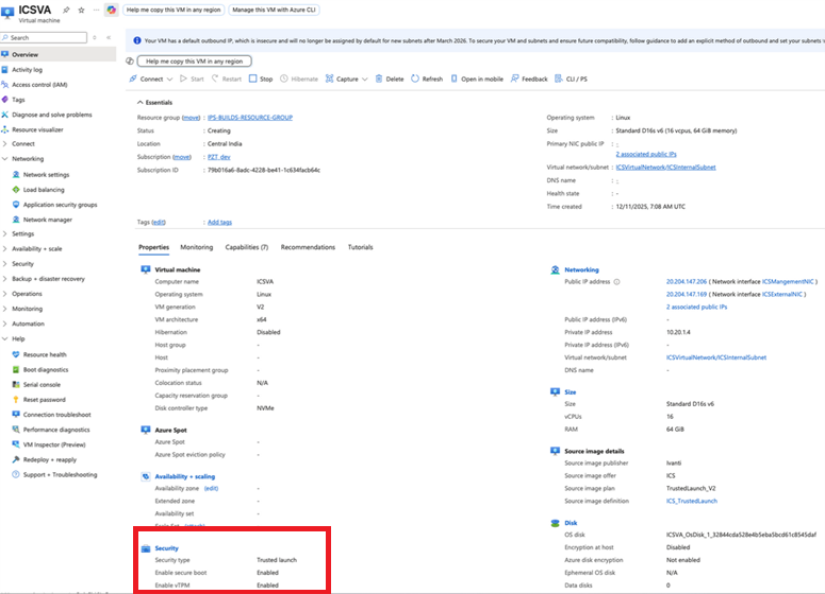
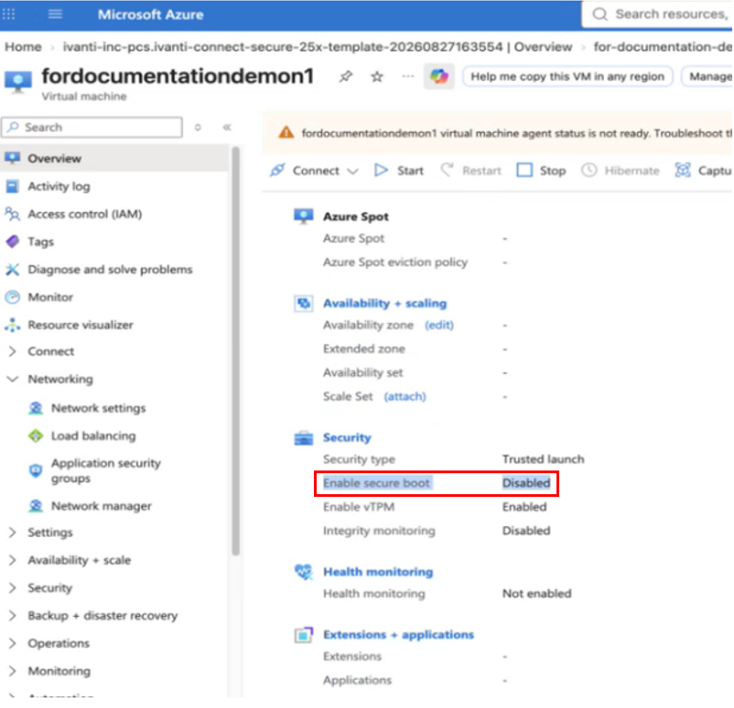
12.To enable secure boot, select Overview and scroll-down. Under Security, the Enable secure boot is Disabled by default.
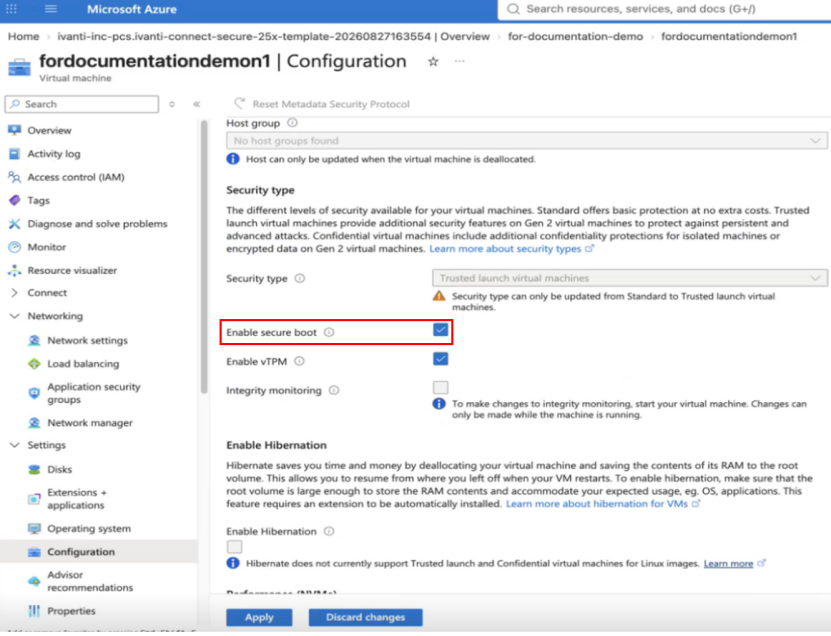
13.Click Security. In the window that is displayed, scroll-down to Security Type section. Select the Enable secure boot option, and then click Apply.
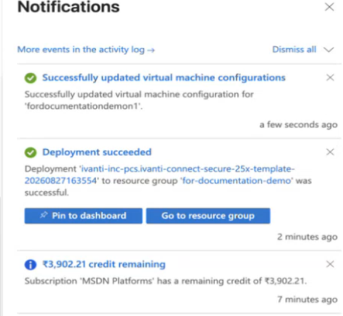
14.The Notifications panel shows the VM configuration update is successful.
Starting Virtual Machine
15.Select Overview. The Status shows Stopped.
16.To start the VM, scroll-down to Security section and verify Enable secure boot option is Enabled.
Caution: Do not click the Stop option in this window. Stopping the VM may take up to 90 minutes to complete the deallocation operations.
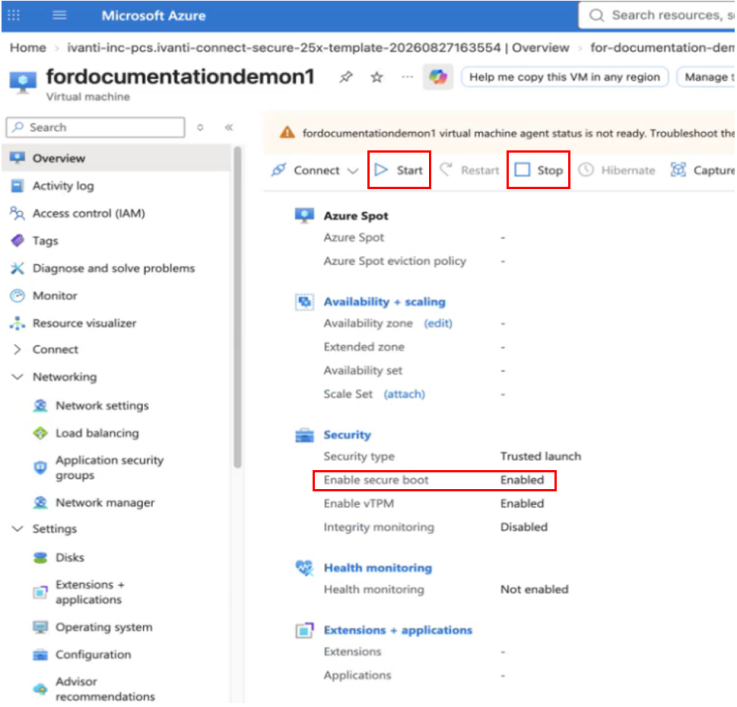
17.Click Start to start the VM. The Status changes to Running, and the Notifications panel shows the Starting Virtual Machine message.
18.Select the Serial Console window to see the progress. This process will take around 10 minutes.
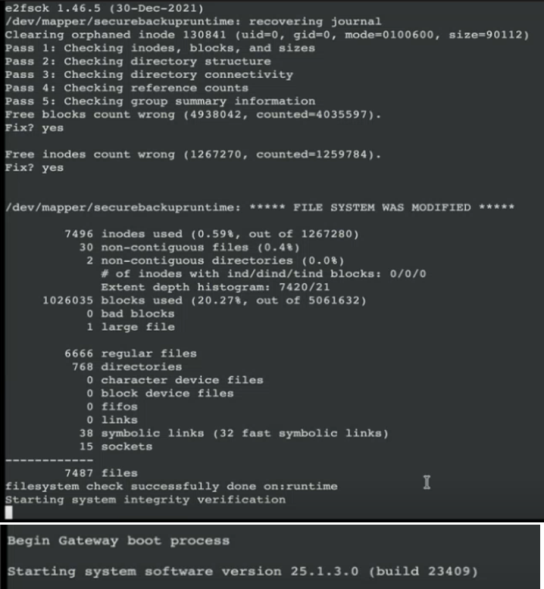
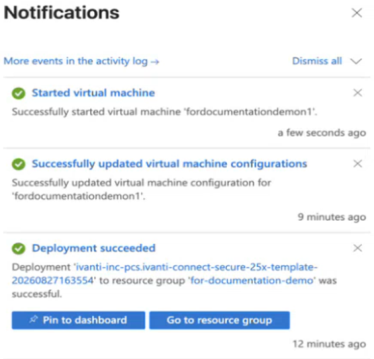
19.Once the VM is up and running, the notification panel shows Started VM successfully.
20.Log in to the ICS as administrator, verity the Platform and create additional users.
Resizing a managed disk in the Azure portal
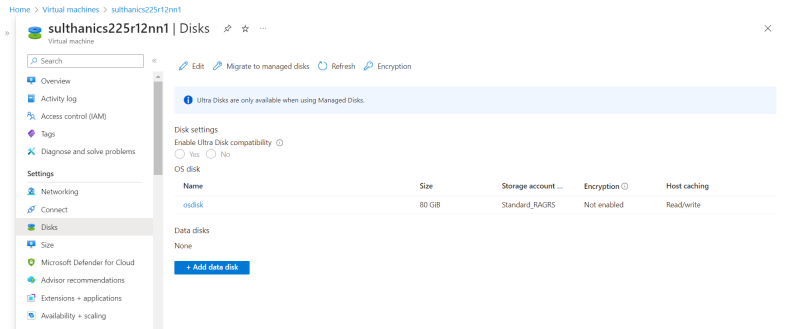
On fresh installation, 80 GB disk space is available by default. You can modify or increase the disk size only once on fresh installation or upgrade of the ICS images, but not on rollback or factory reset images.
To modify the disk size:
1.In the Azure portal, go to the virtual machine in which you want to expand the disk. Select Stop to de-allocate the VM.
2.In the left menu under Settings, select Disks.
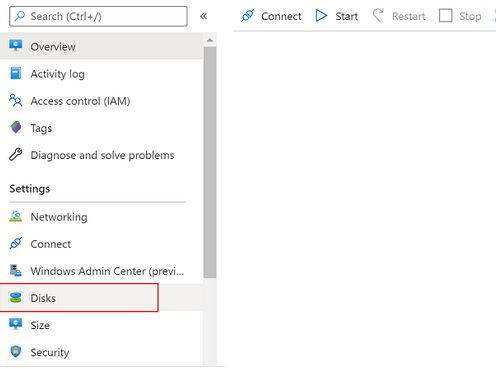
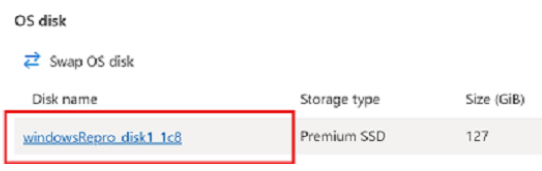
3.Under Disk name, select the disk you want to expand.
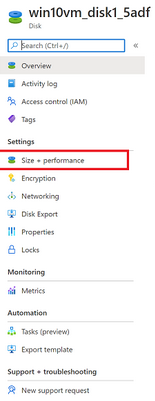
4.In the left menu under Settings, select Size + performance.
5.In Size + performance, select the disk size you want to resize and click Save.
Deploying Ivanti Connect Secure on Azure Cloud
Create a Resource Group
To create a Resource group, do the following:
1.Log into Azure portal.
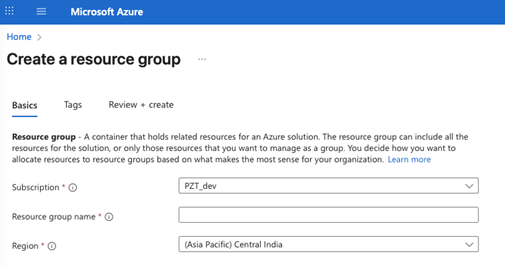
2.Navigate to Resource Groups. Enter unique resource group name.
3.Click Review + create to finalize and create resource group.
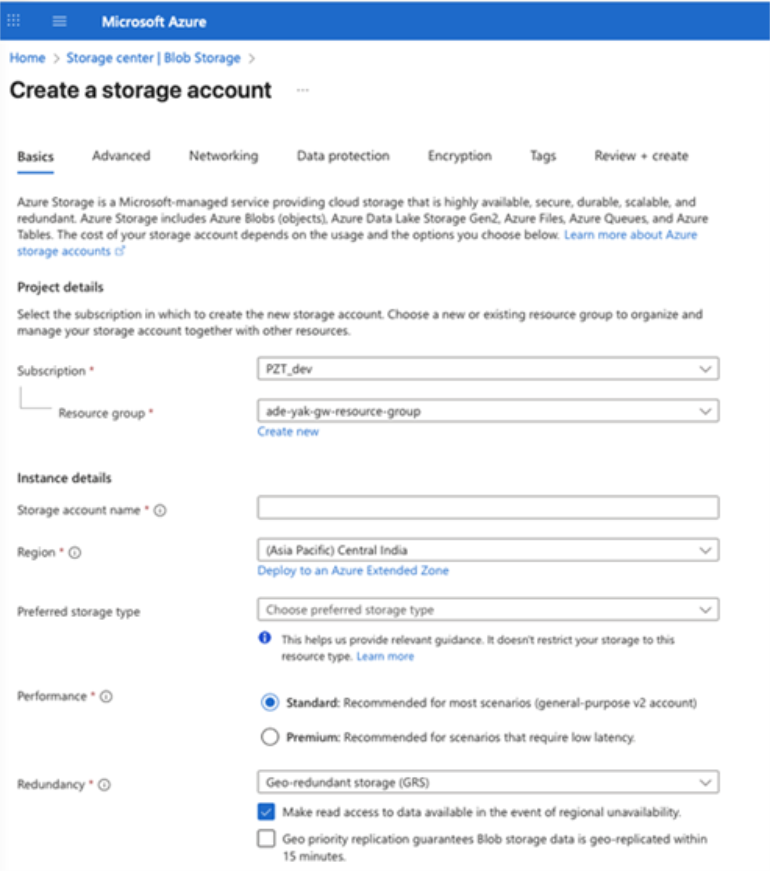
Create a Storage Account
To create a Storage Account, do the following:
1.Log in to the Azure portal.
2.Click New and create a Storage Account.
3.Choose the resource group you have already created.
4.Enter a unique name for the storage account name.
5.Click Review + create to create storage account.
Upload ICS Appliance Image to Storage Account
To upload Ivanti Connect Secure Virtual Appliance image to Stroage Account, do the following:
1.Download the Azure ICS image file (ics-azure-isa-v-<releaseno>-<buildno>-package.zip) which is in the zipped format.
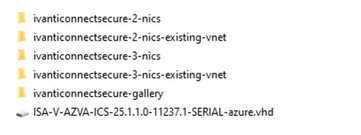
•The package contains the following components:
•ISA-V-AZVA-ICS-<releaseno>-<buildno>-SERIAL-azure.vhd: VHD disk image for Ivanti Connect Secure VA, to upload to Azure
•ivanticonnectsecure-gallery: Publish VHD as Shared Image Gallery image
•ivanticonnectsecure-2-nics: Deploy ICS with 2 NICs (new VNet)
•ivanticonnectsecure-2-nics-existing-vnet: Deploy ICS with 2 NICs (existing VNet)
•ivanticonnectsecure-3-nics: Deploy ICS with 3 NICs (new VNet)
•ivanticonnectsecure-3-nics-existing-vnet: Deploy ICS with 3 NICs (existing VNet)
•azuredeploy.json: ARM deployment templates
2.Unzip the file and look for the Ivanti Connect Secure Virtual Appliance vhd image.
3.Log in to the Azure portal.
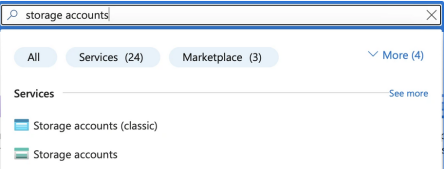
4.In the Azure portal, search for storage accounts and select the Storage Account you have created.
5.To upload ICS Virtual Appliance image. Select Storage browser in the left menu.
6.Click Blob containers and select your target container.
7.Click Upload at the top, browse for your file and hit the final Upload button and upload.
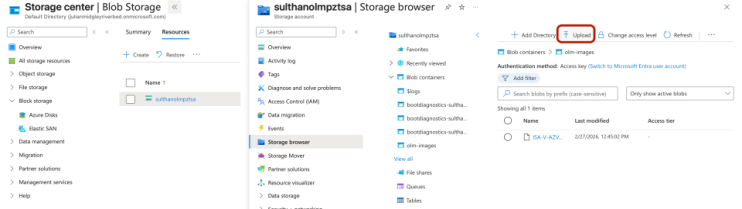
8.Inside your Storage Account, go to the left menu and click Storage browser under Data storage.
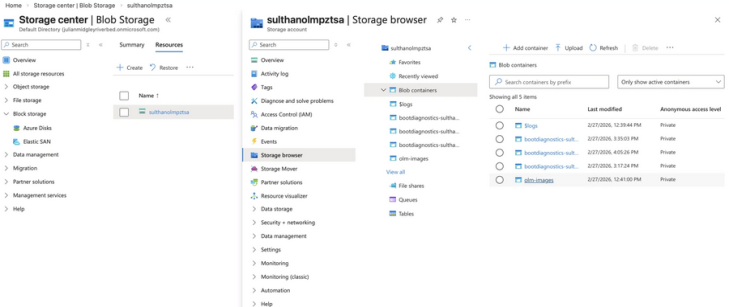
9.Under Blob containers, find and select your container (e.g., az-images) where the VHD file is uploaded.
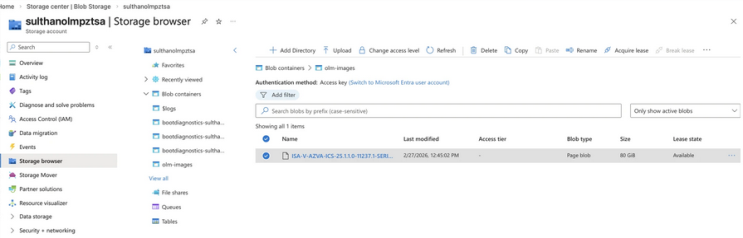
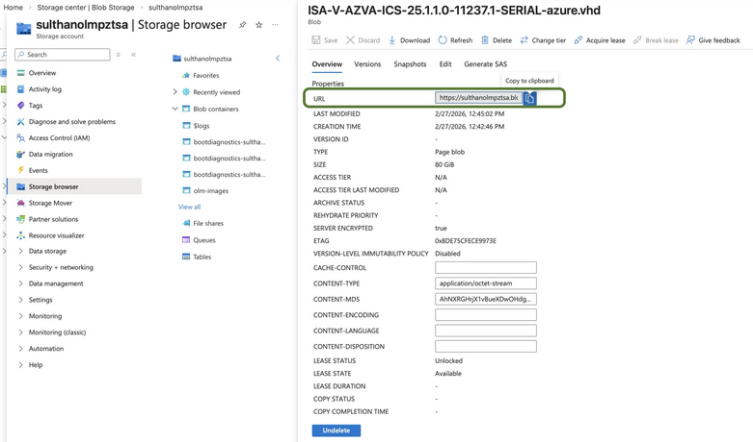
10.Inside the container, find your VHD file (e.g., ISA-V-AZVA-ICS-<releaseno>-<buildno>-SERIAL-azure.vhd). Click on the file to open its properties.
11.In the Overview or properties pane, look for the field named URL. Click the copy icon next to it.
The URL will be in this format: https://<name>.blob.core.windows.net/az-images/ISA-V-AZVA-ICS-<releaseno>-<buildno>-SERIAL-azure.vhd. This URL is need to deploy the Azure Gallery
Upload Azure Resource Manager Template to Gallery
1.Navigate to Custom Deployment.
2.Select Build your template in the editor.
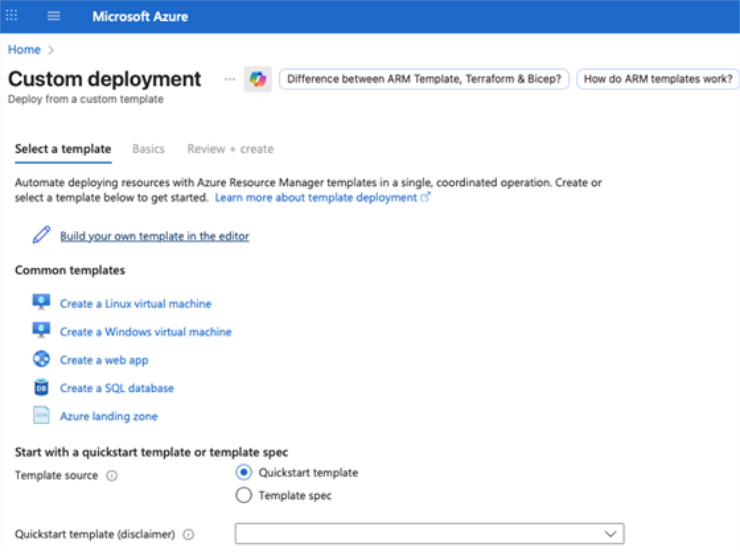
3.Locate the Azure Gallery deployment template file in folder (ivanticonnectsecure-gallery/azure-gallery-deploy.json).
4.Open this file and Copy its content and paste the into the designated field.
5.Click Save to apply the template.
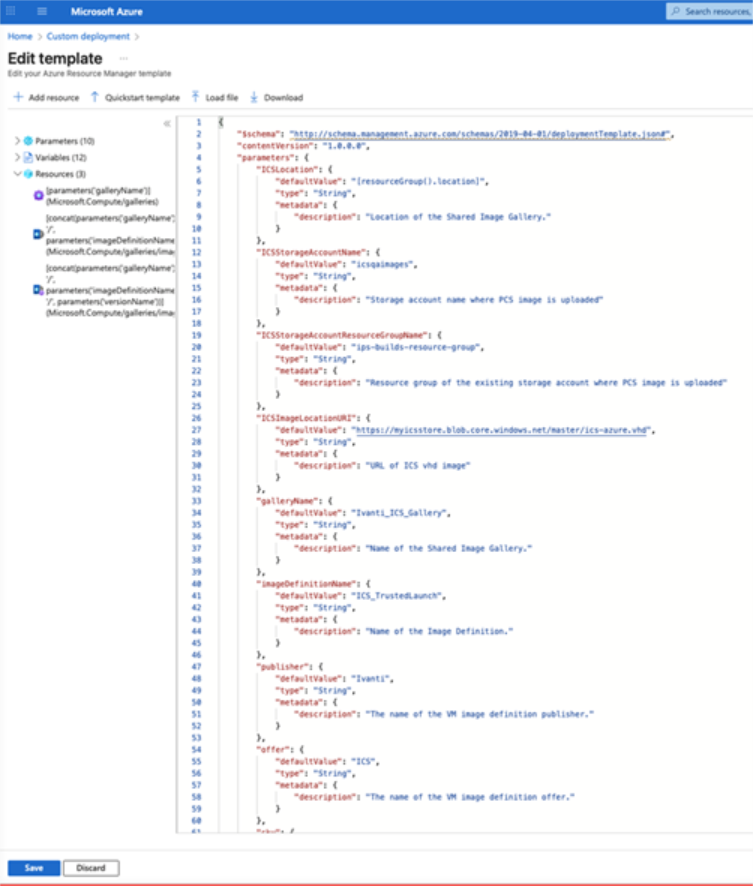
6.Fill or modify the following parameters:
•Region (mandatory): place
•ICS Location: Location of the Shared Image Gallery (Where Azrure Gallery image is deployed)
•Resource Group (mandatory): A resource group is a collection of resources that share the same lifecycle, permissions, and policies, where ICS is getting deployed
•ICS Storage Account Name: Storage account name where ICS image is uploaded
•ICS Storage Account Resource Group Name: Resource group of the existing storage account where ICS image is uploaded
•ICS Image Location URI: The is the URL to the location where ICS Azure vhd image is stored
•Gallery Name: The name of the Shared Image Gallery (this value is from Azure Gallery image)
•Image Definition Name: The name of the Image Definition (this value is from Azure Gallery image)
•Publisher: The name of the VM image definition publisher
•Offer: The name of the VM image definition offer
•SKU: The name of the VM image definition SKU
•Version Name: The VM image version name in semantic version pattern. The allowed characters are digit and period. For example: 0.0.1, 15.35.0. (this value is from Azure Gallery image)
Azure Gallery Naming Restrictions
|
Resource Type |
Allowed Characters |
Disallowed Characters |
Length |
Start/End |
Rule Example |
|---|---|---|---|---|---|
| Gallery Name | Letters (A-Z, a-z), digits (0-9), underscores (_), periods (.) | Dashes (-), spaces, other special characters | 1–80 chars | Cannot start/end with _ or . | Ivanti_ICS.Gallery |
| Image Definition | Letters, digits, underscores (_), periods (.), hyphens (-) | Name Spaces, other special characters | 1–80 chars | None | ICS-Trusted_Launch.25 |
| Image Version Name | Digits (0-9), periods (.) | Letters, hyphens, other characters | 1–80 chars | Must follow X.Y.Z format | 25.1.1 |
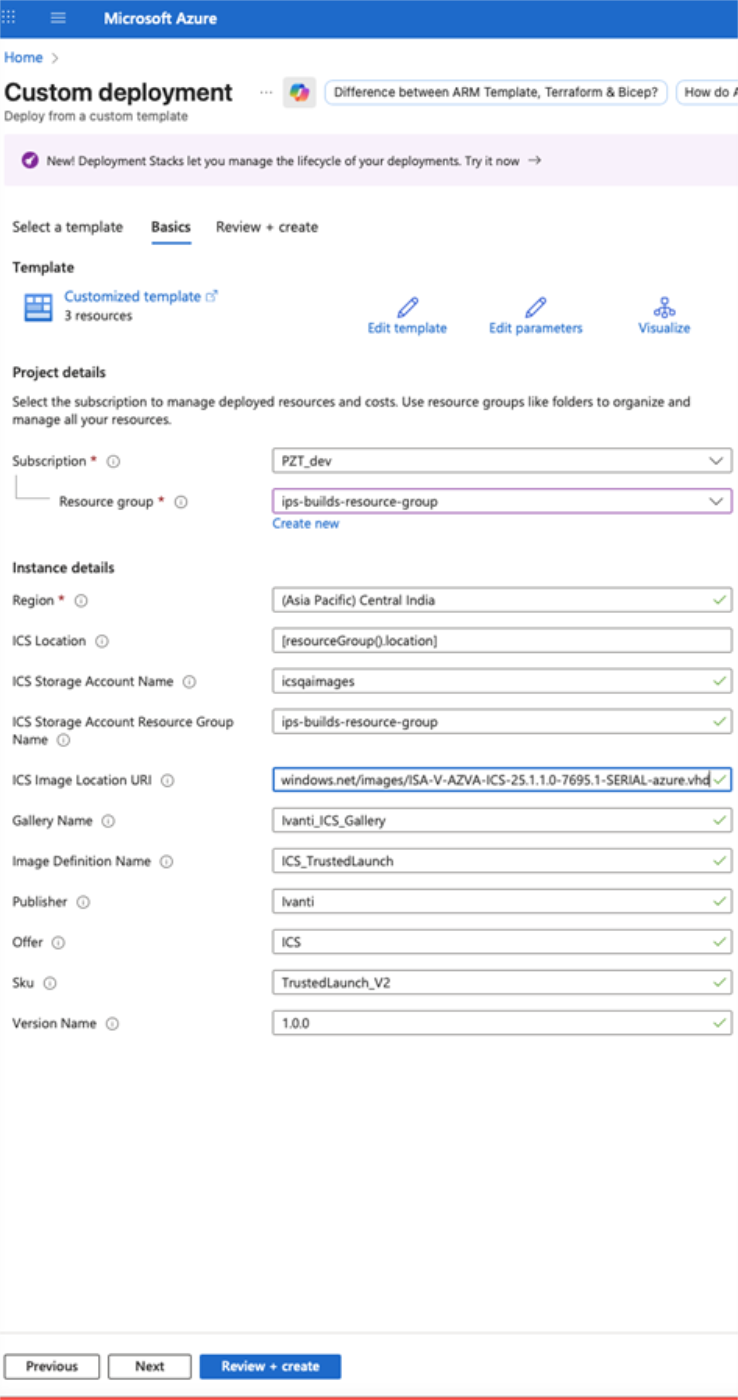
1.Click Review+ create to review your selections.
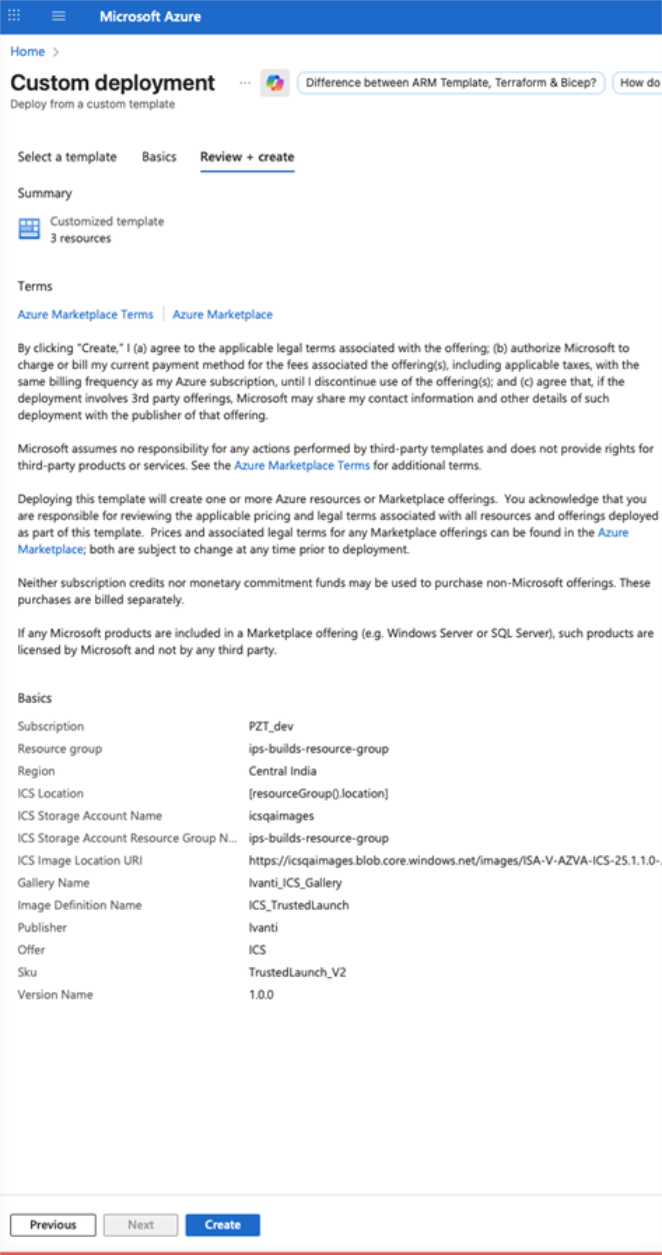
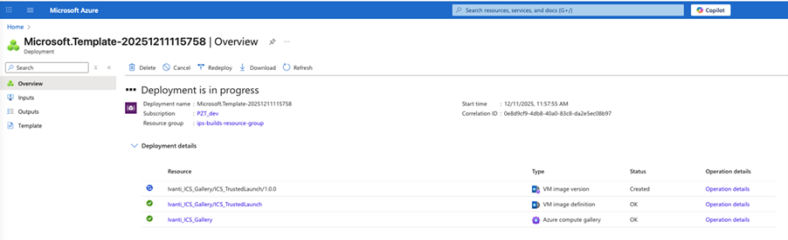
2.Click Create. Deployment will take 10 to 15 Minutes.
After a successful deployment, the Azure Gallery image for ICS will be ready for deploying the ICS virtual appliance.
ICS Virtual Machine Deployment
1.Navigate to Custom Deployment.
2.Select Build your own template in the editor.
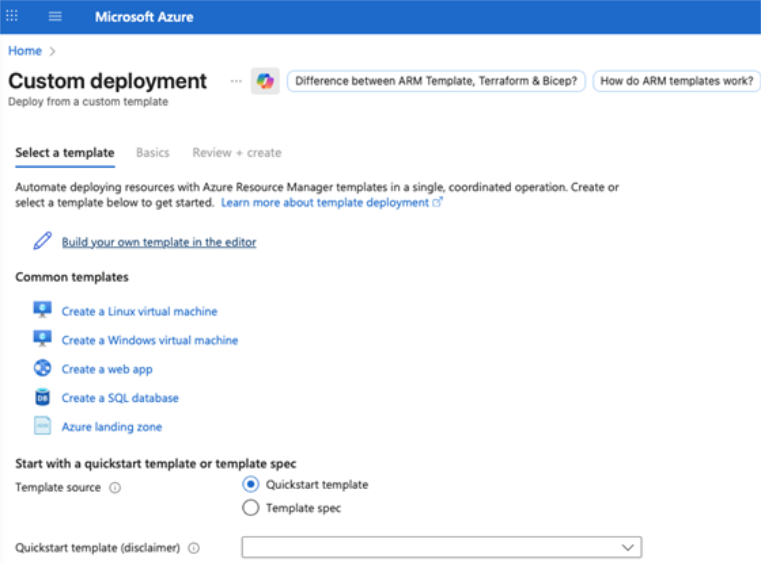
3.Download the Azure deployment template 2-NIC or 3-NIC from "Azure-template" folder (ivanticonnectsecure-3-nics/azuredeploy.json) to get azuredeploy.json.
25.1.1.0
ISA4000-V supports only 2-NIC deployment. ISA6000-V and ISA8000-V support 2-NIC and 3-NIC deployments.
|
Standard Model |
vCPU |
RAM(GiB) |
Disk Space |
NICs |
|---|---|---|---|---|
| ISA4000-V (Standard_D4s_v6) | 4 | 16 GB | 80 GB | 2 |
| ISA4000-V (Standard_D4ds_v6) | 4 | 16 GB | 80 GB | 2 |
| ISA6000-V (Standard_D8s_v6) | 8 | 32 GB | 80 GB | 3 |
|
ISA6000-V (Standard_D8ds_v6) |
8 | 32 GB | 80 GB | 3 |
|
ISA8000-V (Standard_D16ds_v6) |
16 |
64 GB |
80 GB |
3 |
|
ISA4000-V (Standard_F4as_v6) |
4 |
16 GB |
80 GB |
2 |
|
ISA6000-V (Standard_F8as_v6) |
8 | 32 GB | 80 GB | 3 |
|
ISA8000-V (Standard_F16as_v6) |
16 |
64 GB |
80 GB |
3 |
25.1.3.0
|
Standard Model |
vCPU |
RAM(GiB) |
Disk Space |
NICs |
|---|---|---|---|---|
| ISA4500-V (Standard_D4s_v6) | 4 | 16 GB | 80 GB | 2 |
| ISA4500-V (Standard_D4ds_v6) | 4 | 16 GB | 80 GB | 2 |
| ISA6500-V (Standard_D8s_v6) | 8 | 32 GB | 80 GB | 3 |
|
ISA6500-V (Standard_D8ds_v6) |
8 | 32 GB | 80 GB | 3 |
|
ISA8500-V (Standard_D16ds_v6) |
16 |
64 GB |
80 GB |
3 |
|
ISA4500-V (Standard_F4as_v6) |
4 |
16 GB |
80 GB |
2 |
|
ISA6500-V (Standard_F8as_v6) |
8 | 32 GB | 80 GB | 3 |
|
ISA8500-V (Standard_F16as_v6) |
16 |
64 GB |
80 GB |
3 |
1.Copy and paste the azuredeploy.json into the designated field.
2.Edit Virtual Machine Standards - variables section "variables": ["VirtualMachineSize": "Standard_D8ds_v6",]
3.Click Save to apply the template.
You can modify the following parameters in the VM Template to suit your requirements:
•Gallery name, Image Definition name, and Image Version number
•Network Details
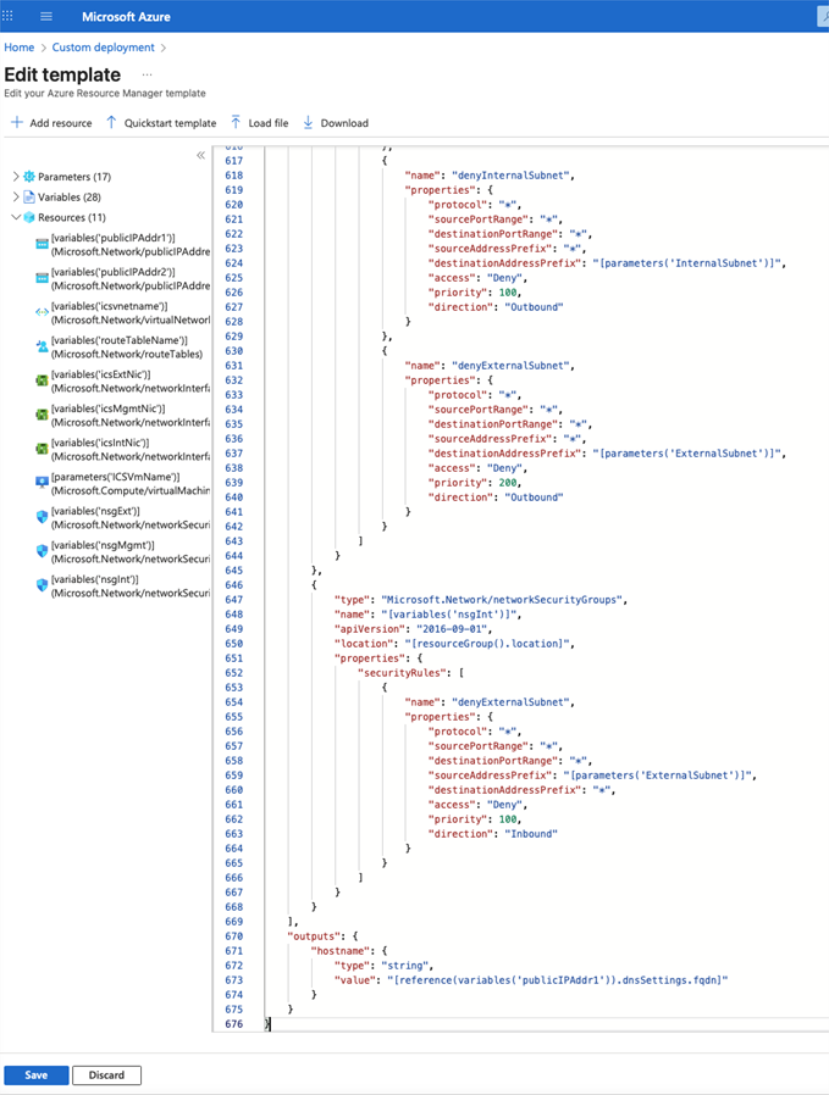
4.Fill or modify the following parameters:
•ICS Storage Account Name: Storage account name where ICS image is uploaded
•ICS Storage Account Resource Group Name: Resource group of the existing storage account where ICS image is uploaded
•Gallery Name: The name of the Shared Image Gallery (This value is from Azure gallery image created)
•Image Definition Name: The name of the Image Definition (This value is from Azure gallery image created)
•Version Name: The VM image version name in semantic version pattern. The allowed characters are digit and period. For example: 0.0.1, 15.35.0 (This value is from Azure gallery image created)
•ICS VM Name: This is the name given to ICS Virtual Appliance.
•ICS Admin User: Ivanti Connect Secure Admin User, value must be 2-30 characters long.
•ICS Admin Password: Ivanti Connect Secure Admin Password, value must be 12-128 characters long and no special characters.
•SSH Public Key: This is an RSA public key that is used to access Ivanti Connect Secure via SSH.
•ICS Config: This section contains provisioning parameters that are required during the deployment of a Virtual Appliance. An XML-based configuration file can be present in another Virtual Machine in Azure cloud or in the corporate network which is accessible for Ivanti Connect Secure through site-to-site VPN between Azure and the corporate data center.
•Key pair name: The new ssh key pair name.
•DNS Label Prefix Ext: This is the prefix for External Interface DNS label.
•DNS Label Prefix Mgmt: This is the prefix for Management Interface DNS label.
In case of two NIC deployment, the management port would not be auto-populated and admin has to provide details for internal port manually.
•VNet Address Space: This is a Virtual Network address space
•Internal Subnet: Subnet from which Ivanti Connect Secure Internal Interface needs to lease IP.
•External Subnet: Subnet from which Ivanti Connect Secure External Interface needs to lease IP.
•Management Subnet: Subnet from which Ivanti Connect Secure Management Interface needs to lease IP.
•Tunnel Subnet: Subnet which will be configured as Tunnel IP pool in Ivanti Connect Secure VPN profile.
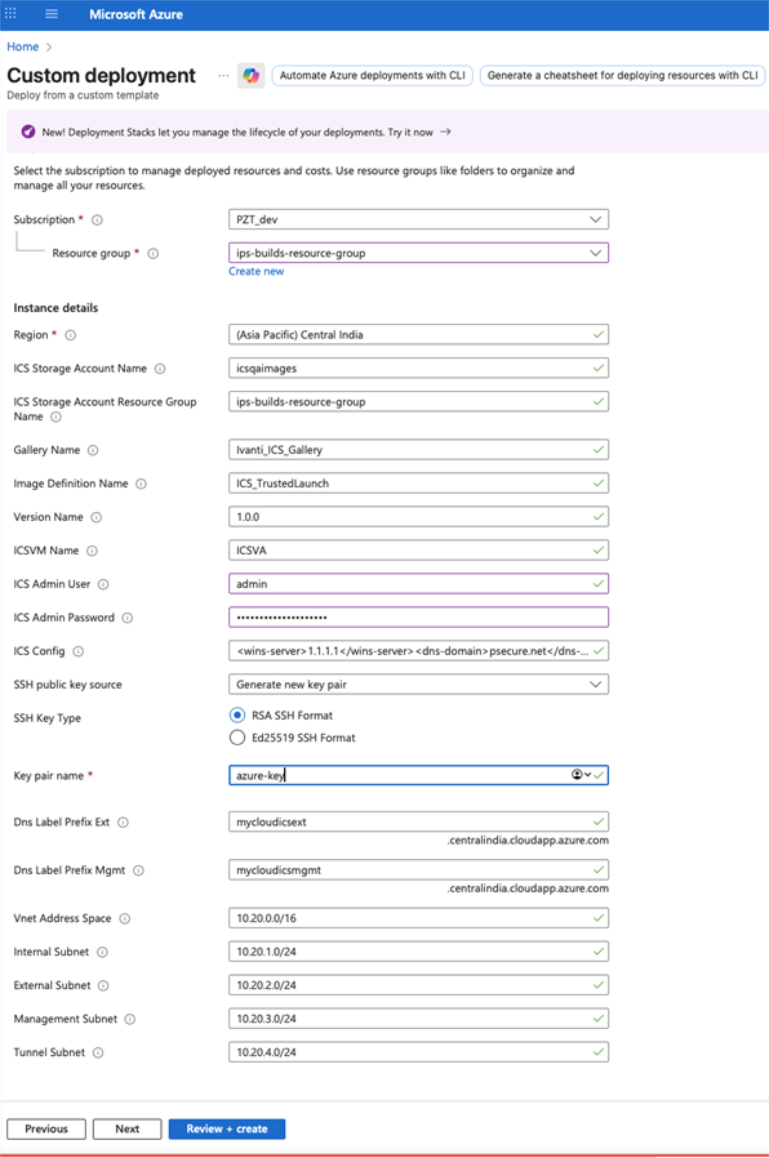
5.Click Review + create to review your selections.
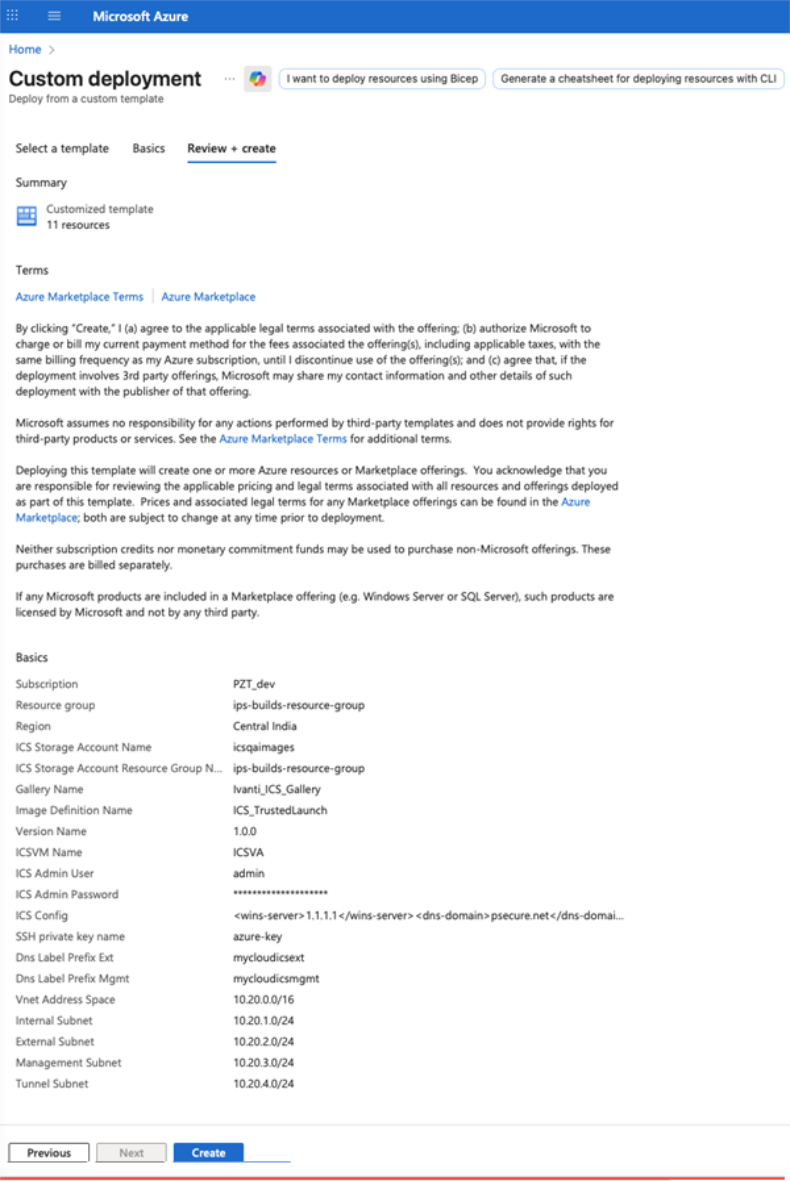
6.Click Create. A prompt will appear for generating new key pairs
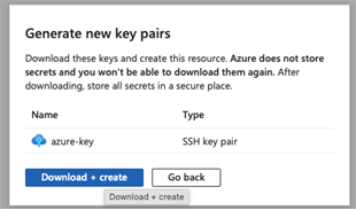
7.Click "Download + Create" to download the PEM key and begin deploying the virtual appliance (VA).
This action will create all required network resources, routes, and deploy the VA.
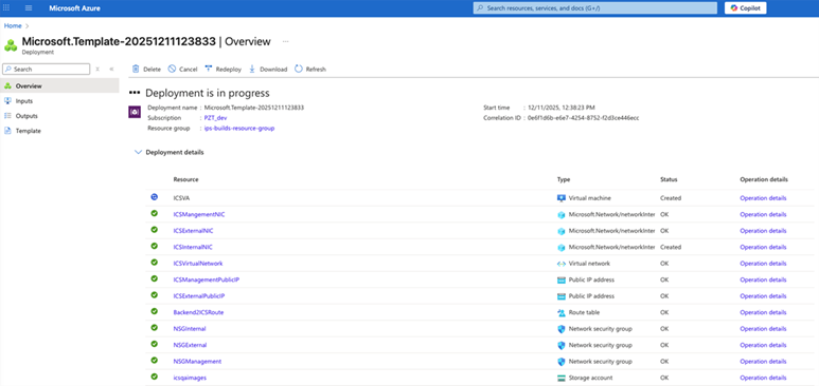
8. Once the virtual appliance (VA) status shows as "Created," the VA will appear in the list of Virtual Machines.
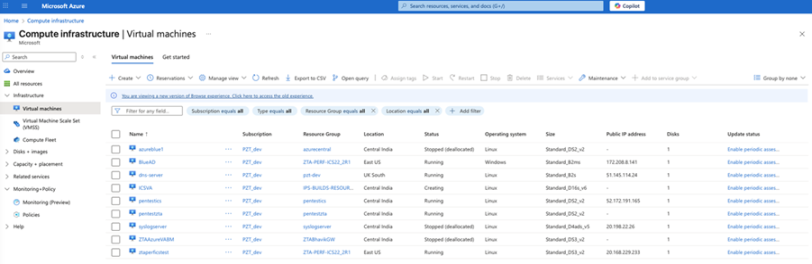
The new ICS virtual appliance will boot with the following features enabled:
•Secure Boot
•vTPM (virtual Trusted Platform Module)
•Disk controller type set to NVME