Deploying on Openstack
•Prerequisites and System Requirements
•Deploying ICS on OpenStack Using Horizon Dashboard
•vTPM and Secure Boot Support on OpenStack
Overview
Assumptions
The basic understanding of deployment models of ICS on a data center and basic experience in using OpenStack is needed for the better understanding of this guide.
Supported Platform Systems
This section helps you in choosing the instance types that should be deployed with Ivanti Connect Secure.
 25.1.1.0
•ISA4000-V
•ISA6000-V
•ISA8000-V
25.1.3.0
•ISA4500-V
•ISA6500-V
•ISA8500-V
For more details, see ISA VA Supported Platforms.
Prerequisites and System Requirements
The OpenStack Fabric has various components such as Controller, Compute, Identity, Image, Networking etc. that are separately installed. For details about these services,
To deploy the ICS VA on OpenStack, you need the following:
•Access to the OpenStack Dashboard
•An OpenStack account with deployment rights
•ICS KVM Image
•(Optional) ICS licenses
•(Optional) ICS configuration in xml format, required only for zero touch deployment
•Desired flavors of ISA-V. For details, see ISA VA Supported Platforms.
•Desired ICS KVM image on OpenStack
•Internal, External and Management networks on OpenStack
•Security Groups for Internal, External and Management Ports
•Compute nodes should support vTPM.
•Compute nodes should support secure boot for virtual machines.
•Compute nodes should have Ivanti released OVMF firmware binary (OVMF_CODE.secboot.ivanti.fd) and NVRAM file (OVMF_VARS_4M.ivanti.fd) for secure boot.
Deploying ICS on OpenStack Using Horizon Dashboard
Before proceeding with the ICS deployment, ensure that the necessary prerequisites are set up. For details, see Appendix A: Setting Up Prerequisites
To deploy ICS on OpenStack, do the following:
1.Log in to the OpenStack.
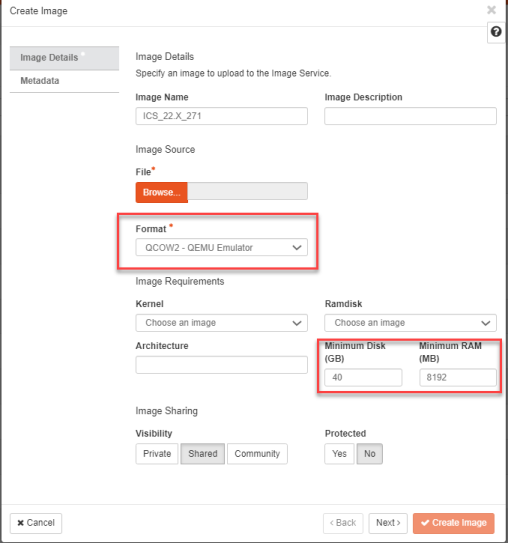
2.In the OpenStack dashboard displayed, select Project > Compute > Imagesand then create an image. For more information, see Create Image.
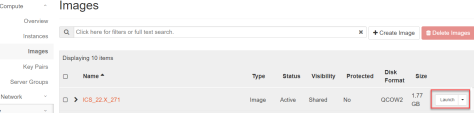
3.From the list of images displayed, click on Launch corresponding to the ICS KVM image you want to launch.
Image selected must have following attributes for secure boot and vTPM supported ICS image.
•hw_disk_bus='virtio'
•hw_firmware_type='uefi'
•hw_machine_type='q35'
•hw_tpm_model='tpm-crb'
•hw_tpm_version='2.0'
•os_secure_boot='required'
The following figure depicts the ICS VA Images screen:
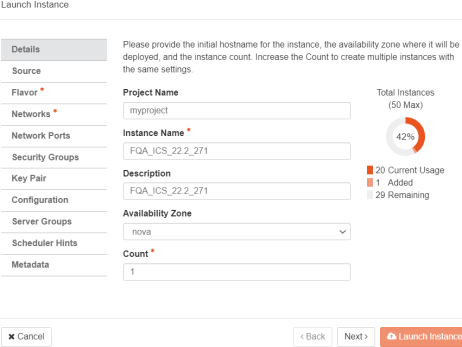
4.In the Launch Instance Details window, fill the following and then click Next.
•Instance Name: Specify host name of the ICS Virtual instance
•Description: Enter a brief description on this instance
•Availability Zone: Select the zone where the instance is deployed
•Count: Number of VM instances
The following figure depicts the Device Details screen:
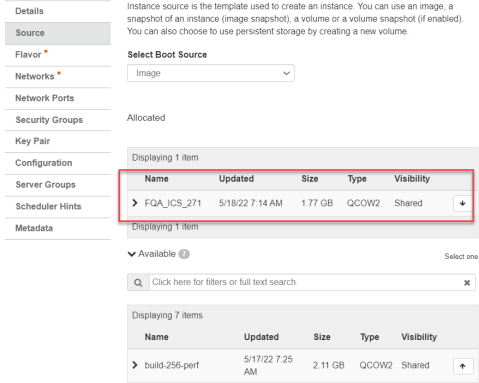
5.The Source window displays the details of the image used. Click Next.
The following figure depicts the Source Selection screen.
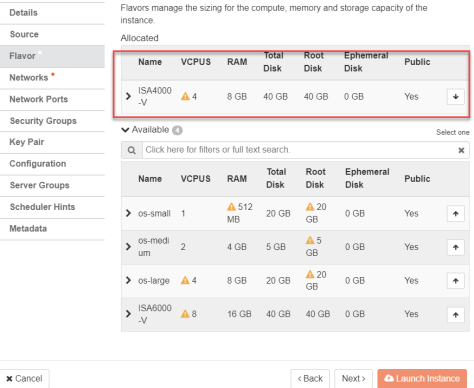
6.In the Flavor window, select required flavors of ISA-V from the list based on the memory and storage capacity of the instance. Click Next.
The following figure depicts a sample Flavor Selection screen.
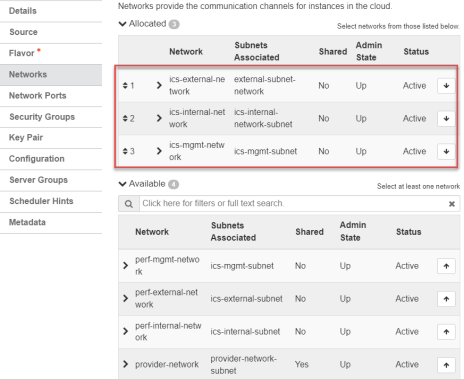
7.In the Networks window, select networks from the list that specifies internal, external and management subnets. ICS supports VM with 2-NICs model and 3-NICs model for deployment. Click Next.
The following figure depicts the Network Selection screen:
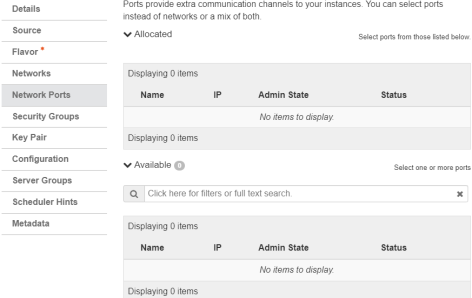
8.(Optional) Network Ports window. Click Next.
The following figure depicts the Network Ports Selection screen:
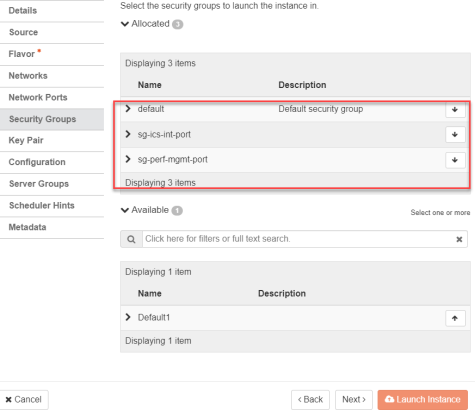
9.In the Security Groups window, select the required network security groups from the list for internal, external and management ports. Click Next. To create new security groups, refer Creating Required Security Groups for Internal, External and Management Ports
The following figure depicts the Security Groups Selection screen:
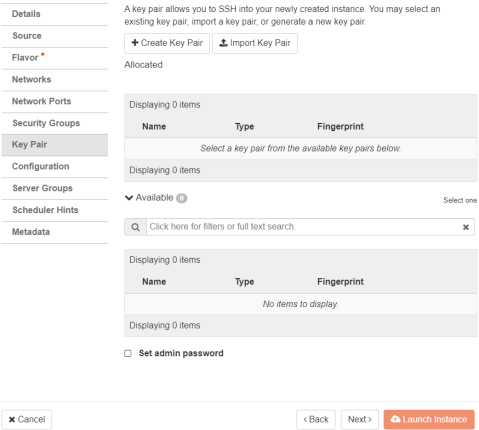
10.Key Pair is not used. Click Next.
The following figure depicts the Key Pair screen:
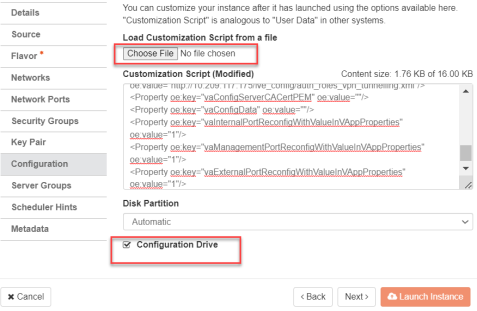
11.Click Choose File and import the file that contains the provisioning parameters in XML format OR paste the Customization script and do the required modifications. Select the Configuration Drive check box. The template file is available for ISA-V instance and click Launch Instance upon selecting the Configuration Drive option.
The following figure depicts the Configuration Script screen:
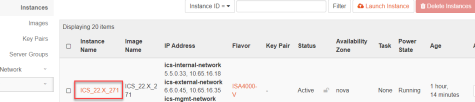
12.The Instances window lists all the ICS VA instances. The blue bar in the Task column shows the status of creation of the instance. This will take a few minutes.
Open the created ICS VA instance by clicking on the Instance Name link.
The Interface tab shows the networks that are created.

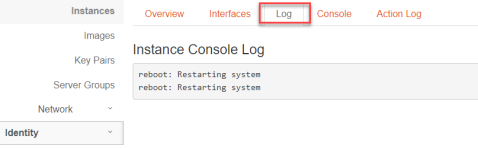
The Log tab shows the log details of the device that is created.
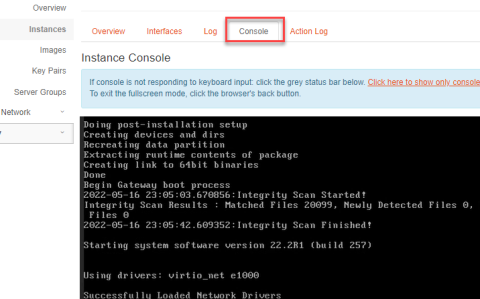
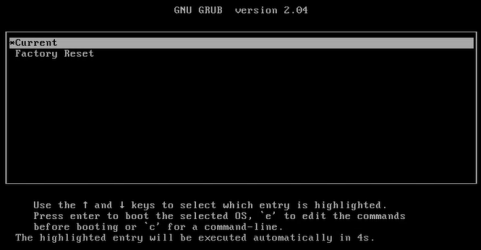
The console tab provides the virtual console to view the device coming up.
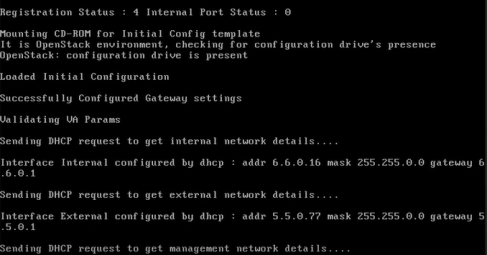
13.Next, the Internal and External interfaces are configured by DHCP (Zero touch configuration).
The following figure depicts the Internal and External Interfaces Configuration by DHCP screen:
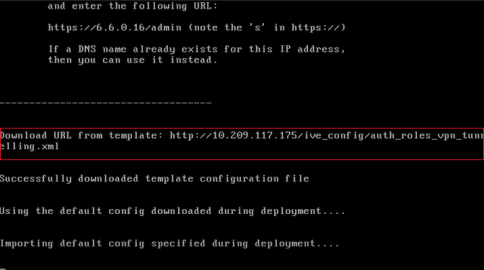
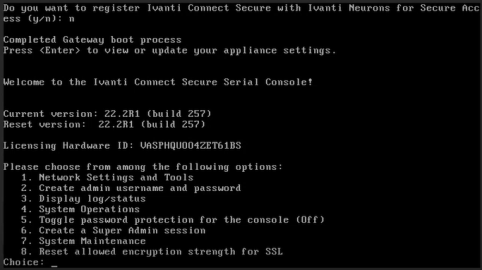
14.The Config URL is downloaded for initial configuration.
The following figure depicts the Download Config URL from Template screen:
ICS Provisioning Parameters
Provisioning parameters are those parameters which are required during the deployment of a virtual appliance. ICS accepts the following parameters as provisioning parameters in the XML format.
|
<PropertySection> <Property oe:key="vaIPAddress" oe:value=""/> <Property oe:key="vaNetmask" oe:value=""/> <Property oe:key="vaGateway" oe:value=""/> <Property oe:key="vaDefaultVlan" oe:value=""/> <Property oe:key="vaExternalIPAddress" oe:value=""/> <Property oe:key="vaExternalNetmask" oe:value=""/> <Property oe:key="vaExternalGateway" oe:value=""/> <Property oe:key="vaExternalDefaultVlan" oe:value=""/> <Property oe:key="vaManagementIPAddress" oe:value=""/> <Property oe:key="vaManagementNetmask" oe:value=""/> <Property oe:key="vaManagementGateway" oe:value=""/> <Property oe:key="vaManagementDefaultVlan" oe:value=""/> <Property oe:key="vaPrimaryDNS" oe:value=""/> <Property oe:key="vaSecondaryDNS" oe:value=""/> <Property oe:key="vaWINSServer" oe:value="1.2.3.4"/> <Property oe:key="vaDNSDomain" oe:value="ics.company.com"/> <Property oe:key="vaAdminUsername" oe:value="admindb"/> <Property oe:key="vaAdminPassword" oe:value="Password123$"/> <Property oe:key="vaCommonName" oe:value="ics-ext-port.company.com"/> <Property oe:key="vaOrganization" oe:value="Ivanti"/> <Property oe:key="vaRandomText" oe:value="randomtextrandomtextrandomtextrandomtext"/> <Property oe:key="vaAcceptLicenseAgreement" oe:value="y"/> <Property oe:key="vaEnableLicenseServer" oe:value="n"/> <Property oe:key="vaAdminEnableREST" oe:value=""/> <Property oe:key="vaAuthCodeLicense" oe:value=""/> <Property oe:key="vaConfigURL" oe:value="http://a.b.c.d/ics_config.xml"/> <Property oe:key="vaConfigServerCACertPEM" oe:value=""/> <Property oe:key="vaConfigData" oe:value=""/> <Property oe:key="vaInternalPortReconfigWithValueInVAppProperties" oe:value="1"/> <Property oe:key="vaManagementPortReconfigWithValueInVAppProperties" oe:value="1"/> <Property oe:key="vaExternalPortReconfigWithValueInVAppProperties" oe:value="1"/> </PropertySection> |
|
Parameter Name |
Type |
Description |
|---|---|---|
|
vaIPAddress |
IP address |
Internal interface IP |
|
vaNetmask |
IP address |
Internal interface subnet mask |
|
vaGateway |
IP address |
Internal interface IP gateway |
|
vaDefaultVlan |
integer |
VLAN number to assign to this interface |
|
vaExternalIPAddress |
IP address |
External interface IP |
|
vaExternalNetmask |
IP address |
External interface subnet mask |
|
vaExternalGateway |
IP address |
External interface IP gateway |
|
vaExternalDefaultVlan |
Integer |
VLAN number to assign to this interface. |
|
vaManagementIPAddress |
IP address |
Management interface IP |
|
vaManagementNetmask |
IP address |
Management interface subnet mask |
|
vaManagementGateway |
IP address |
Management interface IP gateway |
|
vaManagementDefaultVlan |
Integer |
VLAN number to assign to this interface |
|
vaPrimaryDNS |
IP address |
Primary DNS IP |
|
vaSecondaryDNS |
IP address |
Secondary DNS IP |
|
vaWINSServer |
IP address |
Windows server IP |
|
vaDNSDomain |
string |
Windows domain name |
|
VaAdminUsername |
string |
Admin username |
|
vaAdminPassword |
string |
Admin password |
|
vaCommonName |
string |
Common name |
|
vaOrganization |
string |
Organization name |
|
vaRandomText |
string |
Random text to generate self-signed certificate |
|
vaAcceptLicenseAgreement |
character |
“y” to accept the license agreement |
|
vaEnableLicenseServer |
character |
“y” to enable it as VLS server. “n” to bring it up as a ICS node. |
|
vaAdminEnableREST |
character |
“y” to enable REST for administrator user |
|
vaAuthCodeLicense |
string |
Authentication code that needs to be obtained from Ivanti. |
|
vaConfigURL |
String URL |
Http based URL where XML based ICS configuration can be found. |
|
vaConfigServerCACertPEM |
string |
PEM format of CA certificate. |
|
vaConfigData |
string |
base64 encoded XML based ICS configuration. |
|
vaInternalPortReconfigWithValueIn |
integer |
The Internal port overwrite property. If set to 1, overwrite the virtual appliance’s internal port settings with the ones specified during deployment. Set this value as 1. |
|
vaManagementPortReconfigWithValueIn |
integer |
The Management port overwrite property. If set to 1, overwrite the management port-related parameters in the ICS with the ones defined here. Set this value as 1. |
|
vaExternalPortReconfigWithValueIn |
integer |
The External port overwrite property. If set to 1, overwrite the external port-related parameters in ICS/IPS with the ones defined here. Set this value as 1. |
IICS supports zero touch provisioning. This feature can detect and assign DHCP networking settings automatically at the ICS boot up. The following ICS parameters should be set to null in order to fetch the networking configuration automatically from the DHCP server.
|
•vaIPAddress |
•vaExternalIPAddress |
•vaManagementIPAddress |
|
•vaNetmask |
•vaExternalNetmask |
•vaManagementNetmask |
|
•vaGateway |
•vaExternalGateway |
•vaManagementGateway |
|
•vaPrimaryDNS |
•vaSecondaryDNS |
•vaDNSDomain |
Leased IP from DHCP server should be valid for a long time as ICS does not request for DHCP renewals.
vTPM and Secure Boot Support on OpenStack
This section provides guidance on enabling virtual Trusted Platform Module (vTPM) and Secure Boot features for Ivanti Connect Secure virtual appliances deployed on OpenStack. Implementing vTPM and Secure Boot improves data protection by supporting encrypted secrets and secure firmware validation.
vTPM Overview
This section describes the process and prerequisites for enabling vTPM (virtual Trusted Platform Module) and Secure Boot for Ivanti Connect Secure virtual appliances on OpenStack. Enabling these security features ensures that sensitive data such as encryption keys are stored securely and validates the integrity of the virtual appliance firmware during boot. The guidance provided here will help you configure a compliant and robust OpenStack environment for secure ICS deployments.
Enabling vTPM
To enable vTPM (virtual Trusted Platform Module) support on OpenStack for Ivanti Connect Secure virtual appliances, ensure the following requirements and steps are met on each compute host:
Prerequisites:
•An OpenStack key manager service, such as Barbican, must be deployed and configured on the controller node. This service is required to store the secrets used for encrypting virtual device files at rest.
•The user deploying the ICS virtual appliance must have the creator role in the corresponding OpenStack project to allow Barbican to create ICS secrets.
•The swtpm binary and associated libraries must be installed on each compute node
•/etc/nova/nova-compute.conf should have following configuration to support virtual TPM.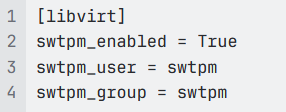
•Set the  config option to 'True' in
 of compute node. This will enable support for both TPM version 1.2 and 2.0.
With the above requirements satisfied, verify vTPM support by inspecting the traits on the compute node’s resource provider:
Enabling Secure Boot
To enable UEFI secure boot on OpenStack, follow steps as per OpenStack documentation.
You can verify UEFI Secure Boot support by inspecting the traits on the compute node’s resource provider:
In order to boot Ivanti virtual ICS in secure boot mode, perform following steps.
1.Extract Ivanti released OVMF firmware and VARS file from KVM ZIP artifact.
2.Ivanti released OVMF firmware and VARS file needs to be copied to /usr/share/OVMF directory of compute nodes.
Ivanti released VARS file has secure boot certificate required to boot virtual ICS in secure boot mode.
3.Copy 40-edk2-x86_64-secure-enrolled.json to 10-edk2-x86_64-secure-enrolled.json and modify 10-edk2-x86_64-secure-enrolled.json file in /usr/share/qemu/firmware directory to use Ivanti’s secure boot OVMF files.
b. Following contents need to be changed to use Ivanti’s released OVMF files.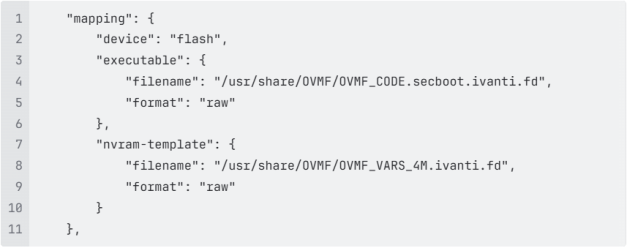
4.Restart libvirtd and nova-compute on compute nodes
Setting Virtual ICS Image Attributes
Following attributes need to be set to enable secure boot for virtual ICS.
1.Select virtual ICS image.
2.Edit image.
3.Select Metadata section.
4.Update following attributes.
•hw_disk_bus='virtio'
•hw_firmware_type='uefi'
•hw_machine_type='q35'
•hw_tpm_model='tpm-crb'
•hw_tpm_version='2.0'
•os_secure_boot='required'
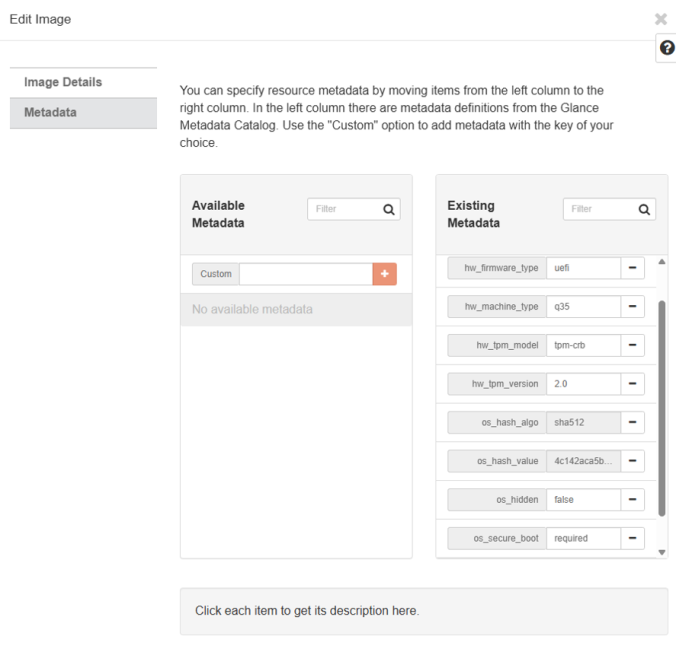
If above listed attributes are enabled then virtual ICS will boot with secure boot enabled and vTPM attached.
Limitations
1.Snapshot and Restore functionality does not work in OpenStack for ICS with vTPM.
a. Source
b. Spawning from an image created by snapshotting a VM with a vTPM will result in a fresh, empty vTPM
2.Operations like “hard reboot” or “shut off/start” may fail to start ICS with vTPM. Refer Bug link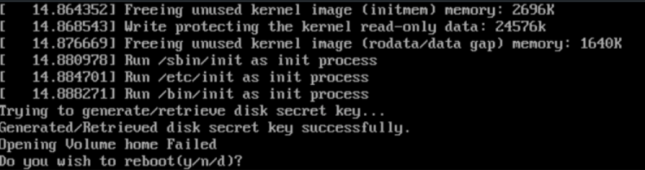
a. Above error may be seen.
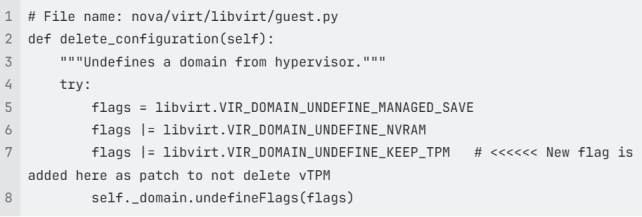
b. OpenStack fix link is needed to solve this issue.
c. Alternately, following workaround can be added in your OpenStack environment.