Deploying Ivanti Policy Secure on Azure using Azure CLI
Before proceeding with the deployment, refer Upload Ivanti Policy Secure Virtual Appliance Image to Azure Web Portal.
-
Download and Install Azure CLI from https://azure.github.io/projects/clis.
-
Visit https://www.ivanti.com and download the ps-pps-azure-psa-v-<releaseno>-<buildno>-package.zip file.
-
Unzip the file and look for the pulsesecure-pps-3-nics.zip file. Unzip the file to get azuredeploy.json
-
Ensure that parameters section has correct default values:
- PPS Storage Account Name: Storage account name where the Ivanti Policy Secure Virtual Appliance image is available
- PPS Storage Account Resource Group: Resource group where the Ivanti Policy Secure Virtual Appliance image is copied
- PPS Image Location URI: URI to the Ivanti Policy Secure Virtual Appliance Image
- PPS VM Name: Name of the Ivanti Policy Secure Virtual instance
- PPS Config: Provisioning parameters in an XML format. Refer “Ivanti Policy Secure Provisioning Parameters”
- DNS Label Prefix Mgmt: Prefix for the management interface DNS label
- Vnet Address Space: Virtual network address space
- Internal Subnet: Subnet from which the Ivanti Policy Secure internal interface needs to lease IP
-
To deploy Ivanti Policy Secure using Azure CLI, run the following commands
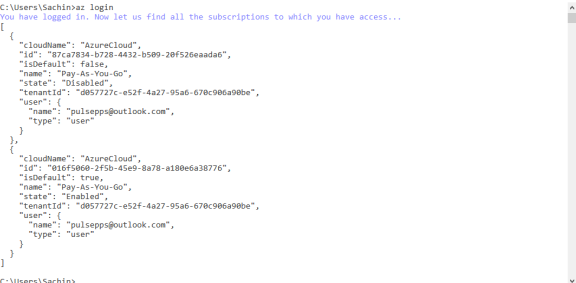
$ az login
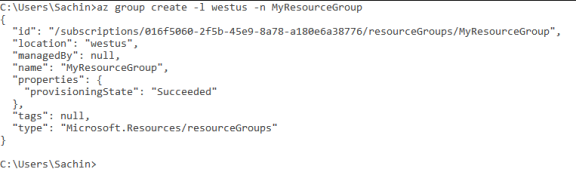
$ az group create -l <location> -n <resource group name>
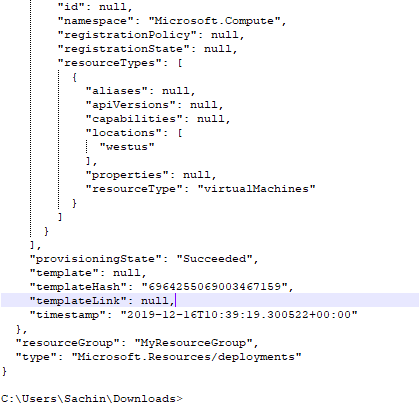
$ az group deployment create -g <resource group name> --template-file <json file name>
For example: C:\Users\xyz>az login
C:\Users\xyz>az group create -l westus -n MyResourceGroup
C:\Users\xyz\Downloads>az group deployment create -g MyResourceGroup --template-file forcli.json