Creating and Registering a PCS Appliance VM on vSphere
You can create and register a PCS appliance as a vSphere Virtual Machine from Pulse One directly. This process will create the VM appliance and perform all required registration activities on the appliance automatically.
- You can also create and register a virtual PCS appliance for AWS, see Creating and Registering a PCS Appliance VM on AWS.
- This process requires sufficient appliance licensing capacity on Pulse One.
- Before beginning this process, ensure that your vSphere host is synced to an NTP server. Failure to do this may result in certificate verification issues that cause auto-registration of any resulting PCS appliance to fail. Refer to the VMware vSphere documentation for details of this operation.
- During this process, you can optionally use a master appliance template. A master template encapsulates an existing deployed appliance, and enables the re-use of many configuration settings on any appliance that is deployed using the template. To create a master template, see Creating an Appliance Master Template on vSphere.
To create and register a PCS appliance as a VM on vSphere:
1.Log into Pulse One as an administrator.
2.Click the Appliances menu and then the Appliances tab.
The Appliances tab displays all current appliances.
3.Click Add Appliance.
The Add Appliance wizard starts.
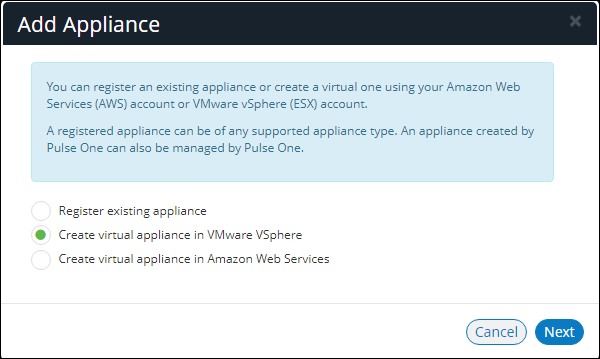
4.Select Create virtual appliance in VMware vSphere and click Next.
The vSphere Credentials panel of the wizard appears.

5.You must then specify vCenter credentials. Either:
•Select Add New for Account, then:
•For Account, select Add New.
•For Hostname, enter the FQDN or IP address of your vCenter host.
•For Username and Password, enter your vSphere credentials.
•Select an existing vCenter Account.
6.Click Next.
The Appliance Configuration panel of the wizard appears.
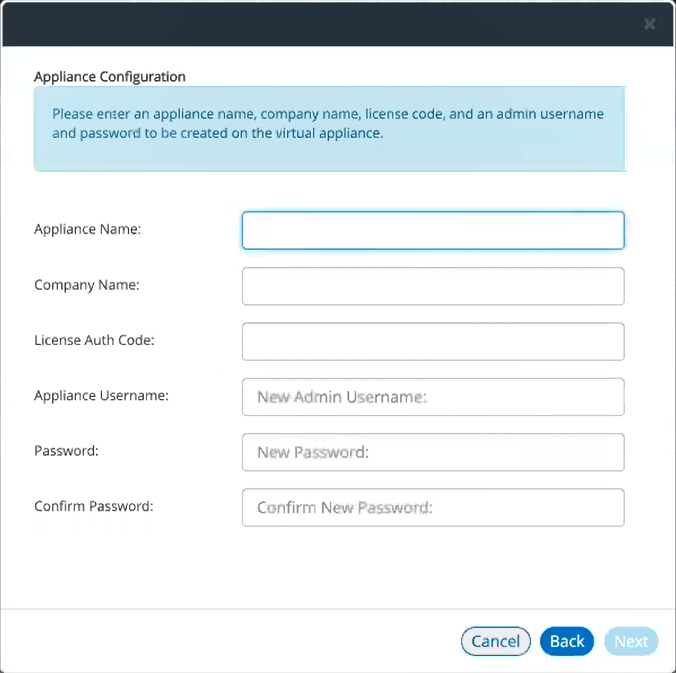
7.Enter the Appliance Name. This will be the displayed name in the list of appliances and will also be used to automatically populate the Internal FQDN and External FQDN properties on subsequent wizard panels.
8.Specify additional information for the appliance:
•A Company Name.
•The Appliance Username, Password (and Confirm Password) for a required user on the appliance. This user will be created after the appliance is created.
•(Optional) A License Auth Code can be entered if required.
9.Click Next.
The Appliance Network Configuration panel of the wizard appears.

10.Specify the Primary DNS and the Secondary DNS for your network.
The displayed values are examples, and not defaults.
11.Expand the Internal Network Settings panel.
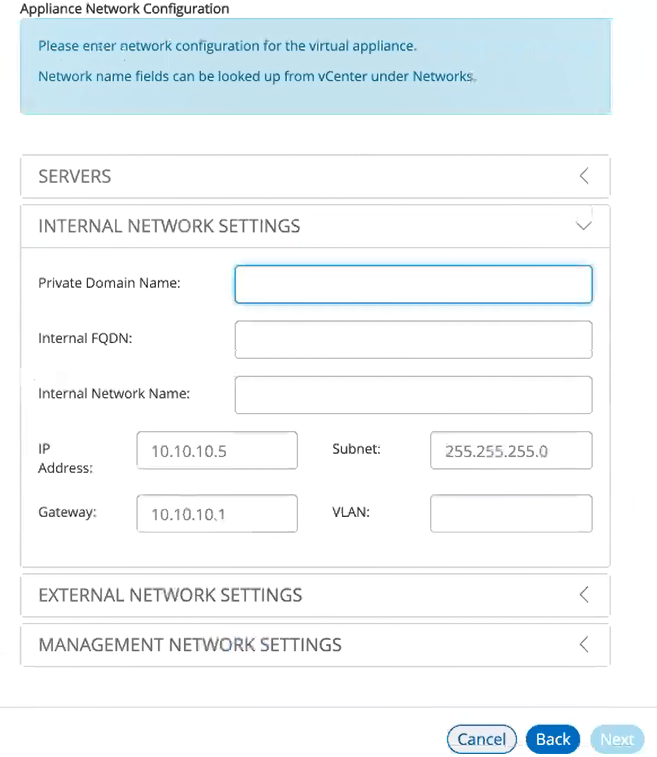
12.In the Internal Network Settings:
•For Private Domain Name, enter the internal domain name for your appliance.
When you shift focus away from this property, the Private Domain Name setting is displayed as a suffix to Internal FQDN.
•The Internal FQDN property is populated automatically using the Appliance Name you specified in the Appliance Configuration wizard panel, with the Private Domain Name used as a suffix. Change the Internal FQDN as required.
•For Internal Network Name, enter a name for the vSphere network. For example, VM Network.
•For IP Address, enter the required internal IP address of the appliance.
•For Subnet and Gateway, enter the required subnet mask and gateway IP address.
•(Optional) For VLAN, enter your numeric VLAN identifier.
13.Expand the External Network Settings panel.

14.In the External Network Settings:
•For Public Domain Name, enter the external (Internet) domain name for your appliance.
When you shift focus away from this property, the Public Domain Name setting is displayed as a suffix to External FQDN.
•The External FQDN property is populated automatically using the Appliance Name you specified in the Appliance Configuration wizard panel, with the Public Domain Name used as a suffix. Change the External FQDN as required.
•For External Network Name, enter a name for the vSphere network. For example, VM Network.
•For IP Address, enter the required external IP address of the appliance.
•For Subnet and Gateway, enter the required subnet mask and gateway IP address.
•(Optional) For VLAN, enter the numeric value you used for the Internal Network Settings panel.
15.Expand the Management Network Settings panel.
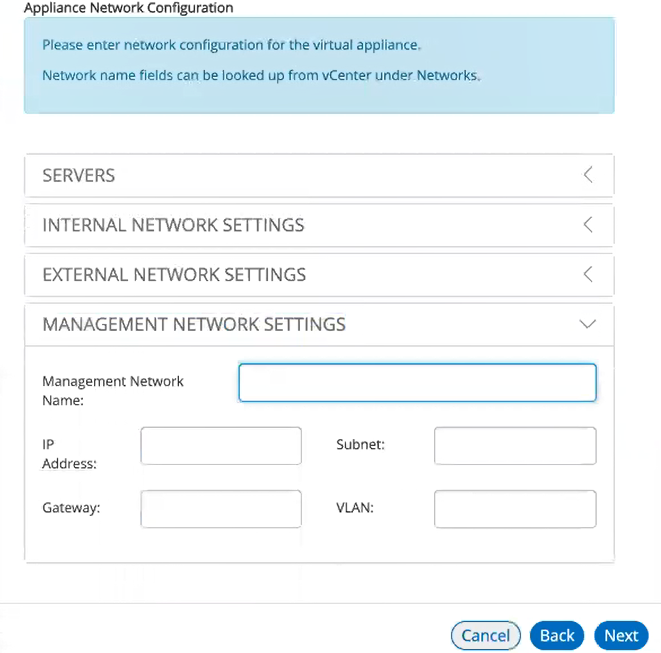
16.In the Management Network Settings:
•For Management Network Name, enter a name for the vSphere network. For example, VM Network.
•For IP Address, enter the required management IP address of the appliance.
•For Subnet and Gateway, enter the required subnet mask and gateway IP address.
•(Optional) For VLAN, enter the numeric value you used for the External Network Settings panel.
17.Click Next.
The vSphere Configuration wizard panel appears.

18.Complete the properties for this panel of the wizard:
•For Data Center, enter your required vSphere data center. Data centers are listed on the Storage tab on vSphere.
•For Data Store, enter the required vSphere data store from your selected data center. Data stores are listed under each data center on the Storage tab on vSphere.
•For Resource Pool, enter the required vSphere resource pool from your selected data center. Resource pools are listed under each data center on the Hosts and Clusters tab on vSphere.
•(Optional) Enter an Appliance Master Template. Templates are listed under the data center on the VMs and Templates tab on vSphere. For details of how to create an appliance master template, see Creating an Appliance Master Template on vSphere.
19.Click Save.
The wizard closes, and the new Unregistered vSphere appliance is added to the list of appliances.
20.Click the Actions icon for the appliance and select Start Appliance.
21.The status of the new appliance goes through a series of states until it successfully running.
•Unregistered
•Creating
•Starting
•Started
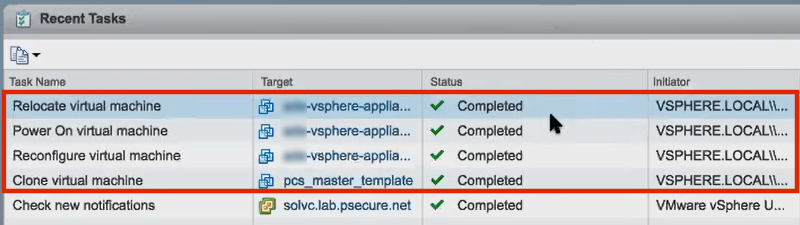
22.(Optional) During the creation of the appliance, you can monitor progress from the vSphere Recent Tasks tab.

23.Wait until vSphere allocates all IP addresses to the new appliance (see the vSphere Summary tab for a selected appliance).
The appliance is auto-registered. That is, you do not need to manually complete the registration of the appliance from the appliance GUI.
The creation and registration of the virtual PCS appliance on vSphere is now complete.
Creating an Appliance Master Template on vSphere
Pulse Connect Secure is delivered as a pair of OVF/VMDK template files for use on vSphere. You deploy these OVF template files in vSphere to create a virtual PCS appliance.
You can create a master appliance template which encapsulates the configuration for the appliance.
Appliances that are created from the master template will use the encapsulated configuration, and require less configuration after deployment.
To create a master appliance template:
1.Obtain the Pulse Connect Secure template files from Pulse Secure Support and store the files in an accessible location in your network.
2.Log into the vSphere Web Client.
3.Right-click and an existing host and click Deploy OVF Template. For example:

The Deploy OVF Template wizard appears.
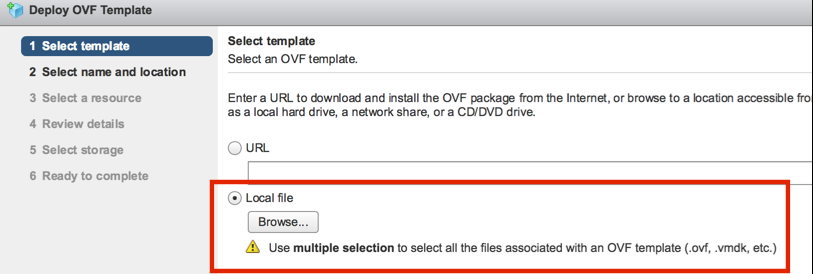
4.Select the Local file option and click Browse.
5.Locate and multi-select the OVF and VMDK template files. For example:

6.Click Next to proceed to the next panel of the wizard. For example:

7.Enter a Name and select a data center for the deployment.
In this example, the Name of the appliance is pcs_import.
8.Click Next to proceed to the next panel of the wizard. For example:
9.Click Next to proceed to the next panel of the wizard.
10.Review the displayed details and step back through the wizard to correct these if required.
11.Click Next to proceed to the next panel of the wizard. For example:
12.Click Next to proceed to the next panel of the wizard. For example:

13.Select appropriate network interfaces for each of the PCS interfaces.
14.Click Next to proceed to the next panel of the wizard.

15.Make no changes to this wizard page.
16.Click Next to proceed to the final panel of the wizard.
17.Review the displayed details and step back through the wizard to correct these if required.
18.Click Finish to complete the wizard and deploy the appliance.
After the appliance is deployed, it appears in the main page of the vSphere Web Client. For example:
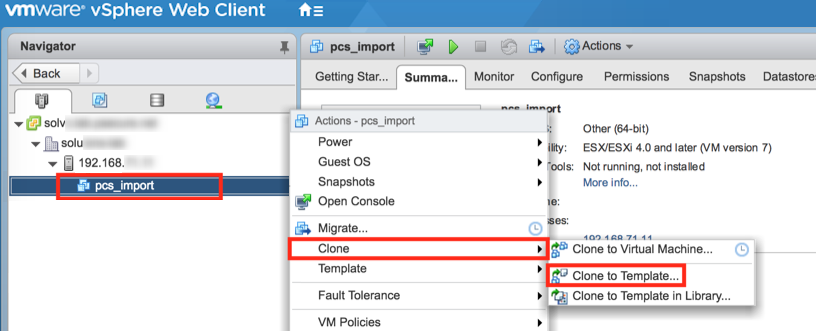
19.Right-click on the appliance and then click Clone > Clone to Template.
The Clone Virtual Machine to Template wizard starts. For example:
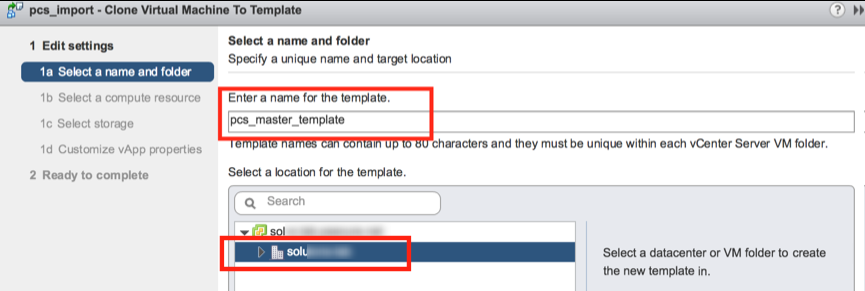
20.Specify a name and select a location for the required template.
21.Click Next to proceed to the next panel of the wizard. For example:
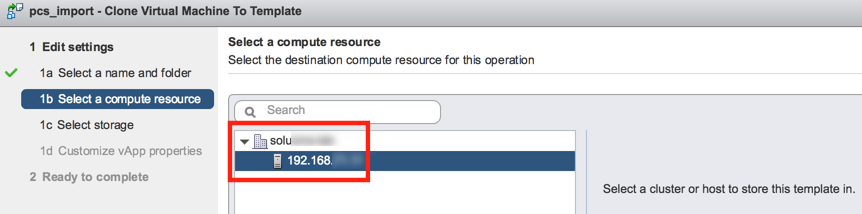
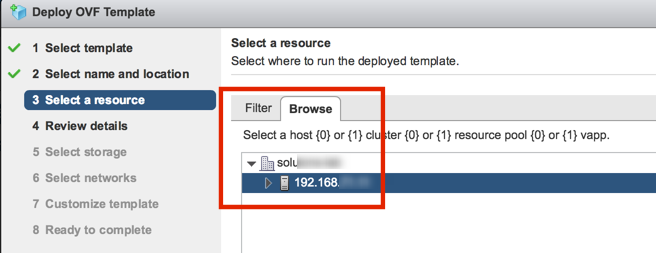
22.Select the required compute resource.
23.Click Next to proceed to the next panel of the wizard. For example:
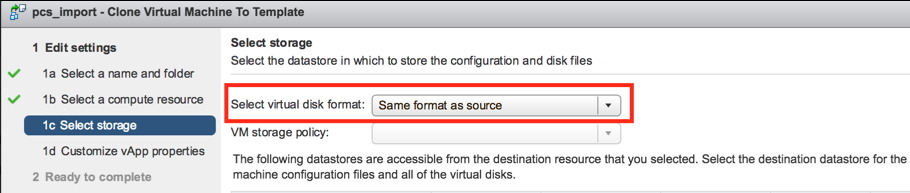
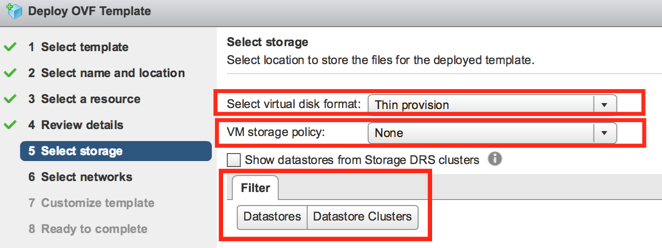
24.Set Select virtual disk format to Same format as source.
25.Click Next to proceed to the next panel of the wizard. For example:
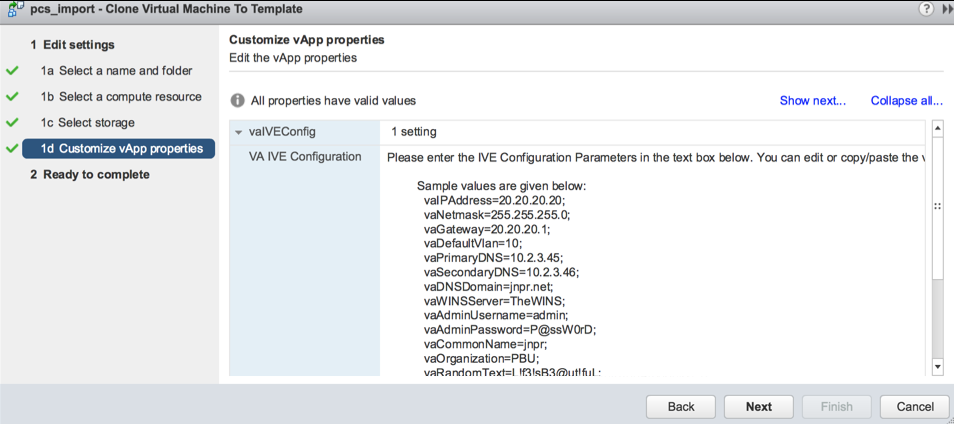
26.Click Next to proceed to the final panel of the wizard.
27.Review the displayed details and step back through the wizard to correct these if required.
28.Click Finish to complete the wizard and create the master appliance template.
After you have a master appliance template, you can optionally use it on the vSphere Configuration page of the Add Appliance Wizard, see Creating and Registering a PCS Appliance VM on vSphere.