Creating and Registering a PCS Appliance VM on AWS
You can create and register a PCS appliance as an AWS Virtual Machine from Pulse One directly. This process will create the VM appliance and perform all required registration activities on the appliance automatically.
- This process requires sufficient appliance licensing capacity on Pulse One.
- You can also create and register a Virtual Machine appliance for vSphere, see Creating and Registering a PCS Appliance VM on vSphere.
Perform the following tasks:
1.Before you begin, you must locate and record the following information:
•The required Route 53 zones, see Identifying the Required Route 53 Zones.
•The required VPC ID and Subnet IDs, see Identifying the Required VPC ID and Subnet IDs.
•The required EC2 deployment key, see Identifying the EC2 Deployment Key and AMI ID.
2.You can then create the appliance, see Creating the PCS Appliance VM on AWS.
Identifying the Required Route 53 Zones
Both a private and a public Route 53 zone are required during the creation of a virtual machine PCS appliance. To locate this information:
1.Login to the AWS Management Console.
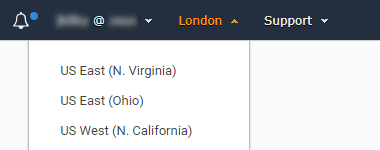
2.On the AWS top bar, select the required Region. For example, EU (London).
3.On the AWS top bar, click Services and then locate the Network & Content Delivery options.
4.Under Network & Content Delivery, select Route 53.
The AWS Route 53 Management Console appears.
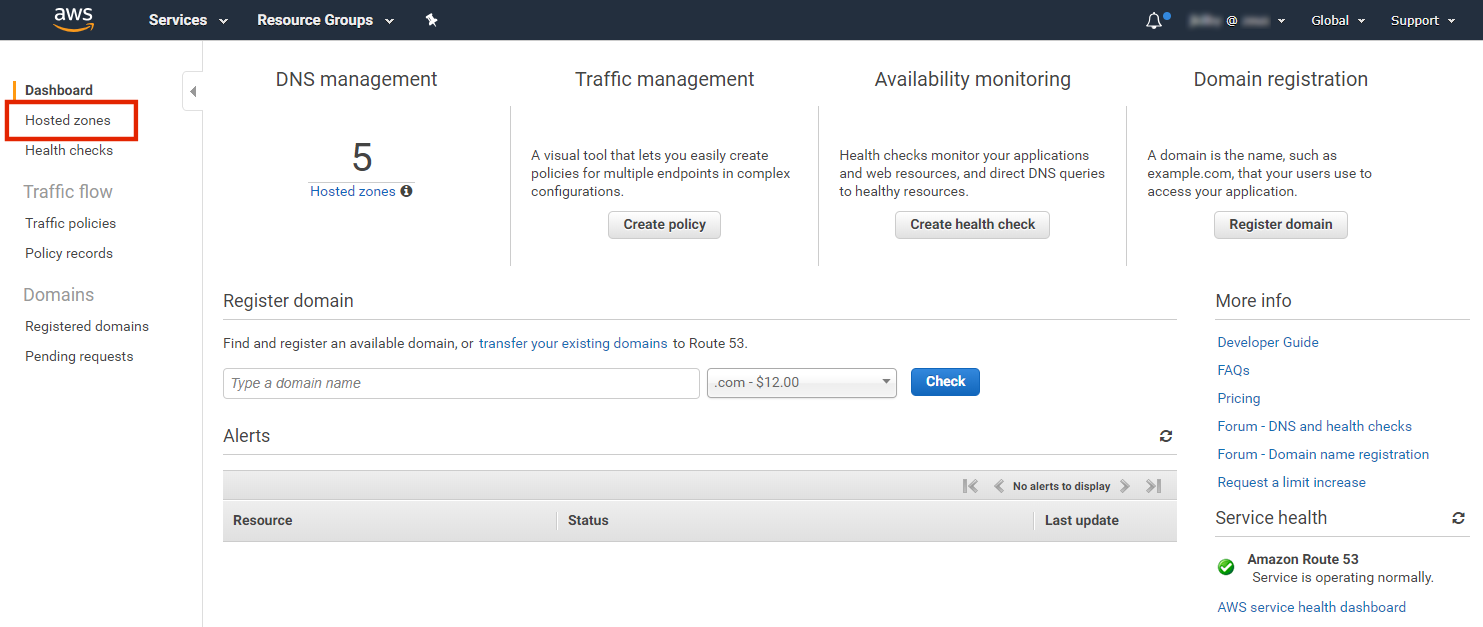
5.Select Hosted Zones.
The hosted zones panel appears. This lists all domain names (zones) that are available to you.
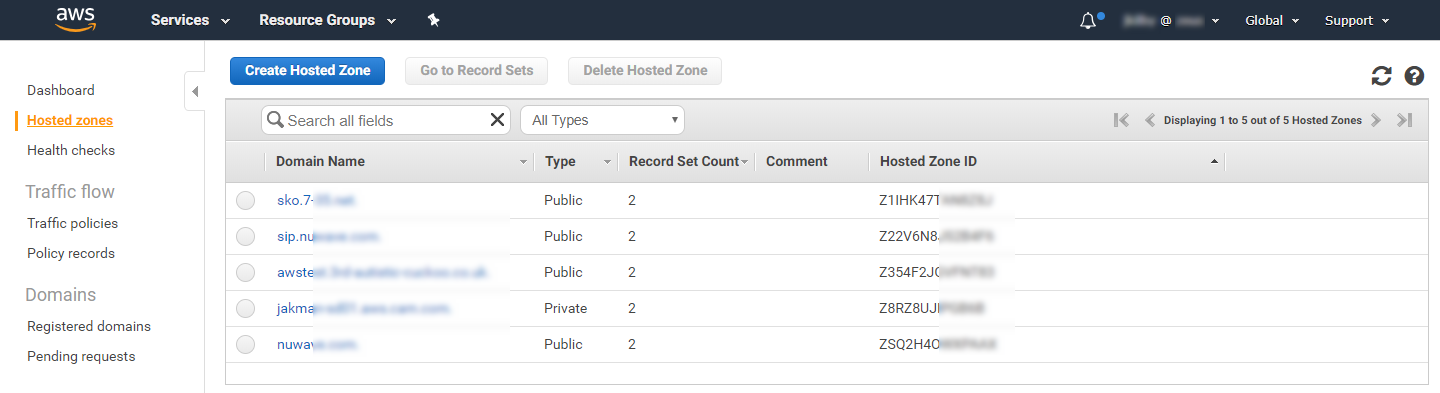
In the domain name list:
•Zones that have a Type of Public have externally-facing (Internet) domain names. The external FQDN that is required when you create the PCS appliance VM will use the external domain name as a suffix.
•Zones that have a Type of Private have internally-facing domain names. The internal FQDN that is required when you create the PCS appliance VM will use an internal domain name as a suffix.
For example:
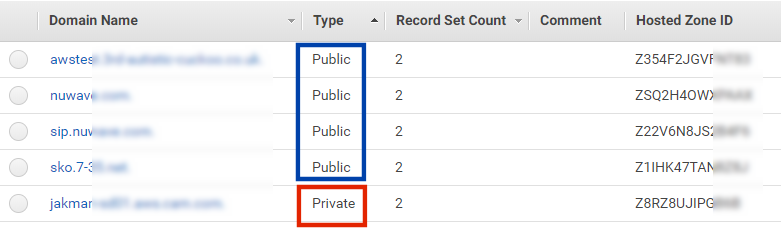
6.Select the required Public zone and record its Domain Name.
7.Locate the required Private zone and record its Domain Name.
You can then perform any remaining preparations, and then continue to create and register the PCS appliance virtual machine on AWS.
Identifying the Required VPC ID and Subnet IDs
A VPC identifier is required during the creation of a virtual machine PCS appliance. To locate this information:
1.Login to the AWS Management Console.
2.On the AWS top bar, select the required Region.
3.On the AWS top bar, click Services and then locate the Network & Content Delivery options.
4.Under Network & Content Delivery, select VPC.
The AWS VPC Dashboard appears.

5.Select Your VPCs.
A list of available VPCs appears.
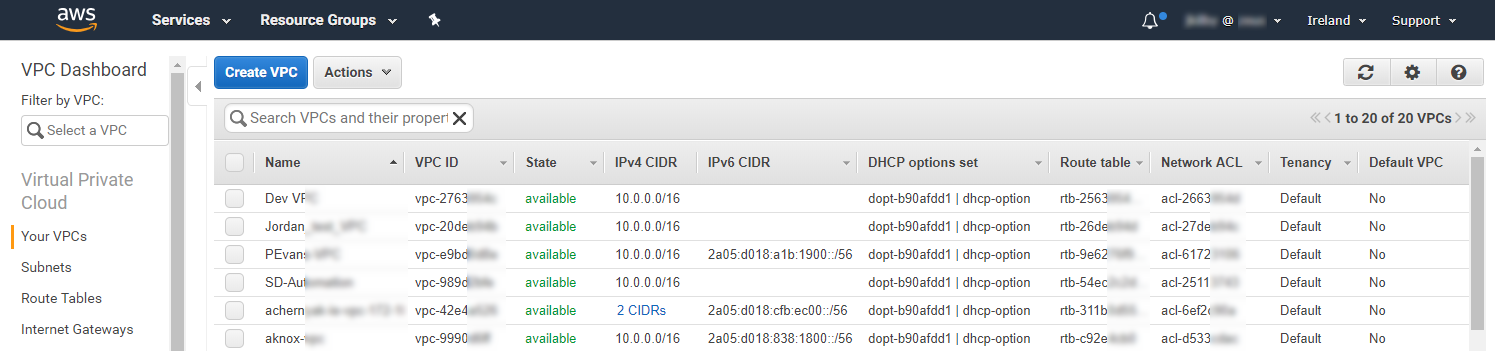
6.Locate the required VPC and record its VPC ID. For example:

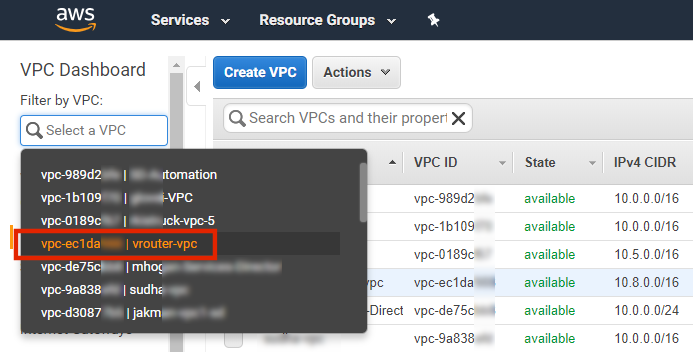
7.In the Filter by VPC filter, select the required VPC. For example:
8.Click Subnets.
A list of all subnets in the selected VPC appears.
This list must include three different subnets that are in the same Availability Zone. Each will be used for one of the standard PCS interfaces in a later procedure (see Creating the PCS Appliance VM on AWS). The interfaces requirements are:
•Internal interface - This must be a private subnet.
•External Interface - This must be a public subnet.
•Management Interface - This can be either a public or private subnet, depending on your requirements.
Where the required subnets do not exist, you must create them before proceeding.
9.Select a public subnet and record its Subnet ID from the bottom panel. For example:

This subnet be used for the internal interface of the PCS appliance in a later procedure.
10.Select a private subnet (in the same Availability Zone as step 9) and record its Subnet ID from the bottom panel. This subnet be used for the external interface of the PCS appliance in a later procedure.
11.Select a third subnet (either private or public, and in the same Availability Zone as step 9) and record its Subnet ID from the bottom panel. This subnet be used for the management interface of the PCS appliance in a later procedure.
You can then perform any remaining preparations, and then continue to create and register the PCS appliance virtual machine on AWS.
Identifying the EC2 Deployment Key and AMI ID
An EC2 key pair (deployment key) and an AMI ID are required during the creation of a virtual machine PCS appliance. To locate this information:
1.Login to the AWS Management Console.
2.On the AWS top bar, select the required Region.
3.On the AWS top bar, click Services and then locate the Compute options.
4.Under Compute, select EC2.
The AWS EC2 Dashboard appears, showing Key Pairs.

5.In the Resources panel, click Key Pairs.
A list of defined key pairs appears.

6.Select the required key pair and record its Key pair name from the bottom panel. This name is used as the “deployment key” during installation. For example:

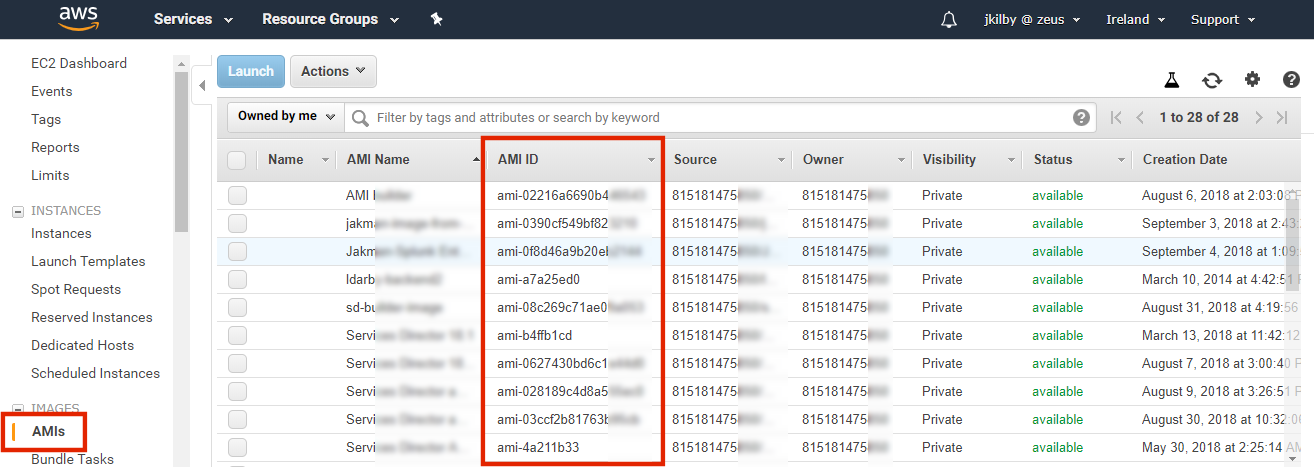
7.On the EC2 dashboard menu, under Images select AMIs.
A list of defined AMIs appears. For example:
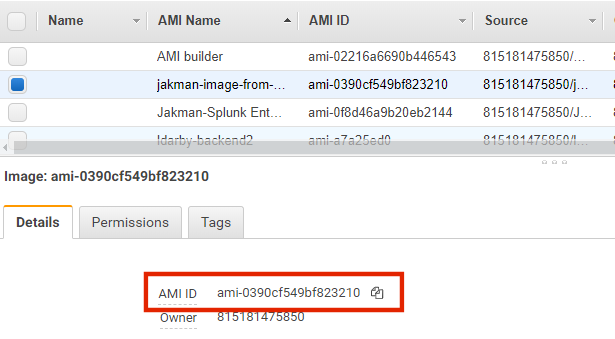
8.Select the required AMI and record its AMI-ID from the bottom panel. For example:
You can then perform any remaining preparations, and then continue to create and register the PCS appliance virtual machine on AWS.
Creating the PCS Appliance VM on AWS
After you have identified all required information (see Creating and Registering a PCS Appliance VM on AWS), you can start the process to create and register a PCS appliance as a VM on AWS:
1.Log into Pulse One as an administrator.
2.Click the Appliances menu and then the Appliances tab.
The Appliances tab displays all current appliances.
3.Click Add Appliance.
The Add Appliance wizard starts.
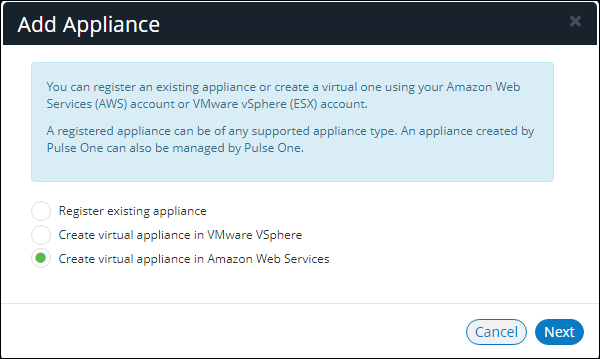
4.Select Create virtual appliance in Amazon Web Services and click Next.
The AWS Credentials panel of the wizard appears.

5.You must then specify AWS credentials. Either:
•Select Add New for Account, then enter your AWS Access Key and Secret Key, OR
•Select an existing AWS Account.
6.Click Next.
The Appliance Configuration panel of the wizard appears.

7.Enter the Appliance Name. This will be the displayed name in the list of appliances and will also be used to automatically populate the Internal FQDN and External FQDN properties on subsequent wizard panels.
8.Specify additional information for the appliance:
•A Company Name.
•(Optional) A License Auth Code can be recorded if required.
•The Appliance Username, Password (and Confirm Password) for a required user on the appliance. This user will be created after the appliance is created.
9.Click Next.
The Appliance Network Configuration panel of the wizard appears.

10.Specify the Primary DNS and the Secondary DNS for your network.
The displayed values are examples, and not defaults.
11.Expand the Internal Network Settings panel.

12.In the Internal Network Settings:
•For the Hosted Zone, enter the internal domain name (internal Route 53 hosted zone) for your appliance. See Identifying the Required Route 53 Zones.
When you shift focus away from this property, the internal Hosted Zone setting is displayed as a suffix to Internal FQDN.
•For the Internal FQDN, complete the FQDN by adding a unique appliance identifier to the left-hand side of the internal domain name in this field. Typically, you will specify the Appliance Name you specified in the Appliance Configuration dialog, and the internal Hosted Zone is used as a suffix.
13.Expand the External Network Settings panel.

14.In the External Network Settings:
•For the Public Domain Name, enter the external domain name (external Route 53 hosted zone) for your appliance. See Identifying the Required Route 53 Zones.
When you shift focus away from this property, the external Hosted Zone setting is displayed as a suffix to External FQDN.
•For the External FQDN, complete the FQDN by adding a unique appliance identifier to the left-hand side of the external domain name in this field. Typically, you will specify the Appliance Name you specified in the Appliance Configuration dialog, and the external Hosted Zone is a suffix.
15.Expand the Management Network Settings panel.

16.In the Management Network Settings:
•For Management Domain Name, enter a name for the AWS network.
When you shift focus away from this property, the Management Domain Name setting is displayed as a suffix to Management FQDN.
•For the Management FQDN, complete the FQDN by adding a unique appliance identifier to the left-hand side of the external domain name in this field. Typically, you will specify the Appliance Name you specified in the Appliance Configuration dialog, and the Management Domain Name is a suffix.
17.Click Next. The AWS Configuration panel of the wizard appears.
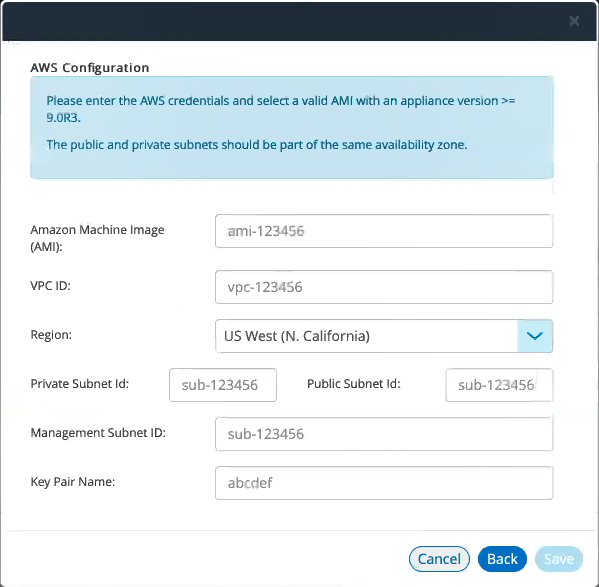
18.Specify the following properties:
•Amazon Machine Image (AMI) is the AMI ID that you identified in Identifying the EC2 Deployment Key and AMI ID.
•VPC ID is the value that you identified in Identifying the Required VPC ID and Subnet IDs.
•Region is automatically populated from your chosen region.
•Private Subnet ID, Public Subnet ID, and Management Subnet ID are the three subnet IDs that you identified in Identifying the Required VPC ID and Subnet IDs.
•Deployment Key is the key pair that you identified in Identifying the EC2 Deployment Key and AMI ID.
19.Click Save.
The wizard closes, and the new Unregistered AWS appliance is added to the list of appliances. For example:
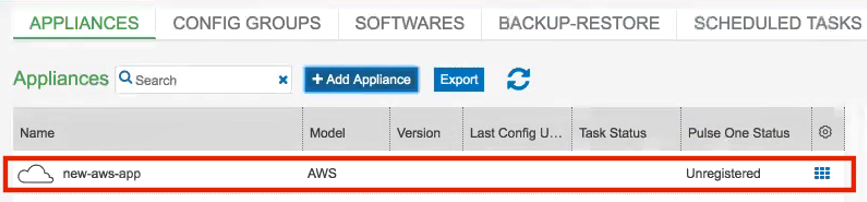
20.Click the Actions icon for the appliance and select Start Appliance.
21.The status of the new appliance goes through a series of states until it successfully created.
•Unregistered
•Creating
•Starting
•Started
22.Wait until the appliance is created.
23.Go to the EC2 Dashboard in AWS and view Instances.
24.The new appliance is listed and reports a Status Check of Initializing. For example:

The appliance is auto-registered. That is, you do not need to manually complete the registration of the appliance from the appliance GUI.
The creation and registration of a PCS appliance as a virtual machine on AWS is now complete.