Editing Event Destinations
Event destinations determine the channels via which vWAF notifies you when one of the conditions defined for the Event Sources becomes true (see also Configuring Alerts).
Event destinations are combined into event destination groups. Event sources aren’t directly linked to individual event destinations but always to exactly one event destination group.
You can add as many event destinations to an event destination group as you like. For example, if you want to send an alert message by email not only to one but to various recipients, just add several Mail Event Destinations to the event destination group. You can then specify a different mail to attribute for each Mail Event Destination.
Creating and editing an event destination group
The created event destination group only is available for the application for which it has been created but not for other applications or for global alerting. If the event destination group is created for global alerting, it only is available for global alerting but not for application-specific alerting.
- Activate the
Event Destination Groups tab.
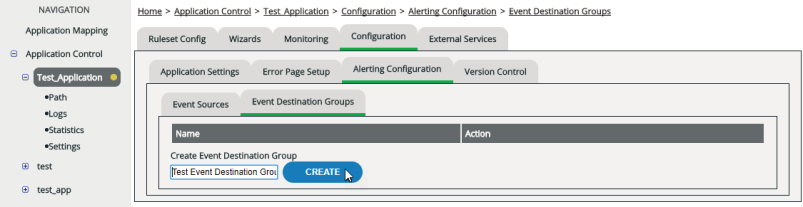
You can now add, edit and remove individual event destinations (see following sections).
If you need to set up several groups that are largely identical, you can duplicate an existing group. To do so, click the green Export/Import icon in the Action column, and then click Copy from exiting. You can also export a group’s settings into a file and then import them back into another group.
Adding event destinations
- From the selection list under
Add Event Destination, select the event destination to be added. Details on the individual event destinations can be found in the reference part of this documentation under
Event Destinations.
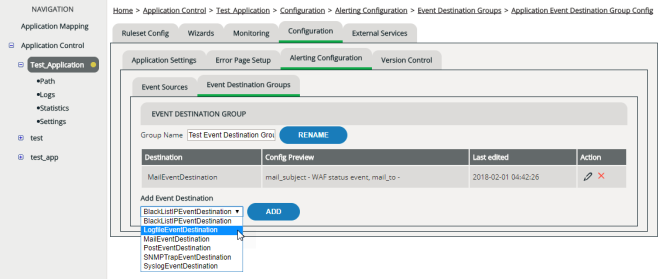
The event destination just added then appears highlighted on the list. The event destination initially inherits the attributes preset on the system. To configure the destination in detail, you need to edit it.
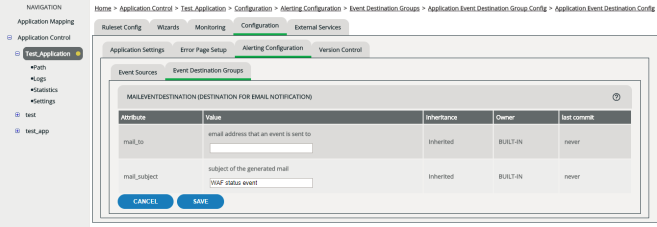
Editing an Event Destination
- In the
Action column, click the relevant Edit icon.
The attributes of the event destination are shown.
- In the Inheritance column you can see whether the values given under Value have been inherited as system-based presets (Inherited entry) or have been modified individually (Local entry).
- The Owner column shows the username of the administrator who made that setting. The BUILT-IN entry identifies the default values.
- The Last Commit column shows whether and when a setting has already been committed.
Detailed information on the attributes of the individual event destinations can be found in the reference part of this documentation under Event Destinations.