Configuring LDAP Auto-Provisioning
This section describes the required processes to configure LDAP auto-provisioning:
Overview: LDAP Auto-Provisioning
Enterprises manage Active Directory (AD) / Lightweight Directory Access Protocol (LDAP) domain for end users to authenticate/authorize to their corporate resources like Outlook, access Share Point and so on. By implementing LDAP support using Pulse One/Workspace, enterprise end users can provision their device automatically with Pulse One console using their domain account.
Pulse One admins can validate the LDAP groups and map them to respective policies according to the corporate requirement. When end users provision their devices, they get the required policies pushed to device as per their user group membership configuration.
Pulse One server provides the self-registration portal for the enterprise users to submit their email to validate their email domain and user account with backend AD/LDAP server through Appliance. Appliance validates the user account using its account/email to deliver the registration email successfully to the end user's Inbox to proceed with the registration.
Configuring LDAP on Pulse Connect Secure
The LDAP configuration on Pulse Connect Secure includes the following tasks:
Creating an LDAP Server
To create an LDAP server:
1.Go to Authentication > Auth Servers > New Server.
The Authentication Servers page appears.
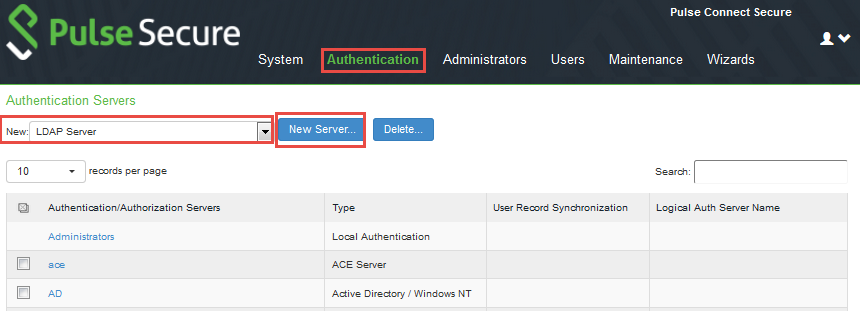
2.Under New, select LDAP Server and then click New Server.
The New LDAP Server page appears.

3.Complete the configuration by doing the following:
•Specify a Name to identify the server within the system.
•Specify the LDAP Server hostname or its IP address.
•Specify the required LDAP Port on the LDAP server:
•Default port number: 389 (unencrypted connection).
•Default port number: 636 (SSL connection).
For more configuration details, refer to the Pulse Connect Secure Administration Guide.
After this is complete, you can create a realm that includes the new LDAP server, see Creating a Realm for LDAP.
Creating a Realm for LDAP
After you have created an LDAP server, you can create a realm that refers to the new server.
To create a realm:
1.Go to Users > User Realms.
2.On the User Realms page, click New.
The New Authentication Realms page appears.
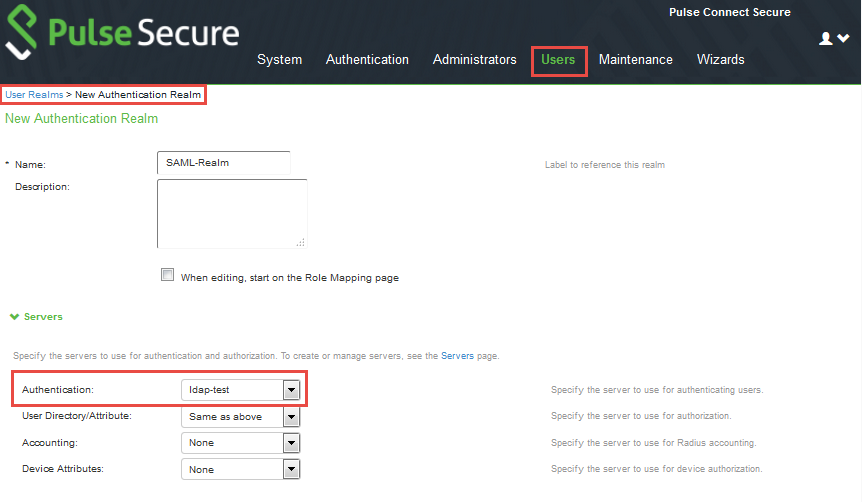
3.Enter a Name to label this realm and (optionally) a Description.
4.Under Servers, for Authentication, select the LDAP server configured in the previous steps.
For more configuration details, refer to the Pulse Connect Secure Administration Guide.
After this is complete, you can create a role that includes the new realm, see Creating a Role and Role Mapping for LDAP.
Creating a Role and Role Mapping for LDAP
After you have created a realm, you can create a role that refers to the new realm.
To create a role and assign the role to the realm:
1.Go to Users > User Roles.
2.Click New Role.
The New Role page appears.
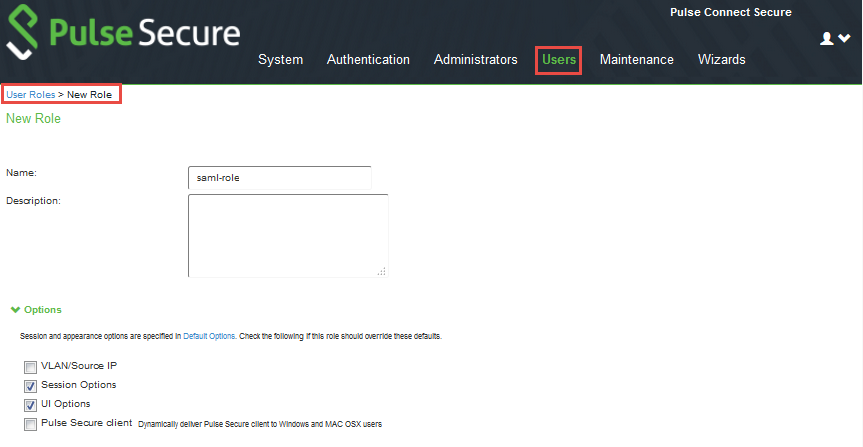
3.Enter a Name and (optionally) a Description and create the role.
This name will be used in the list of roles on the Roles page.
For more configuration details, refer to the Pulse Connect Secure Administration Guide.
4.After creating the role, select the realm and then click the Role Mapping tab.
5.Click New Rule to access the Role Mapping Rule page.

This page provides an in-line editor for defining the rule.
6.Specify a rule Name.
For more configuration details, refer to the Pulse Connect Secure Administration Guide.
7.Save the rule.
After this is complete, you can create a sign-in policy, see Creating Sign-In Policies for LDAP.
Creating Sign-In Policies for LDAP
To create Sign-in URL, do the following:
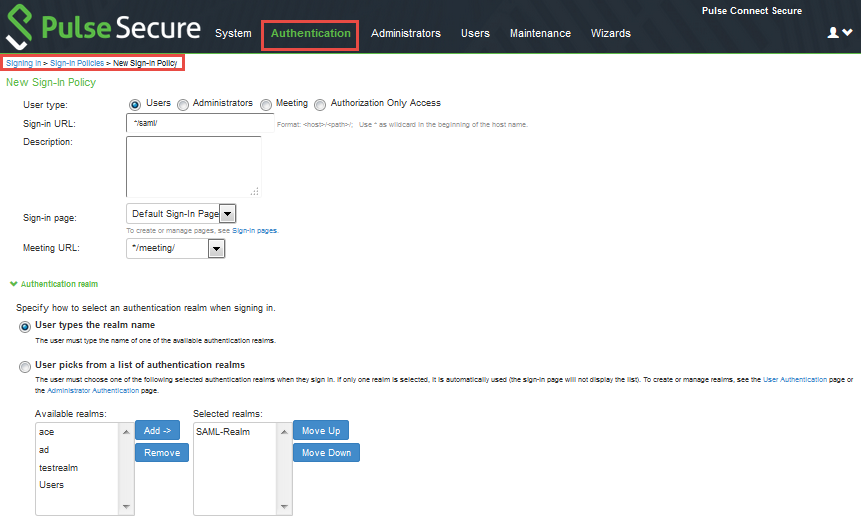
1.Go to Authentication > Sign-in Policies.
2.Create a new sign-in policy and attach the new realm created in Creating a Realm for LDAP.
For more configuration details, refer to the Pulse Connect Secure Administration Guide.
After this is complete, you can register the appliance, see Registering the Appliance for LDAP.
Registering the Appliance for LDAP
To register the Pulse Connect Secure appliance, do the following:
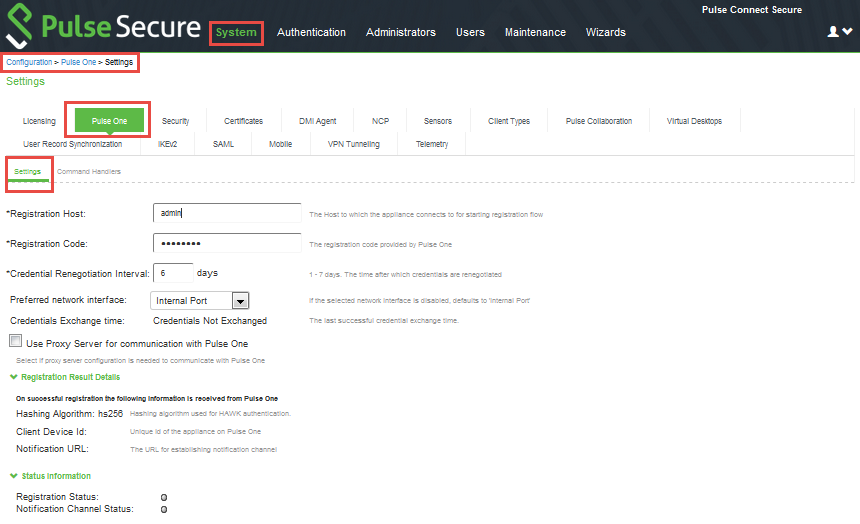
1.Go to System > Configuration > Pulse One > Settings.
2.Register the appliance by providing its Registration Host and Registration Code.
After this is complete, you can select the Pulse Workspace Command Handler for LDAP, see Selecting the Pulse Workspace Command Handler for LDAP.
Selecting the Pulse Workspace Command Handler for LDAP
To select a command handler:
1.Navigate to System > Configuration > Pulse One > Command Handlers.
2.Select the authentication server as Group Lookup Handler.

After this is complete, LDAP configuration on Pulse Connect Secure is complete. You can then proceed to Configuring LDAP Auto-Provisioning.
Configuring LDAP Auto-Provisioning
This section describes the steps to configure LDAP auto-provisioning
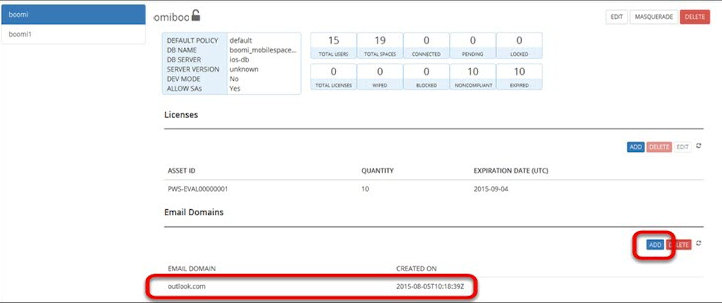
Creating an Email Domain Account
To create an email domain account:
1.Log in to the Domain Management server.
2.Create a new enterprise.
3.Add an Email domain account.
Adding an Appliance
To add an appliance, follow the procedures described in the Pulse One Administration Guide.
Configuring the LDAP Provider Workspace Property
To configure the LDAP Provider workspace property:
1.On the Pulse One console, click the settings icon on top-right-corner of the page and select Workspace Settings.
2.Edit the LDAP Provider property to choose the registered appliance.
3.Click Save.
For full details of workspace properties, see Configuring Workspace Properties.
Adding an LDAP Group
To add an LDAP group, refer to Adding an LDAP Group.
Adding a Policy
When you create a policy, include the LDAP group.
Refer to the Configuring an LDAP Group.
Submitting a Corporate Email Address
To submit a corporate email address for a device:
1.Open the registration portal: https://<enterprise>/register/workspaces
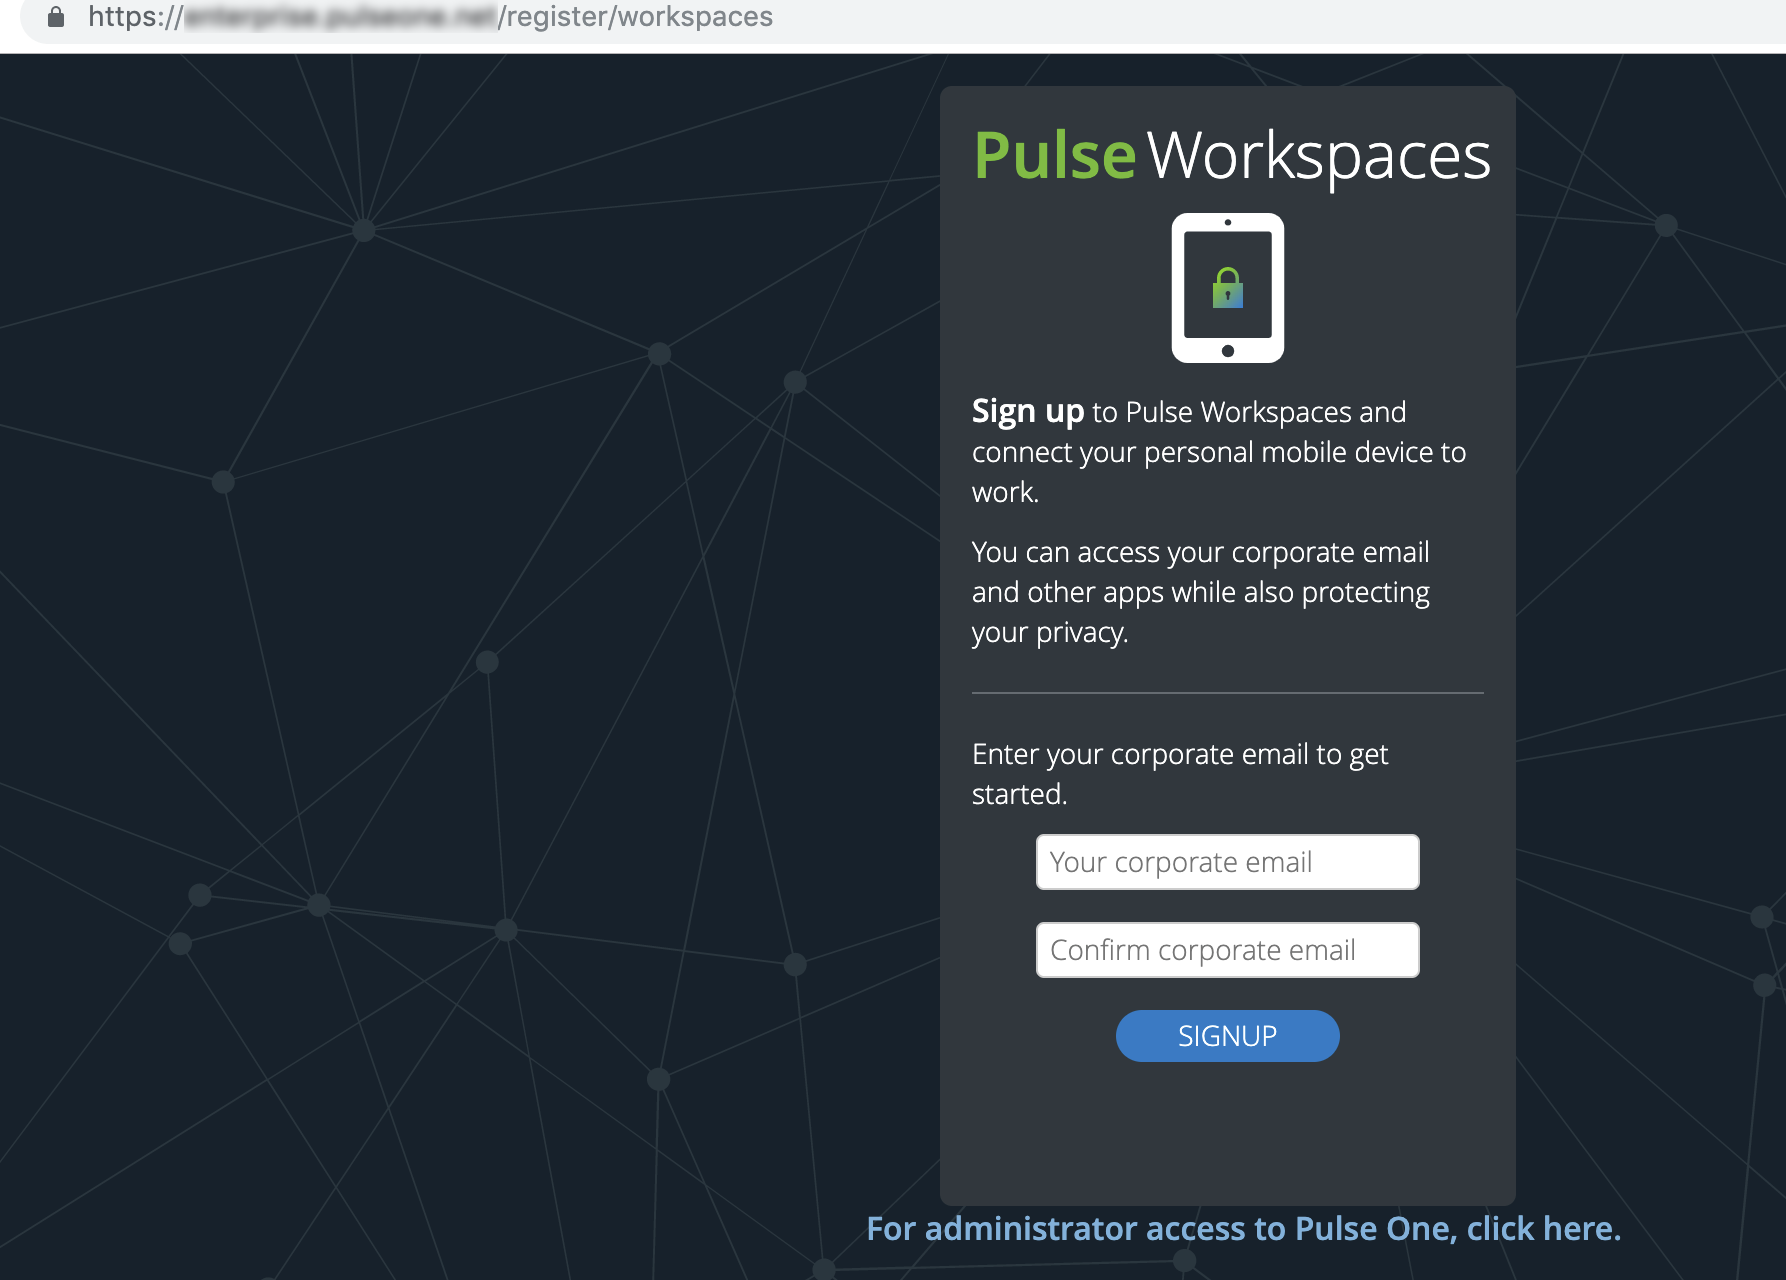
2.Submit your corporate email ID to trigger the registration mail.
Once the corporate email is submitted, the below functional steps are processed:
•The domain will identify the enterprise that belongs to your Email domain.
•Pulse One sends a notification to PCS.
•PCS will request Pulse One for available groups and user name information.
•Pulse One responds to PCS with user account with available verified groups.
•PCS will check user's email, validate SAM account, and group membership with backend LDAP server.
•PCS will then respond to Pulse One to create a temporary record and generate an email to deliver to end user Inbox.
Registering Mobile Devices
After you submit a corporate email address, the required registration details are sent in an email. This includes the host URL and code to register the device.
The end user follows the instructions in the email to download and configure the Android/iOS Pulse Secure client on their device.
•For iOS devices, see Onboarding iOS BYOD Devices.
•For Android devices, see Onboarding Android BYOD Devices.
After successful registration by the end user, go to the Workspace and check if the LDAP groups are updated for the user according to the membership. The required policies will be pushed to the user's device according to the policies mapped to the user's group.
Groups and user membership validation notification will be sent every one hour and the periodic update will be done in 24 hours.