Use Case 3: Public Internet Access
SWG Overview
Secure WEB Gateway gains visibility, protection and controls access to Internet application to secure your data and safeguards user privacy.
This use case is the Secure Web Gateway (SWG). SWG keeps users safe from cyberthreats and unauthorized traffic from entering and spreading through their internal networks. As a cloud-based solution, SWG monitors user web traffic and enforce s policies that define conditions for access to specific websites or types of sites. It plays an important role in protecting employee and user work environments from infections coming from malicious web traffic, sites with vulnerabilities, Internet -borne viruses, malware, and other cyberthreats. SWG also ensures implementation of and compliance with an organization’s standards to protect confidential information from exposure. URL filtering, cloud anti-malware, ability to decrypt and inspect websites accessed via HTTPS, Data Loss Prevention (DLP), and Cloud Access Security Broker (CASB) are standard SWG functions .
URL filtering, cloud anti-malware, ability to decrypt and inspect websites accessed via HTTPS, Data Loss Prevention (DLP), and Cloud Access Security Broker (CASB) are standard SWG functions, all of which are available as part of Lookout SSE.
SWG addresses these common use cases:
•Monitor and control access to websites - Protect users from accessing applications, websites, and web content that doe s not comply with the organization’s acceptable use policies.
•Monitor and control access to risky applications - Control usage and user activities based on analytics and insights. Gain visibility into sanctioned and unsanctioned applications and their risk levels.
•Detect and defend against threats - Protect users and devices from threats posed by access to malicious websites, or access to compromised websites that have unintended malicious content on both encrypted and clear-text web traffic.
•Provide data protection and application security - Prevent corporate data loss from insider threats, unintentional data sharing, or data exfiltration from accessing phishing or malicious websites.
Enable SWG on Lookout
Pre-requisites
Import or Create CA Certificate
To Import or Create CA Certificate:
1. Navigate to Administration > Certificate Management > Signing CA Certificates
2.The device must trust this certificate. If you generate a new one, the .pem file should be installed on the clients.
3.After CA Cert is generated, select the view certificate details, on the right of the given certificate to get the PEM Certificate
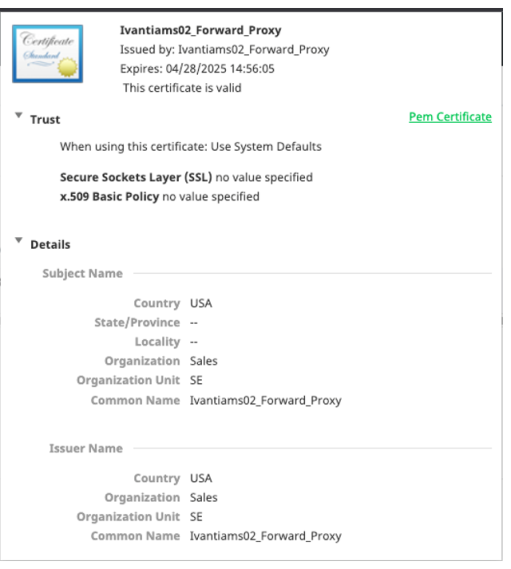
If users are using Firefox, the .pem may need to be installed in the browser itself. For best results, use a publicly trusted CA Certificate.
This certificate trust is required for SWG to operate properly.
Create SWG Rule
To create SWG rule in Lookout:
1.Navigate to Protect > Access Control > New.
2.Select Malware Scan in the Content Inspection Type.
3.Click Next.
4.Navigate to the Websites section of the left selection pane.
5.Select System Category (or some subset of this section).
6.Select Activities > Select Download.
7.Click Next.
8.Select Action and Secondary Action.
9.Click Next and Confirm.
Repeat full process for DLP (instead of Malware Scan) if desired.
DLP rules are very granular and it is advisable to build separate rules for each action, otherwise debugging of failing rules can be very difficult (because any failure will show as the initial general rule)
For more information on DLP config, refer Video walkthrough explaining on how DLP works
Download Proxy URL & Certs (install on endpoint)
To download Proxy URL:
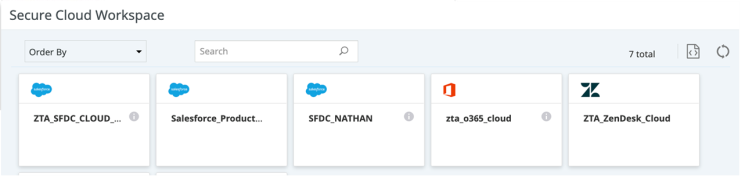
1. Navigate to:Home > Secure Cloud Workspace
2.Right click on the download link for the HTTP Proxy PAC file and select copy link address
•Example of copied link: https://domain-ms.ciphercloud.io/public/proxy-swg-http.pac
Downloading the PAC file from Lookout tenant and configure in nZTA Controller
To download the PAC file:
1.Go to Home > Secure Cloud Workspace in Lookout.
2.Download or copy the PAC file link.
3.To configure the PAC file on the ZTA controller, navigate to Integrations > CASB/SWG and select Lookout URL type and update value of PAC URL got from step 2.
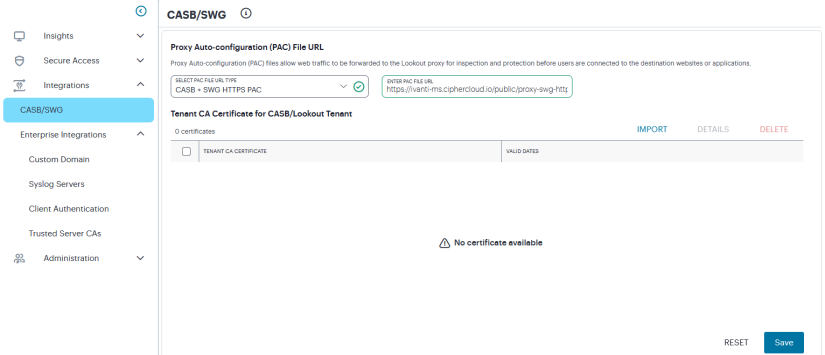
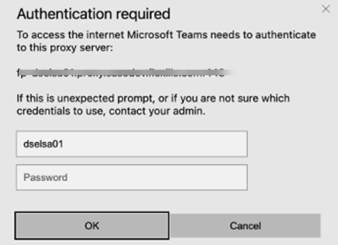
In case if HTTP proxy is configured instead of HTTPS then it will prompt for a pop up to enter user name and password on the endpoint when accessing internet or SaaS application using SWG and CASB respectively.
Enter the Lookout Tenant name in the username field and keep the password blank.
.
Importing the Trusted CA certificate to the nZTA
Trusted CA certificate from Lookout Tenant is required to establish a secured connection. Download the certificate in the .pem format from the Trusted CAs tab (Administration > Certificate Management).
To get the Trusted CA cert from Lookout Tenant and import to the user device:
1.In the Administration > Certificate Management page, click the Trusted CAs tab.
2.Download the certificate and save it in the .pem format.
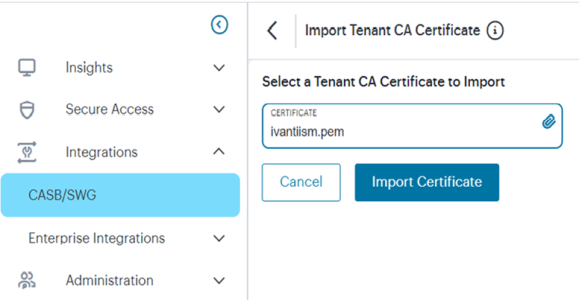
3.Import the root CA certificate to the ZTA controller : navigate to Integrations->CASB/SWG and click on Import Certificate and select pem file downloaded from steps 2.
4.Click Save.