After you have created the required configuration for your Ivanti
Neurons for Zero Trust Access (nZTA) service, you can
begin to enroll your end user devices.
To see which devices have been enrolled, and to perform certain
actions on enrolled devices, use the Insights > Devices
page. For more details, see Viewing Currently
Enrolled User Devices.
To configure settings that control and restrict the functionality available in Ivanti Secure Access Client when a user enrolls their device with the Controller, use the Global Device Preferences tab in the Secure Access > Manage Devices page. For more details, see Setting Global Device
Preferences.
For security reasons, only the authorized user account used to enroll
a device is subsequently permitted to sign-in to nZTA on that
device.
The following desktop and mobile device types are supported:
The table below summarizes feature support for each device type:
Feature Support for Clients
Feature
iOS
Android
macOS
Windows
Linux
On-Demand Connection
Yes
Yes
Yes
Yes
No
End User Portal
No
No
Yes
Yes
Yes (SSO,RDP,SSH not supported)
SAML Auto Sign-in & Single Logout (SLO)
No
No
Yes
Yes
Yes
Automatic Ivanti Secure Access Client Upgrade
Yes
Yes
Yes
Yes
No
Browser-Based Enrollment
No
No
Yes
Yes
No
Dynamic Policy/CARTA
No
No
Yes
Yes
Yes (CARTA message is not supported)
Device Policy
Yes
Yes
Yes
Yes
Yes (limited to support for File, Port number, and Process policy
types)
FQDN/IP based Application
Yes
Yes
Yes
Yes
Yes (Split DNS is not supported)
Client Disconnect
Yes
Yes
Yes
Yes
Yes
Log Upload
Yes
Yes
Yes
Yes
No
nZTA Client Settings
No
No
Yes
Yes
No
CNAME FQDN App
Yes
Yes
Yes
Yes
No
Application Discovery Default Gateway
Yes
Yes
Yes
Yes
No
GSLB Support
Yes
Yes
Yes
Yes
No
Customer PKI support (BYOC)
No
No
Yes
Yes
No
Multiple sign-in URL support
Yes
Yes
Yes
Yes
Yes
After a device is enrolled with nZTA, requests from each
application are handled by the Gateway referenced in the secure access
policy for the application.
Before you start this process, you must have an Windows sign-in URL
for nZTA, based on the tenant FQDN provided by the
Ivanti DevOps/Support organization.
If you have an existing Ivanti Secure Access Client
installed, you must first uninstall it before beginning the
nZTA enrollment process.
The Domain Admin must also ensure that Windows desktop machines can
successfully connect to the Windows domain by updating the Trusted Root
CA Certificates on all machines, see Enabling Trusted Root CA Certificate on Windows Domain.
To enroll a Windows desktop device:
Log into your Windows desktop.
Start a browser session.
In your browser, enter the nZTA enrollment URL into your
address bar. For example, "https://tenant1.mycompany.com/login/" or
"https://tenant1.mycompany.com/login/saleslogin/".
A login page appears.
Provide your credentials to access nZTA enrollment.
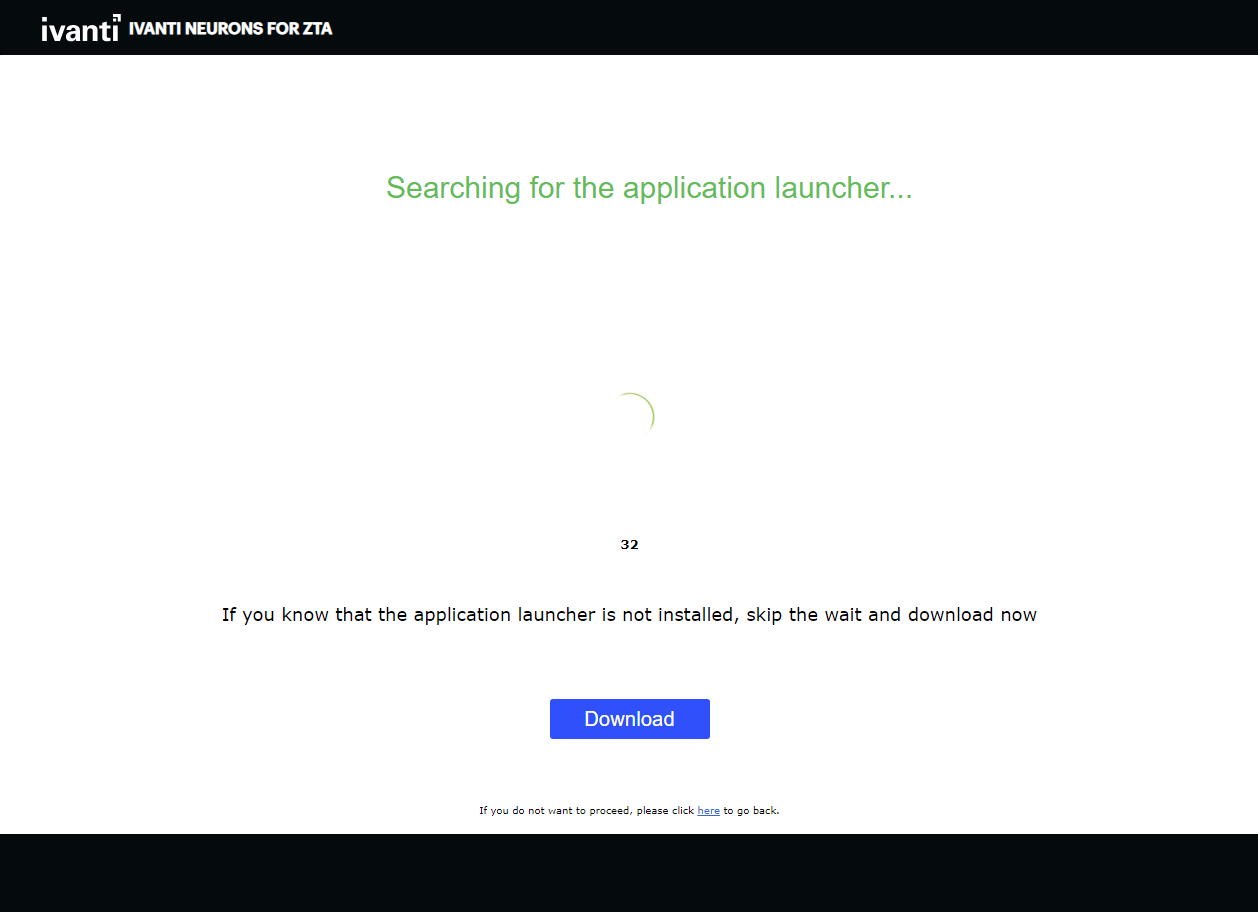
The launcher page appears, for example:
nZTA Launcher
(Windows)
Click Download and save the application launcher
PulseSecureAppLauncher.msi file locally.
A "HERE" hyperlink is displayed in the browser. This is required
after the launcher has installed.
Run the downloaded file to install the
launcher.
Confirm the completion of the launcher installation.
In the browser, click the "HERE" hyperlink to continue with the
enrollment.
A browser dialog requests confirmation to start the launcher
app.
Click Open Pulse Secure Application
Launcher.
The launcher starts.
Accept any certificate warnings.
A progress bar indicates installation status.
Accept that the PulseSetupClientOCX.exe file can make
changes to your device.
Accept that the PulseSetupClientOCX64.exe file can make
changes to your device.
Accept that the Pulse Secure Component Manager Installer
application can make changes to your device.
Ivanti Secure Access Client then downloads.
Accept that the Pulse Secure Component Manager can make
changes to your device.
Ivanti Secure Access Client then installs and starts, and
reports on a number of tasks:
Enrolling the User.
Fetching and Importing Client Certificates. You must
confirm any certificate requests.
Fetching and Importing CA Certificates. You must confirm
any certificate requests.
Launching the Windows Edge/Webview2 browser.
In a typical enrollment, upon successful authentication to the Controller, Ivanti Secure Access Client automatically shows the end-user portal applications page through a Windows Edge/Webview2 browser. This feature is supported with ISAC client version 22.6R1.
Onboarding is then complete.
Ivanti Secure Access Client appears as a task in the Windows
task bar. For example:
Ivanti Secure Access Client Task
in Taskbar (Windows)
When the Controller requests a certificate from the
client, accept the request.
Log into the Controller using your Ivanti Neurons
for Zero Trust Access service user credentials.
The compliance of the device is checked.
(Optional) If your sign-in authentication policy is configured
for Multi-Factor Authentication, you might be required to complete a
TOTP (Time-based One Time Password) secondary authentication step each
time you sign in.
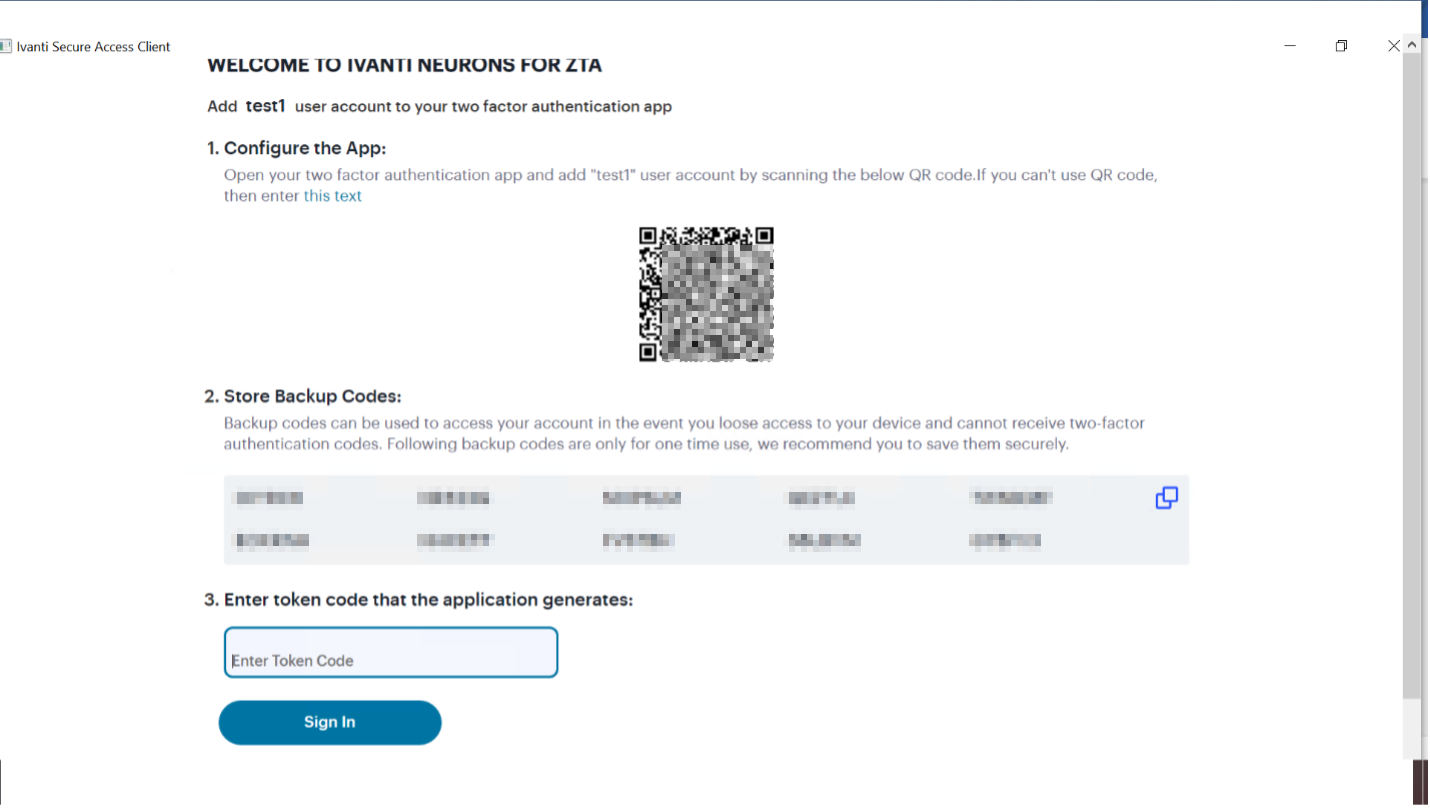
For a first time login, the user is presented with a TOTP
registration page:
First-time login TOTP
registration
Use this page to add your user details to an authenticator app on
your device, such as Google Authenticator or Microsoft Authenticator. If
you do not yet have such a two-factor authenticator app installed, do
that now.
Scan the QR code, or enter the provided text, to add the user details
to your authenticator app. Then, store the generated backup codes in a
secure location for future retrieval of a lost account.
Finally, enter the token code generated by the authenticator app into
the box provided, then select Sign In.
For future sign-in attempts, the TOTP challenge dialog appears
without the registration details or backup codes. As before, you provide
the generated token code from your authenticator app into the box
provided and select Sign In.
When Ivanti Secure Access Client connects, it is minimised
to the taskbar.
Open Ivanti Secure Access Client from the taskbar.
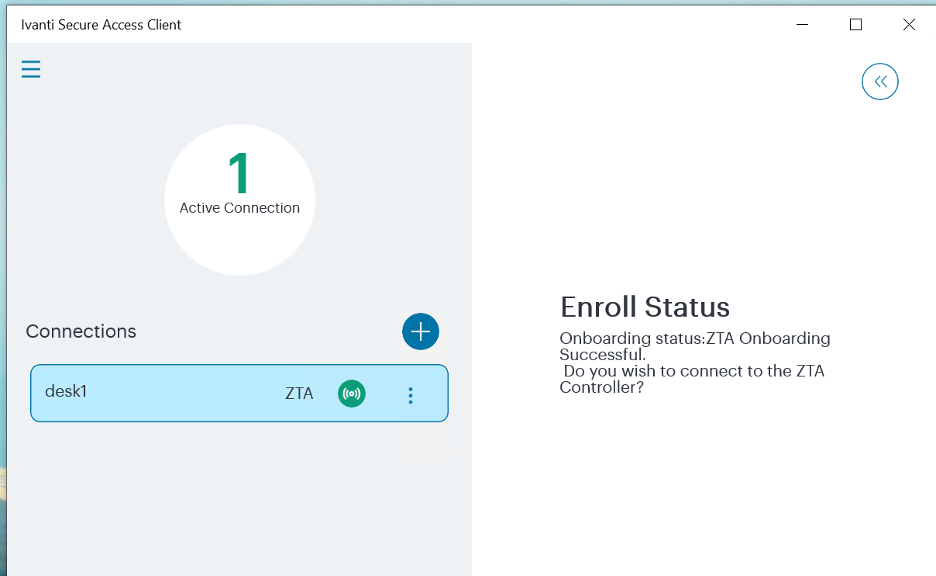
Ivanti Secure Access Client appears. It shows the active
connection to the Controller and presents a Connect button to access assigned applications and
resources. For example:
Ivanti Secure Access Client
(Windows)
To learn more about how Ivanti Secure Access Client
maintains a connection with the Controller, and how user
sessions are validated with your nZTA Gateways, see Introduction.
In a typical enrollment, upon successful authentication to the
Controller, Ivanti Secure Access Client automatically
shows the end-user portal applications page through an embedded browser.
For example:
Assigned Applications and Resources (Windows)
After the nZTA end-user portal applications page appears,
click any displayed resource to launch that item in your default system
browser. To re-show the end-user portal at a future time, use the
ZTA button in the Ivanti Secure Access ClientnZTA connection.
When you launch an SSO (Single Sign-on) application from the end-user
portal for the first time in a session, nZTA presents a pop-up
dialog requesting the user to select a certificate with which to
authenticate this device with the Controller. This is a
one-time activity at the beginning of a session, and all further SSO
application accesses (to any SSO application) re-use the same
certificate.
If a default Gateway is configured on the Controller, and
nZTA is the only active connection, the default Gateway handles
all requests for unlisted applications from your Windows device. Refer
to Using Application Discovery with Ivanti Secure Access Client.
Enabling
Trusted Root CA Certificate on Windows Domain
To ensure that Windows desktop machines can successfully connect to
the Windows domain, each machine must update its Trusted Root CA
Certificates.
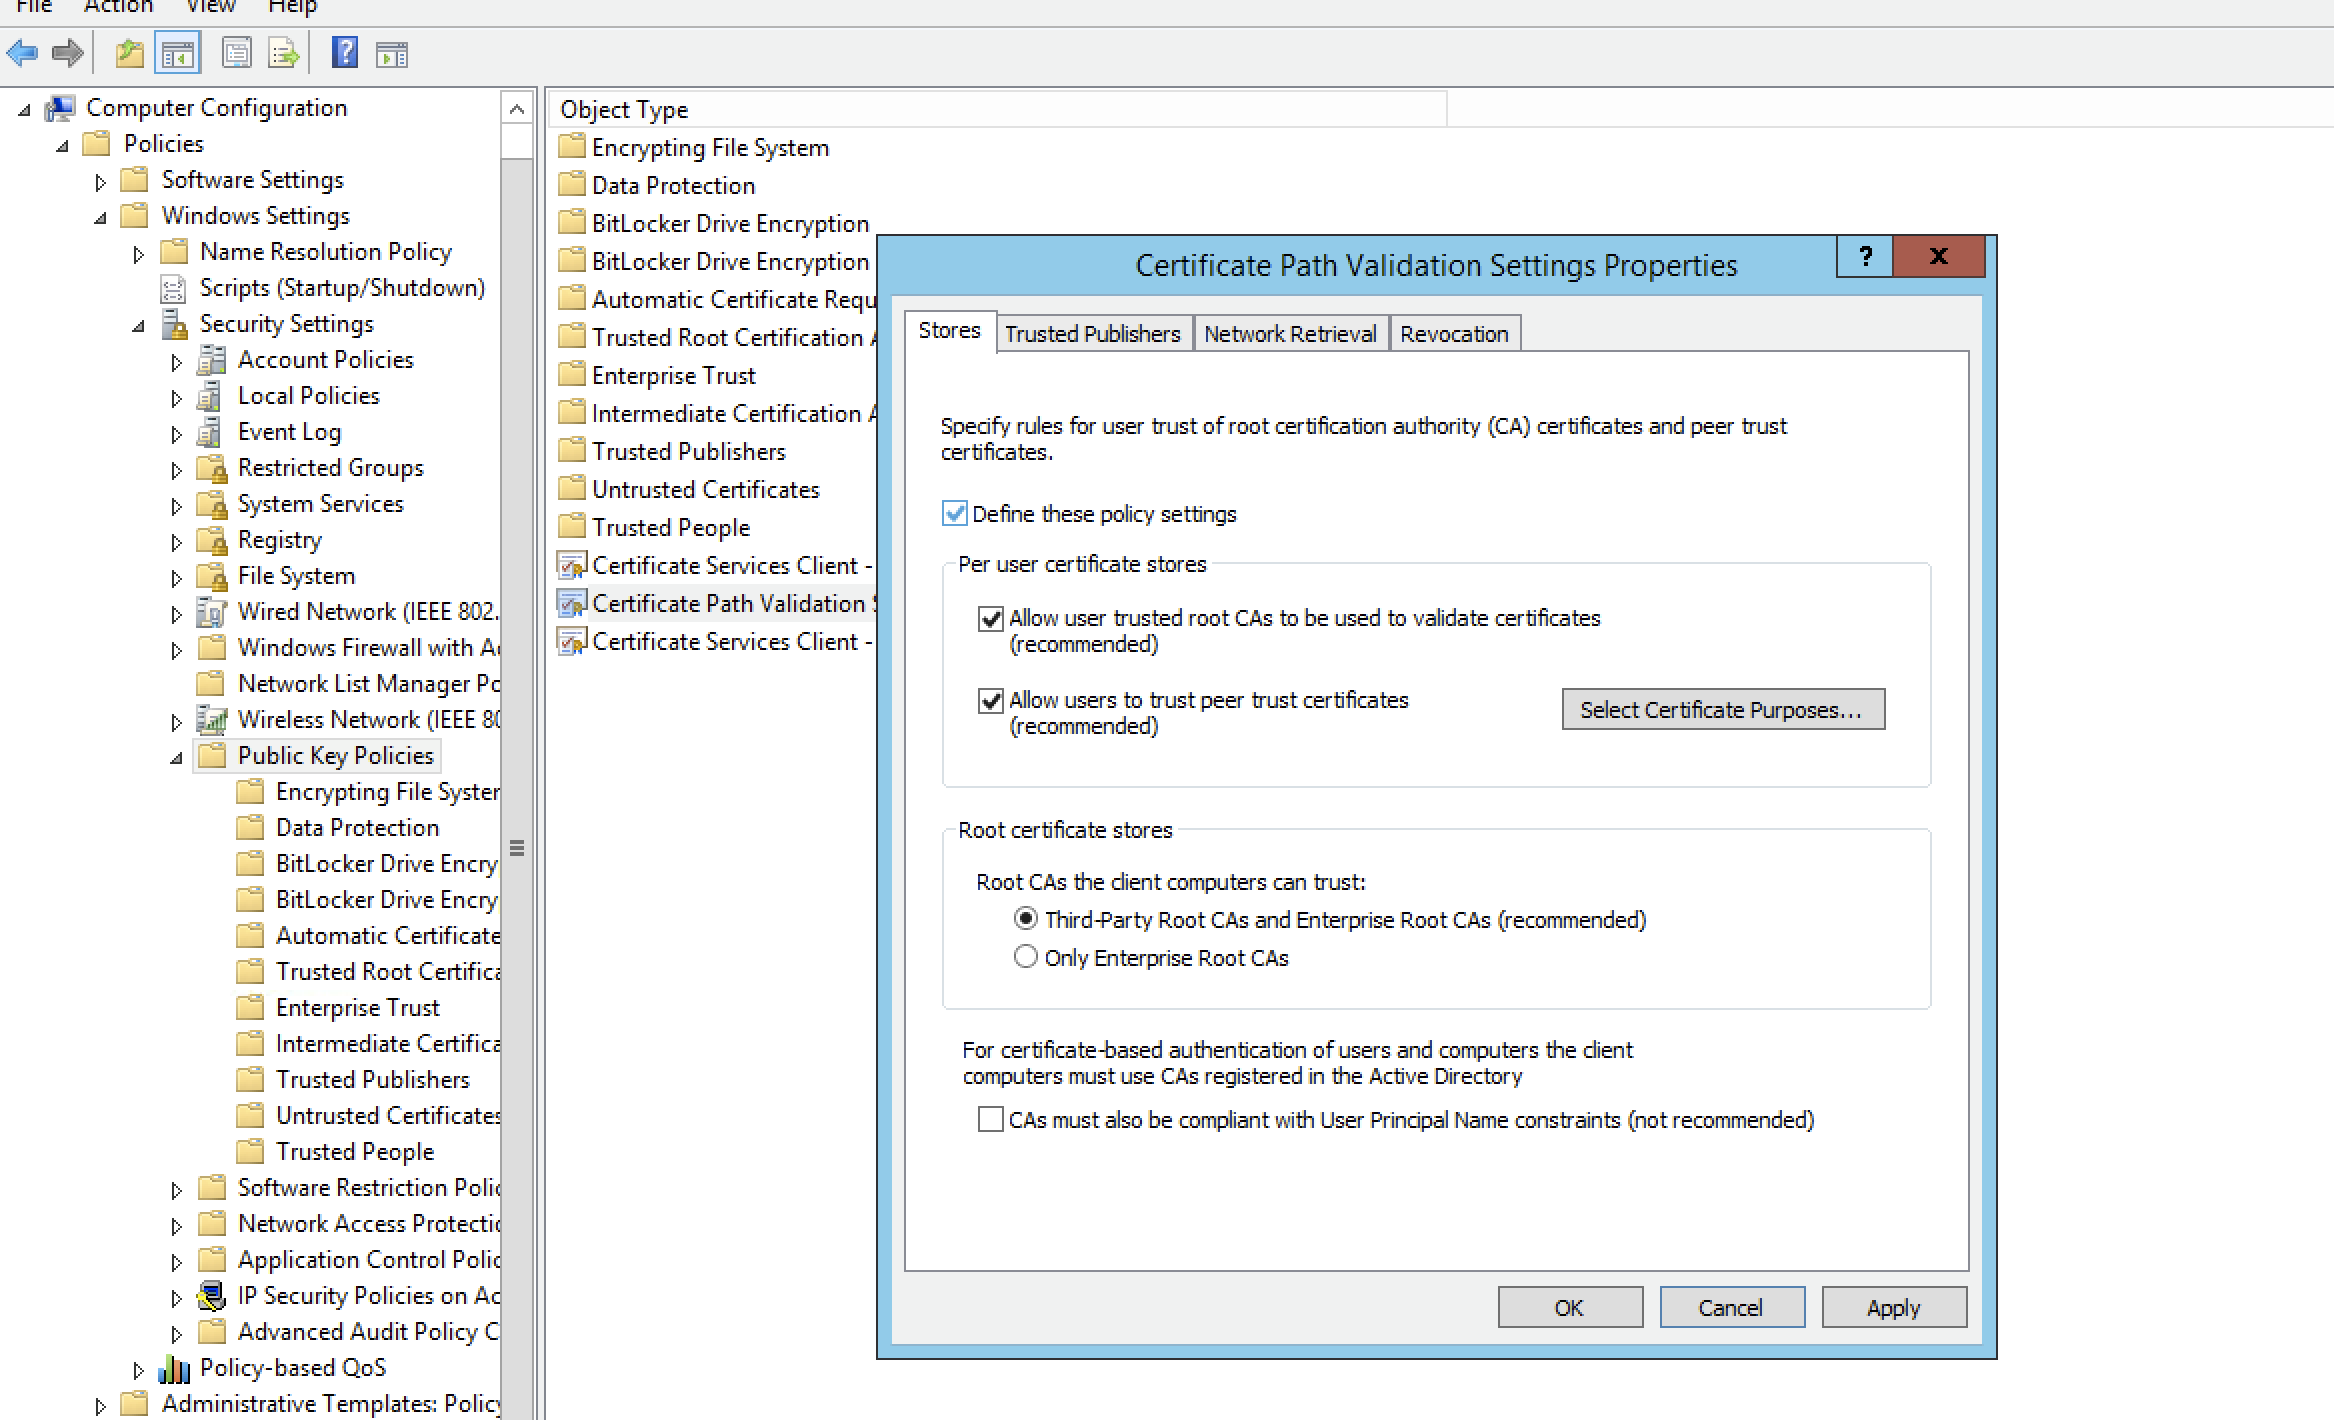
Ivanti recommends that the Domain Admin configures the
Public Key Policies on the Group Policy Object and publishes it to all
connected Windows desktops.
To add certificates to the Trusted Root Certification Authorities
store for a Windows domain:
Access the Windows domain server and log in.
Domain Admins is the minimum group membership required to
complete this procedure.
Open the Server Manager.
Under Features Summary, click Add
Features.
Select the Group Policy Management check
box.
Click Next.
Click Install.
Wait until the Installation Results page shows
that the installation of the Group Policy Management
Console was successful.
Click Close.
Click Start, click Administrative
Tools and then click Group Policy
Management.
The Group Policy Management Console
appears.
In the console tree, double-click to expand Group Policy
Objects in the forest and domain that contains the Default
Domain Policy GPO.
Right-click the Default Domain Policy object, and then
click Edit.
In the Group Policy Management Console, select
Computer Configuration > Windows Settings > Security Settings
> Public Key Policies.
Right-click the Trusted Root Certification Authorities
store.
Click Import and follow the steps in the
Certificate Import Wizard to import the
certificates.
Enabling Trusted Root CA Certificate
When each Windows desktop machine next connects, the required Trusted
Root CA Certificate installs automatically on the machine.
Enrolling a macOS Device
Before you start this process, you must have a sign-in URL for
nZTA, based on the tenant FQDN provided by the Ivanti
DevOps/Support organization.
If you have an existing Ivanti Secure Access Client
installed, you must first uninstall it before beginning the
nZTA enrollment process.
To enroll a macOS desktop device:
Log into your macOS desktop.
Start a browser session.
In your browser, enter the nZTA sign-in URL into your
address bar.
Provide your credentials to access nZTA enrollment.
The launcher page appears, for example:
nZTA Launcher macOS
Click Download and save the application launcher
PulseSecureAppLauncher.dmg file locally.
A "HERE" hyperlink is displayed in the browser. This is required
after the launcher has installed.
Click the downloaded file.
The downloaded file opens, and a folder appears that contains the
PulseSecureAppLauncher.mpkg file.
Double click the PulseSecureAppLauncher.mpkg
file.
Click Continue when the install starts.
Wait until the install completes.
In the browser, click the "HERE" hyperlink to continue with the
enrollment.
A browser dialog requests confirmation to start the launcher
app.
Click Open PulseApplicationLauncher.
The launcher starts.
Confirm that you want to Open the
application.
Confirm that you want the client to contact the
Controller.
Ivanti Secure Access Client then downloads and
installs.
Enter your macOS device credentials.
Ivanti Secure Access Client then installs and starts. The
nZTA connection starts automatically. For example:
macOS Ivanti Secure Access
Client
To learn more about how Ivanti Secure Access Client
maintains a connection with the Controller, and how user
sessions are validated with your nZTA Gateways, see Introduction.
Ivanti Secure Access Client appears as an icon in the macOS
system tray.
Ivanti Secure Access Client in
the System Tray (indicated)
The connection activity reports on a number of tasks:
Enrolling the User.
Fetching and Importing Client Certificates. You must
confirm any certificate requests.
Fetching and Importing CA Certificates. You must confirm
any certificate requests.
Installing the CEF (Chromium Embedded Framework) browser.
This is an embedded browser used by Ivanti Secure Access Client
for SAML-based login and to display the nZTA end-user portal
applications page.
Onboarding is then complete.
In a typical enrollment, upon successful authentication to the
Controller, Ivanti Secure Access Client automatically
signs in the user.
(Optional) If your sign-in authentication policy is configured
for Multi-Factor Authentication, you might be required to complete a
TOTP (Time-based One Time Password) secondary authentication step each
time you sign in.
For a first time login, the user is presented with a TOTP
registration page:
First-time login TOTP
registration
Use this page to add your user details to an authenticator app on
your device, such as Google Authenticator or Microsoft Authenticator. If
you do not yet have such a two-factor authenticator app installed, do
that now.
Scan the QR code, or enter the provided text, to add the user details
to your authenticator app. Then, store the generated backup codes in a
secure location for future retrieval of a lost account.
Finally, enter the token code generated by the authenticator app into
the box provided, then select Sign In.
For future sign-in attempts, the TOTP challenge dialog appears
without the registration details or backup codes. As before, you provide
the generated token code from your authenticator app into the box
provided and select Sign In.
When Ivanti Secure Access Client connects, it is minimised
to the taskbar.
Accept the request to access the private key.
Accept the request to present a certificate for access to
browser-based resources.
The nZTA end-user portal applications page appears. For
example:
Assigned Applications and Resources
After the nZTA end-user portal applications page appears,
click any displayed resource to launch that item in your default system
browser. To re-show the end-user portal at a future time, click the
ZTA button in the Ivanti Secure Access ClientnZTA connection.
When you launch an SSO (Single Sign-on) application from the end-user
portal for the first time in a session, nZTA presents a pop-up
dialog requesting the user to select a certificate with which to
authenticate this device with the Controller. This is a
one-time activity at the beginning of a session, and all further SSO
application accesses (to any SSO application) re-use the same
certificate.
If a default Gateway is configured on the Controller, and
nZTA is the only active connection, the default Gateway will
handle all requests for unlisted applications from the macOS desktop
device. Refer to Using Application Discovery with Ivanti Secure Access Client.
Enrolling a Linux Device
Browser-based enrollment is not supported for Ivanti Secure
Access Client on Linux devices. Follow the instructions in this
section to enroll the device by creating a nZTA connection
through the Ivanti Secure Access Client application. To see the full feature support list for Linux devices, see Introduction.
Before you start this process, you must have:
A Linux sign-in URL for nZTA, based on the tenant FQDN
provided by the Ivanti DevOps/Support organization.
The download location URL for your required installation package, as
provided by the Ivanti DevOps/Support organization.
If you have an existing Ivanti Secure Access Client
installed, you must first uninstall it before beginning the
nZTA enrollment process.
Ivanti Secure Access Client is fully supported for use with
nZTA on the following Linux variants:
To learn more, contact your support representative.
Enrolling on Ubuntu or Debian
This section describes the installation of a Ivanti Secure Access
Client Linux variants on either Ubuntu or Debian. If you want to
install on either Fedora or CentOS/RHEL operating systems, refer to
Enrolling on Fedora or CentOS/RHEL.
To enroll a Linux desktop device on Ubuntu or Debian:
Log into your Linux device.
Obtain the required Ivanti Secure Access Client for
Linux installation package and download it to your Linux device. To
obtain the installation package, contact your support
representative.
Start a command line interface (CLI) terminal session.
If not already installed, install the prerequisite packages
nss3-tools and net-tools. Make sure your
package manager availability list is up to date, then run the following
command for each package in turn:
sudo apt-get install <dependency package name>
Repeat this step for each prerequisite package.
Start the Ivanti Secure Access Client for Linux package
installation at the prompt:
sudo dpkg -i <client installation package>
The installation process reports back to the session. For example,
for Ubuntu:
Selecting previously unselected package pulsesecure.
(Reading database ... xxxxxx files and directories currently installed.)
Preparing to unpack pulsesecure_9.1.R11_amd64.deb ...
Unpacking pulsesecure (9.1.R11) ...
Setting up pulsesecure (9.1.R11) ...
Created symlink /etc/systemd/system/multi-user.target.wants/pulsesecure.service → /lib/systemd/system/pulsesecure.service.
Processing triggers for desktop-file-utils (0.24-1ubuntu3) ...
Processing triggers for gnome-menus (3.36.0-1ubuntu1) ...
Processing triggers for mime-support (3.64ubuntu1) ...
Processing triggers for dbus (1.12.16-2ubuntu2.1) ...
Processing triggers for man-db (2.9.1-1) ...
Start the client. To do this, either start the PulseUI
app from the Activities bar, or use the following from
the command line:
/opt/pulsesecure/bin/pulseUI
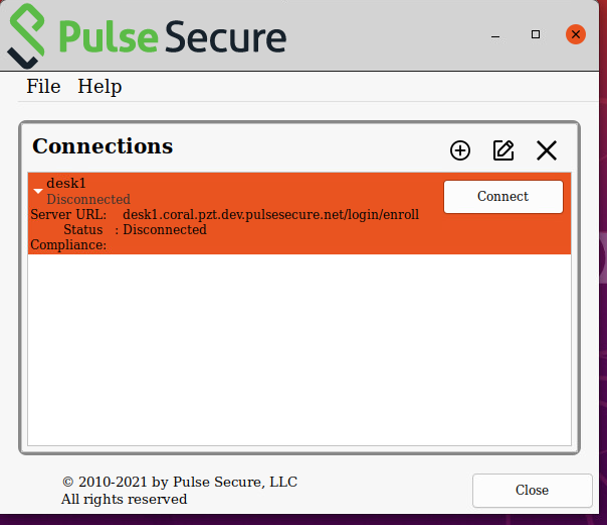
The client appears:
nZTA Ubuntu/Debian Linux
Client
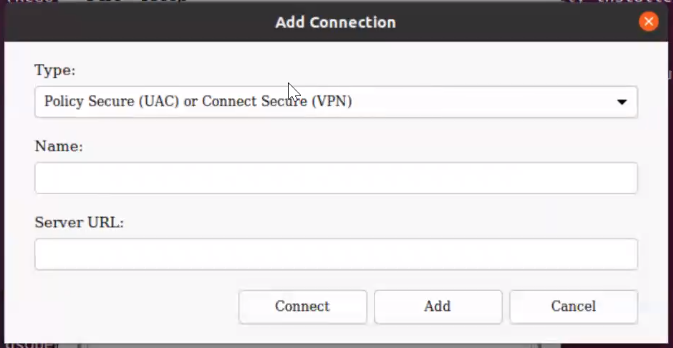
Add the required connection. To do this:
Click the plus icon in the client toolbar.
The Add Connection dialog appears.
nZTA Linux Add
Connection
For Type, select nZTA
Connection.
For Name, enter a suitably identifying name for
the connection.
For Server URL, enter the Linux sign-in URL
provided by the Ivanti DevOps/Support organization.
Click Add to add the connection and close the
dialog.
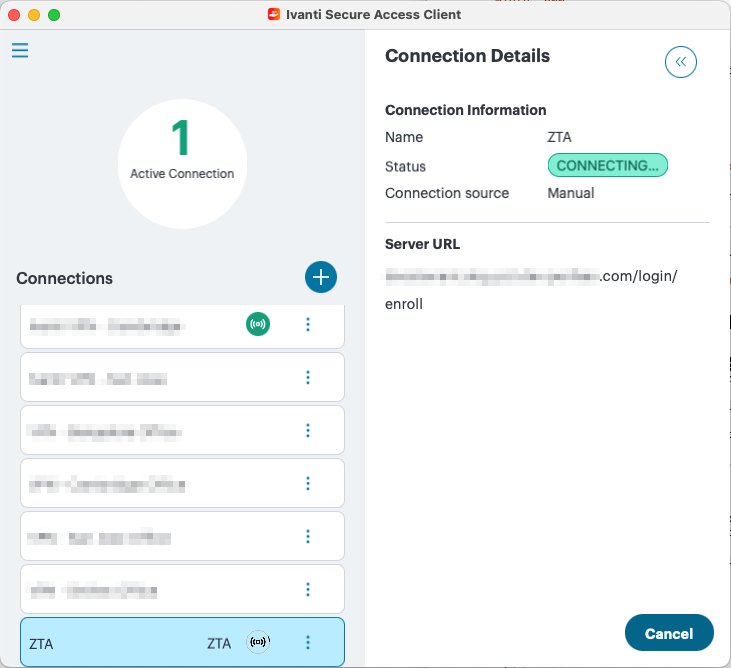
The new connection is added to the list of connections.
nZTA Linux nZTA
Connection
For the Ivanti Neurons for Zero Trust Access connection,
click Connect.
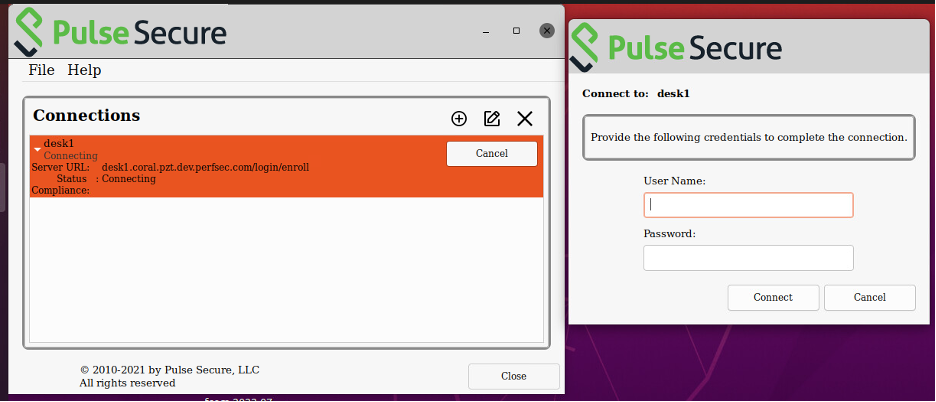
A login dialog appears. For example:
nZTA Linux nZTA
Credentials
Enter your controller credentials and click
Connect.
A connection activity dialog reports a number of tasks:
Enrolling the user.
Fetching and Importing of Client Certificates. You must
confirm any certificate requests.
Fetching and Importing of CA Certificates. You must
confirm any certificate requests.
Installing the CEF (Chromium Embedded Framework)
browser. This is an embedded browser used by Ivanti Secure
Access Client for SAML-based login and to display the nZTA
end-user portal applications page.
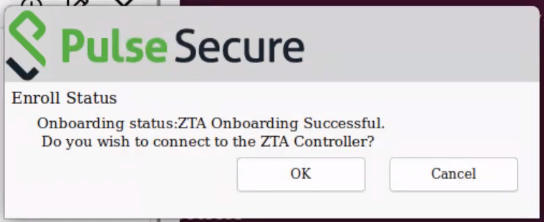
Completion of the connection. For example:
nZTA Linux ZTA Connection
Success
Click OK to connect to nZTA.
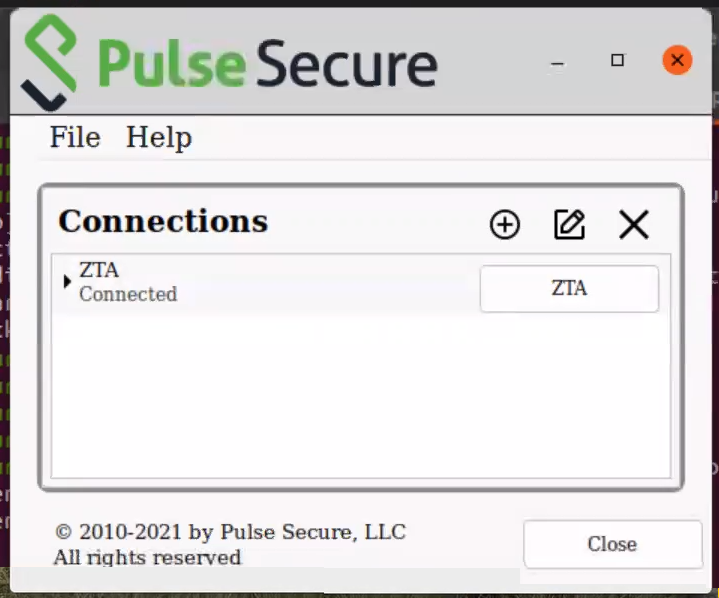
When this completes, the connection updates. For example:
nZTA Linux ZTA
Connected
Onboarding is then complete.
To learn more about how Ivanti Secure Access Client
maintains a connection with the Controller, and how user
sessions are validated with your nZTA Gateways, see Introduction.
(Optional) If your sign-in authentication policy is configured
for Multi-Factor Authentication, you might be required to complete a
TOTP (Time-based One Time Password) secondary authentication step each
time you sign in.
For a first time login, the user is presented with a TOTP
registration page:
First-time login TOTP
registration
Use this page to add your user details to an authenticator app on
your device, such as Google Authenticator or Microsoft Authenticator. If
you do not yet have such a two-factor authenticator app installed, do
that now.
Scan the QR code, or enter the provided text, to add the user details
to your authenticator app. Then, store the generated backup codes in a
secure location for future retrieval of a lost account.
Finally, enter the token code generated by the authenticator app into
the box provided, then select Sign In.
For future sign-in attempts, the TOTP challenge dialog appears
without the registration details or backup codes. As before, you provide
the generated token code from your authenticator app into the box
provided and select Sign In.
In a typical enrollment, upon successful authentication to the
Controller, Ivanti Secure Access Client automatically
shows the end-user portal applications page through an embedded browser.
To re-show this portal at a future time, click the ZTA
button in the Ivanti Secure Access ClientnZTA
connection. Alternatively, access your permitted applications from the
Linux command line.
(Optional) To uninstall Ivanti Secure Access Client
Linux variants, enter the following command at the prompt and provide a
password:
[sudo] password for <user>: sudo apt-get purge pulsesecure
After the process completes successfully, the Linux client has been
removed.
Ivanti Secure Access Client Linux variants do not support
the use of default gateways.
Device rule types for Ivanti Secure Access Client Linux
variants are limited to File, Port, and
Process. For details of these device rule types, see Creating Device Policy Rules.
Enrolling on Fedora or CentOS/RHEL
This section describes the installation of Ivanti Secure Access
Client Linux variants on either Fedora or CentOS/RHEL. If you want
to install on either Ubuntu or Debian operating systems, refer to Enrolling on Ubuntu or Debian.
To enroll a Linux desktop device on Fedora or CentOS/RHEL:
Log into your Linux device.
Obtain the required Ivanti Secure Access Client for
Linux installation package and download it to your Linux device. To
obtain the installation package, contact your support
representative.
Start a command line interface (CLI) terminal session.
If not already installed, install the prerequisite packages
nss3-tools and net-tools. Make sure your
package manager availability list is up to date, then run the following
command for each package in turn:
sudo yum install <dependency package name>
Repeat this step for each prerequisite package.
Start the Ivanti Secure Access Client for Linux package
installation at the prompt:
sudo rpm -ivh <client installation package>
The installation process reports back to the session. For example,
for Fedora:
Click Add to add the connection and close the
dialog.
The new connection is added to the list of connections.
nZTA Linux nZTA
Connection
For the Ivanti Neurons for Zero Trust Access connection,
click Connect.
A login dialog appears. For example:
nZTA Linux nZTA
Credentials
Enter your controller credentials and click
Connect.
A connection activity dialog reports a number of tasks:
Enrolling the user.
Fetching and Importing of Client Certificates. You must
confirm any certificate requests.
Fetching and Importing of CA Certificates. You must
confirm any certificate requests.
Installing the CEF (Chromium Embedded Framework)
browser. This is an embedded browser used by Ivanti Secure
Access Client for SAML-based login and to display the nZTA
end-user portal applications page.
Completion of the connection. For example:
nZTA Linux ZTA Connection
Success
Onboarding is then complete.
To learn more about how Ivanti Secure Access Client
maintains a connection with the Controller, and how user
sessions are validated with your nZTA Gateways, see Introduction.
(Optional) If your sign-in authentication policy is configured
for Multi-Factor Authentication, you might be required to complete a
TOTP (Time-based One Time Password) secondary authentication step each
time you sign in.
For a first time login, the user is presented with a TOTP
registration page:
First-time login TOTP
registration
Use this page to add your user details to an authenticator app on
your device, such as Google Authenticator or Microsoft Authenticator. If
you do not yet have such a two-factor authenticator app installed, do
that now.
Scan the QR code, or enter the provided text, to add the user details
to your authenticator app. Then, store the generated backup codes in a
secure location for future retrieval of a lost account.
Finally, enter the token code generated by the authenticator app into
the box provided, then select Sign In.
For future sign-in attempts, the TOTP challenge dialog appears
without the registration details or backup codes. As before, you provide
the generated token code from your authenticator app into the box
provided and select Sign In.
In a typical enrollment, upon successful authentication to the
Controller, Ivanti Secure Access Client automatically
shows the end-user portal applications page through an embedded browser.
To re-show this portal at a future time, click the ZTA
button in the Ivanti Secure Access ClientnZTA
connection. Alternatively, access your permitted applications from the
Linux command line.
(Optional) To uninstall Ivanti Secure Access Client
Linux variants, enter the following command at the prompt and provide a
password:
sudo rpm -e pulsesecure [sudo] password for <user>:
After the process completes successfully, the Linux client has been
removed.
Ivanti Secure Access Client Linux variants do not support
the use of default gateways.
Device rule types for Ivanti Secure Access Client Linux
variants are limited to File, Port, and
Process. For details of these device rule types, see Creating Device Policy Rules.
Enrolling an iOS Device
Application discovery and the use of a default Gateway is not
supported from iOS mobile devices.
For mobile devices, Ivanti Neurons for Zero Trust Access
compliance requires iOS v12.0 or later.
Before you start this process, you must have an iOS sign-in URL for
nZTA, based on the tenant FQDN provided by the Ivanti
DevOps/Support organization. The procedure to enroll your iOS device
differs depending on whether you have an existing Ivanti Secure
Access Client app installed and configured with a connection to a
classic VPN product.
To enroll an iOS device that has a previous connection to a classic
VPN product:
Start your iOS device and access its home page.
Locate and start the Ivanti Secure Access Client
app.
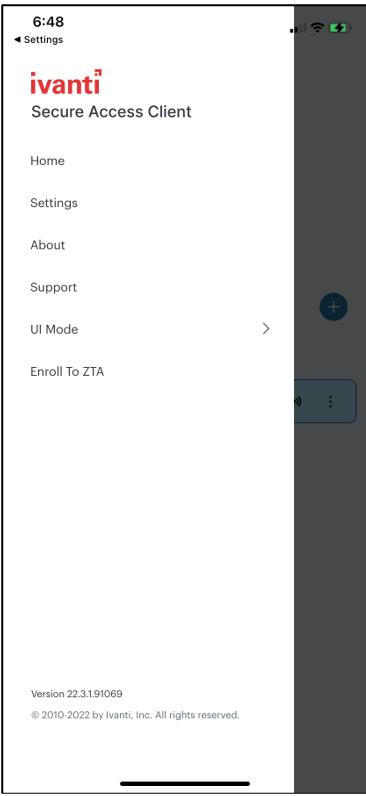
In the main app menu, select Enroll To ZTA:
The Ivanti Secure Access Client
app menu
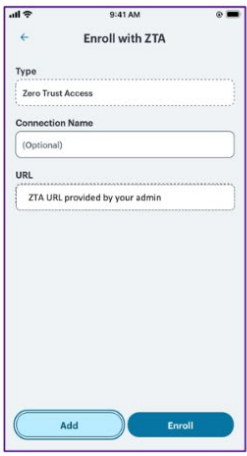
The Enroll with ZTA screen appears.
The network type auto populates as Zero Trust Access. For Connection Name, specify a descriptive name for this connection. The name you specify appears in the Ivanti
Secure Access Client interface.
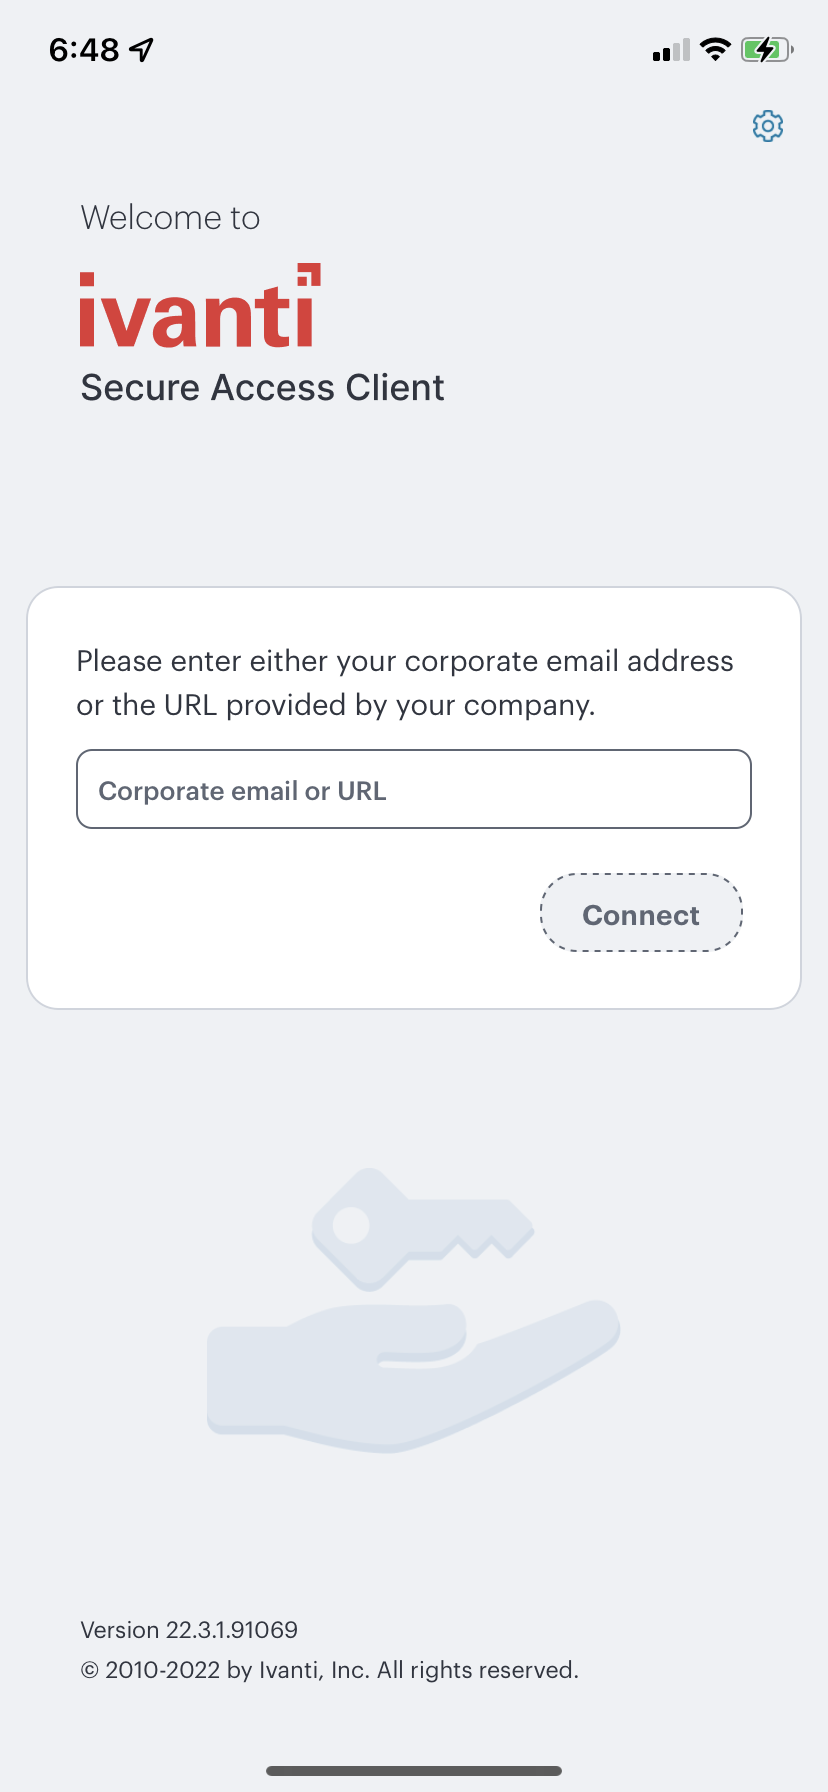
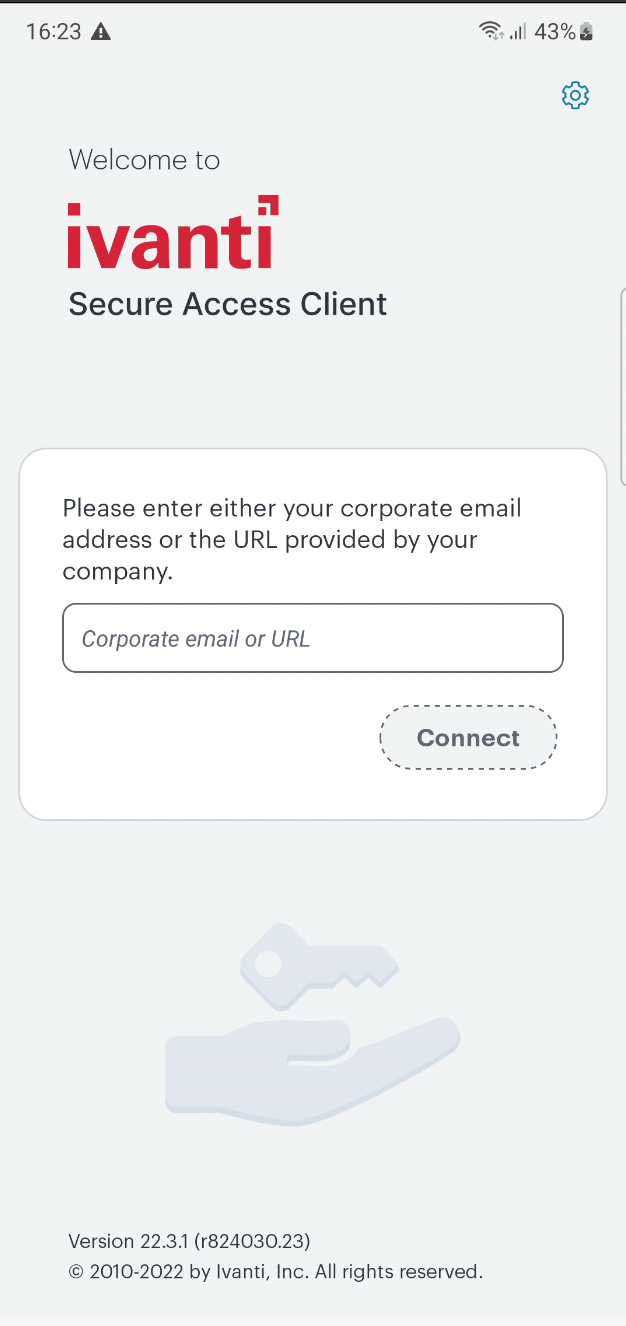
For URL, specify the network that you want to connect to. Enter the nZTA controller URL as provided by the administrator.
Enter sign-in URL
Click Add to save your new connection and the connection displays in the Home page. Click Enroll to
add the connection and initiate a connection to the network.
For both of the previous iOS device
procedures, continue with the following steps:
Perform any required authentication for enrolling. (Local or
Azure AD credentials)
The Connections screen appears.
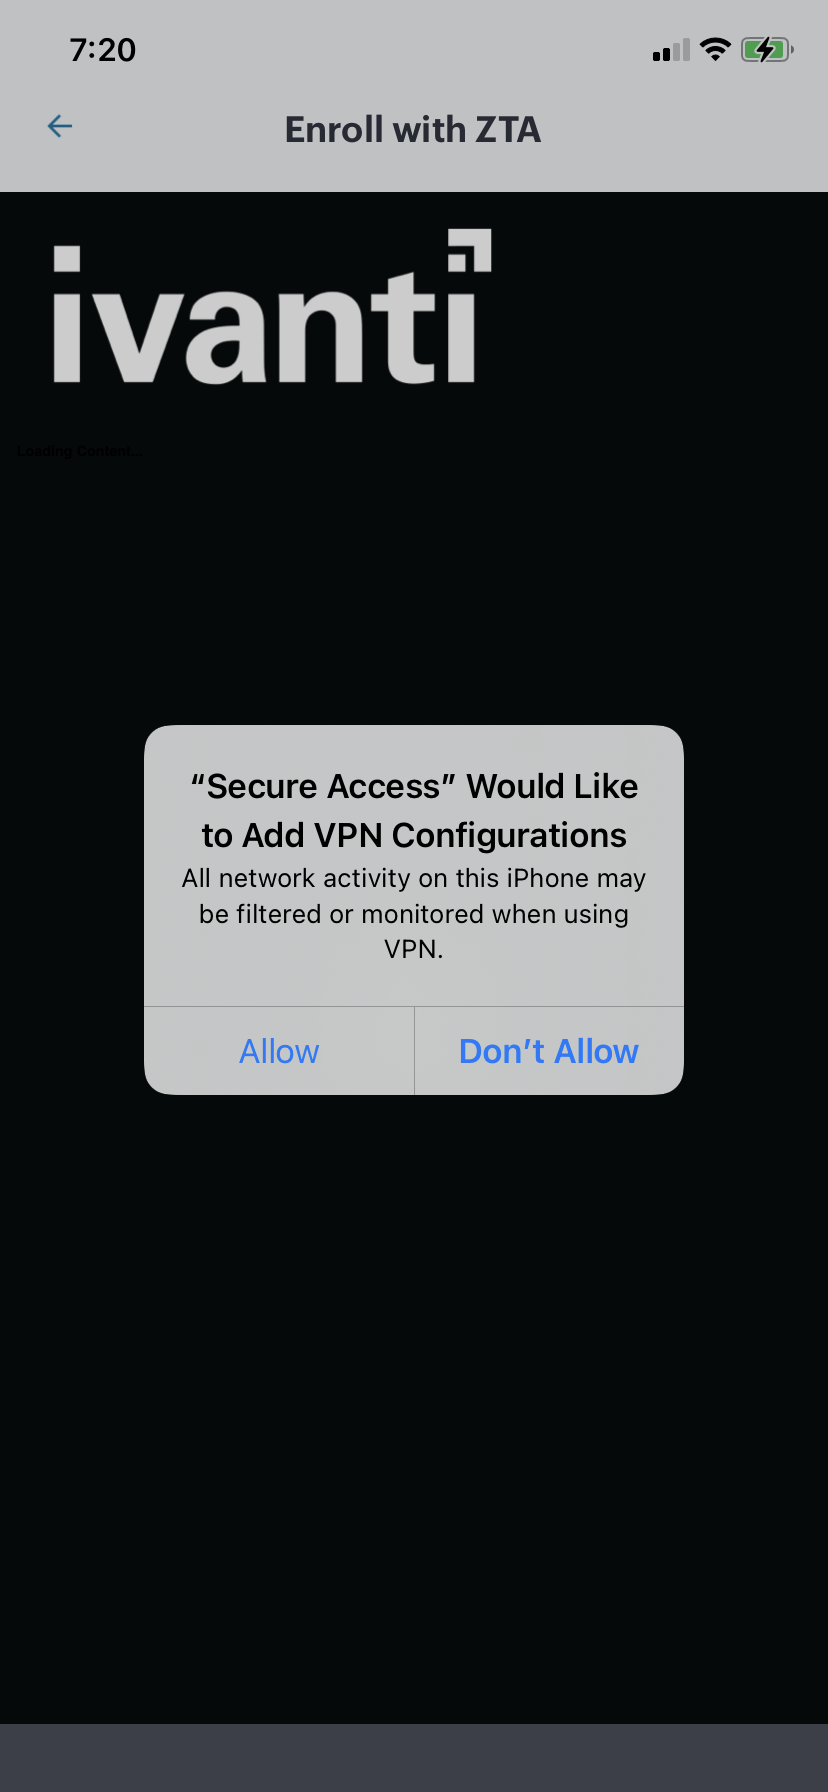
Accept any request to download a VPN configuration from the
Controller. For example:
Adding VPN Configuration
After the nZTA profile is added to your Client
configuration, the compliance of the device is checked. Then, session
information is gathered and a VPN tunnel to the Controller is
created automatically. This is indicated in the iOS status bar.
The Connections screen shows the active
Controller connection:
iOS Active nZTA
Connection
To learn more about how Ivanti Secure Access Client
maintains a connection with the Controller, and how user
sessions are validated with your nZTA Gateways, see Introduction.
(Optional) If your sign-in authentication policy is configured
for Multi-Factor Authentication, you might be required to complete a
TOTP (Time-based One Time Password) secondary authentication step each
time you sign in.
For a first time login, the user is presented with a TOTP
registration page:
First-time sign in TOTP
registration
Use this page to add your user details to an authenticator app on
your device, such as Google Authenticator or Microsoft Authenticator. If
you do not yet have such a two-factor authenticator app installed, do
that now.
Scan the QR code, or enter the provided text, to add the user details
to your authenticator app. Then, store the generated backup codes in a
secure location for future retrieval of a lost account.
Finally, enter the token code generated by the authenticator app into
the box provided, then tap Sign In.
For future sign-in attempts, the TOTP challenge dialog appears
without the registration details or backup codes. As before, you provide
the generated token code from your authenticator app into the box
provided and select Sign In.
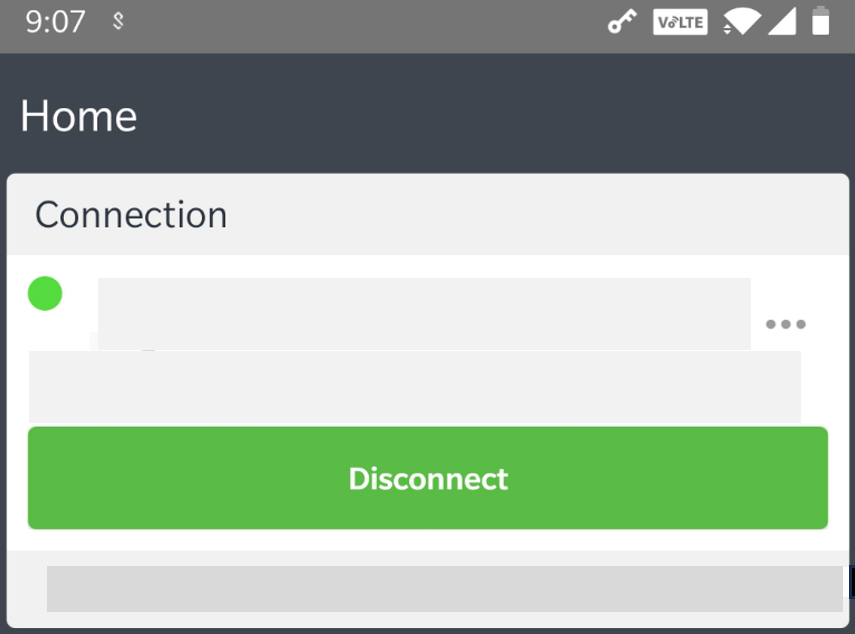
(Optional) Tap the Disconnect button to manually
disable the nZTA connection. This facility overrides the
on-demand connection feature and prevents Ivanti Secure Access
Client from connecting to the Controller or any nZTA
Gateways. By tapping this button, your nZTA-protected
applications become inaccessible until the connection is restored. For
more details, see Disabling the nZTA Connection.
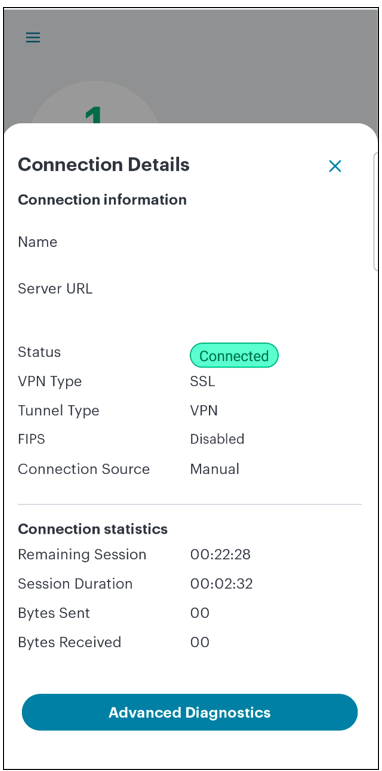
(Optional) Tap the connection to view the connectivity status.
For example:
iOS Connectivity Status
To use a supported app, start the app as usual from the iOS
interface, and enter any credentials if requested.
Installing a Beta
Release of the iOS Client
Periodically, Ivanti might make available a pre-release
beta version of Ivanti Secure Access Client for iOS
for limited testing purposes. Beta releases of Ivanti Secure Access
Client for iOS use the TestFlight package, a third-party app that
enables users to download and test pre-GA packages of products. To learn
more about TestFlight, see https://testflight.apple.com/.
Before you start, you must:
Have an iOS sign-in/enrollment URL for nZTA, as provided by
the Ivanti DevOps/Support organization.
Install and register the TestFlight package from the Apple App
Store.
Configure TestFlight to have access to the Ivanti Secure Access
Client app, using information provided by the Ivanti
DevOps/Support organization.
To enroll a beta client on your iOS mobile device:
Locate and start the TestFlight app. For example:
TestFlight App Icon
In the TestFlight app, select the Ivanti Secure Access
Client app and install it. For example:
After the app installs, it is added to the iOS interface. For
example:
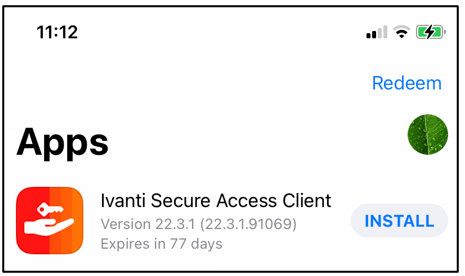
Ivanti Secure Access Client App
Icon
Continue to enroll the device using the standard iOS Client
enrollment procedure. Start the Ivanti Secure Access Client app
and follow the remaining steps.
Enrolling an Android Device
Application discovery and the use of a default Gateway is not
supported from Android devices.
For mobile devices, Ivanti Neurons for Zero Trust Access
compliance requires Android v8.0 or later.
Before you start this process, you must:
Have an Android sign-in URL for nZTA, based on the tenant
FQDN provided by the Ivanti DevOps/Support organization.
(For testing pre-GA/Beta Ivanti Secure Access Client
packages only) Have an invitation email from your Ivanti
representative that describes how to access pre-GA builds of the
Ivanti Secure Access Client app from the Google Play
store.
The procedure to enroll your Android device differs depending on
whether you have an existing Ivanti Secure Access Client app
installed and configured with a connection to a classic VPN product.
To enroll an Android device that has a previous connection to a
classic VPN product:
Start your Android device and access its home page.
Locate and start the Ivanti Secure Access Client
app.
In the main app menu, select Enroll To ZTA:
The Ivanti Secure Access Client
app menu
The Enroll with ZTA screen appears.
The network type auto populates as Zero Trust Access. For Connection Name, specify a descriptive name for this connection. The name you specify appears in the Ivanti
Secure Access Client interface.
For URL, specify the network that you want to connect to. Enter the nZTA controller URL as provided by the administrator.
Enter sign-in URL
Click Add to save your new connection and the connection displays in the Home page. Click Enroll to
add the connection and initiate a connection to the network.
To enroll an Android device with no previous Ivanti Secure Access
Client installation:
Start your Android device and access its home page.
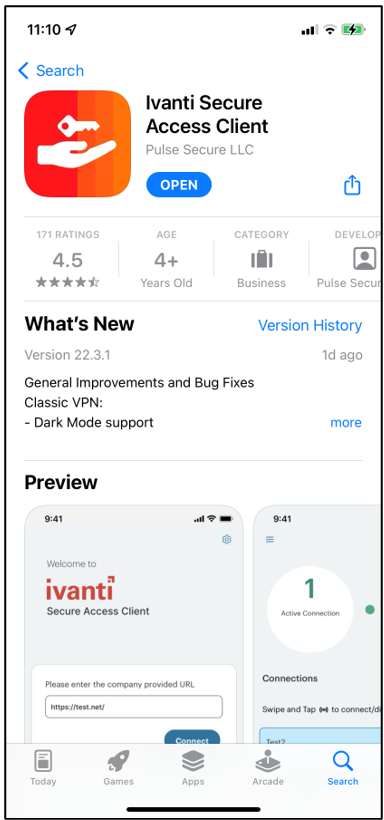
Locate the Ivanti Secure Access Client app in the Google
Play store and install it.
If you are testing pre-GA/Beta builds of Ivanti Secure Access
Client for Android, use the instructions provided in your
invitation email to locate and download applicable pre-GA Ivanti
Secure Access Client app builds in the Google Play store.
After the app installs, it is added to the Android interface. For
example:
_For both of the previous Android device
procedures, continue with the following steps:
Perform any required authentication for enrolling. (Local or
Azure AD credentials)
When using Azure AD authentication during onboarding, if you select
"No" at the "Stay Signed In" prompt, you must re-enter your AD
credentials whenever the login page prompts. To avoid this, make sure
you select Yes at the Stay Signed In page.
The compliance of the device is checked, session information is
gathered, and a VPN tunnel to the Controller is created
automatically. This is indicated by a key icon and a Ivanti Secure
Access Client icon.
The Connections screen shows the active
Controller connection:
Android Active nZTA
Connection
To learn more about how Ivanti Secure Access Client
maintains a connection with the Controller, and how user
sessions are validated with your nZTA Gateways, see Introduction.
(Optional) If your sign-in authentication policy is configured
for Multi-Factor Authentication, you might be required to complete a
TOTP (Time-based One Time Password) secondary authentication step each
time you sign in.
For a first time login, the user is presented with a TOTP
registration page:
First-time sign in TOTP
registration
Use this page to add your user details to an authenticator app on
your device, such as Google Authenticator or Microsoft Authenticator. If
you do not yet have such a two-factor authenticator app installed, do
that now.
Scan the QR code, or enter the provided text, to add the user details
to your authenticator app. Then, store the generated backup codes in a
secure location for future retrieval of a lost account.
Finally, enter the token code generated by the authenticator app into
the box provided, then tap Sign In.
For future sign-in attempts, the TOTP challenge dialog appears
without the registration details or backup codes. As before, you provide
the generated token code from your authenticator app into the box
provided and select Sign In.
(Optional) Tap the Disconnect button to manually
disable the nZTA connection. This facility overrides the
on-demand connection feature and prevents Ivanti Secure Access
Client from connecting to the Controller or any nZTA
Gateways. By tapping this button, your nZTA-protected
applications become inaccessible until the connection is restored. For
more details, see Disabling the nZTA Connection.
(Optional) Tap the connection to view the connectivity status.
For example:
Android Connectivity Status
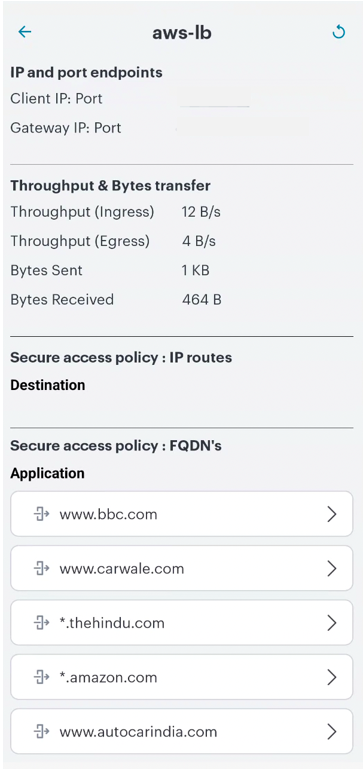
(Optional) Tap the page to view the Gateway Status. For
example:
Android Gateway Status
(Optional) Tap the left arrow to return to the
Connections screen.
To use a supported app, start the app as usual from the Android
interface, and enter any credentials if requested.