Working with Device Location
This section describes the device location functionality in Pulse Workspace.
Overview of Device Location
Pulse Workspace supports the admin ability to locate a device.
- Device location requires iOS v10 or later, or Android 8.0 or later.
- Device location for a mobile device running the Pulse Client in the background requires Android 10 or later, and additional configuration, see Configuring Device Location.
Device location can be enabled by admins and configured for use through policies applied to devices. Pulse Workspace uses an Apple/Google push service to send a notification to the Pulse Client App which is installed on a device. The Pulse Client then uses location services to locate the device and notify Pulse Workspace.
The most-recently retrieved device location is displayed in a map in the workspace details on the Devices tab. For example:

- For iOS devices, the requested accuracy of the device’s location is indicated by a circle.
- For Android devices, the calculated accuracy of the device’s location is indicated by a circle.
The location is updated whenever a locate request is manually issued from the Actions pull-down menu.
By default, the Leaflet browser map plug-in is used. If you have a Google API key, you can optionally use a Google Maps browser plug-in to display the map, see Creating a Google API Key.
Creating a Google API Key
- The activities described in this section are optional, and apply to both iOS and Android devices.
- Device location requires iOS v10 or later, or Android 8.0 or later.
The device location feature uses an embedded map on the Devices tab.
By default, the Leaflet map browser plug-in is used. If you have a Google API key, you can optionally use a Google Maps browser plug-in to display the map.
Perform the following to create a Google API key.
Enabling the Maps JavaScript API
Before you can create a Google API key for Google Maps, you must enable the Google Maps JavaScript API.
To enable the Google Maps JavaScript API:
1.Access the Google Cloud Platform website https://cloud.google.com from your browser.
2.Register for a Google Cloud Platform account, including your billing details.
3.Access the Dashboard tab for your account. For example:
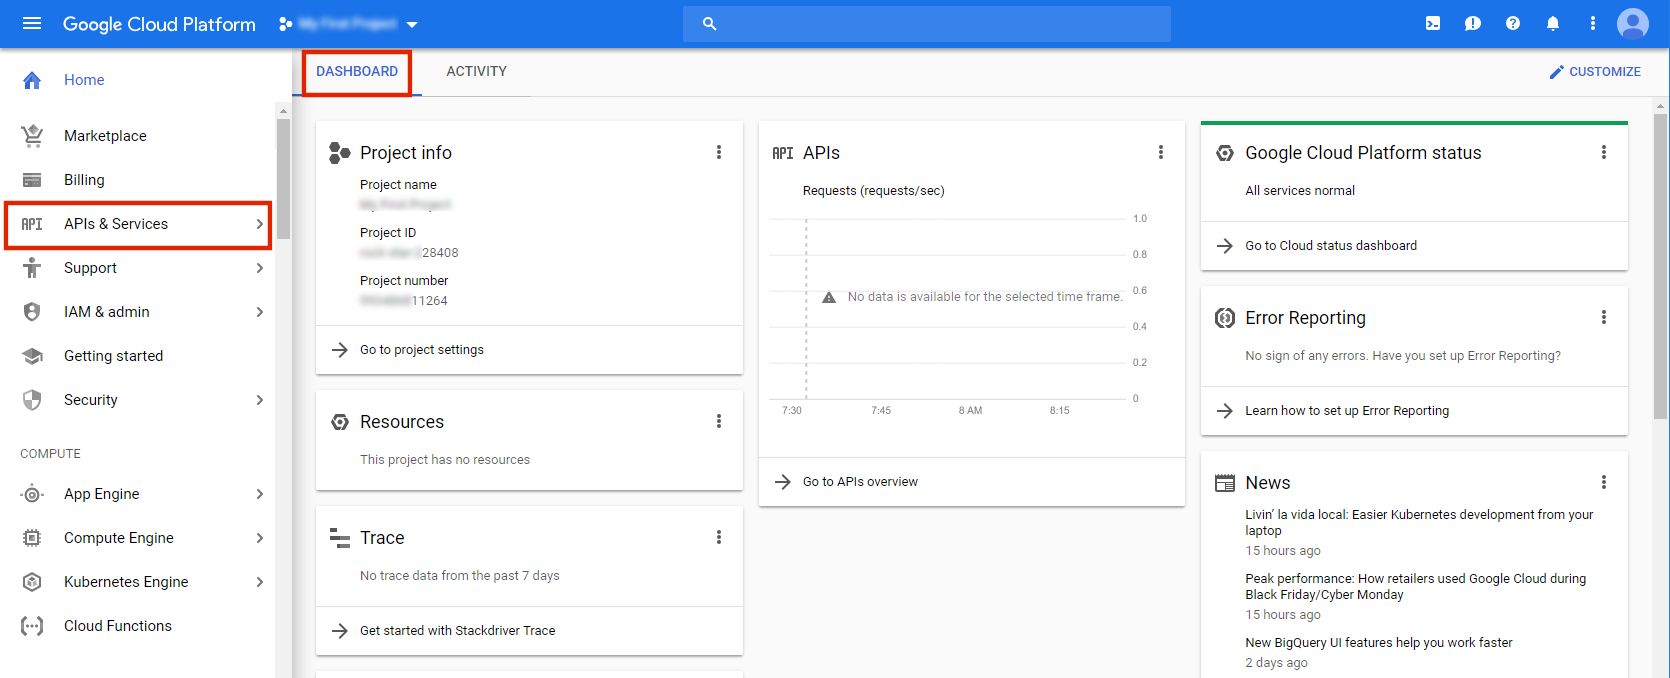
4.In the left menu, click APIs & Services and then click Dashboard.
The APIs & Services Dashboard appears. For example:
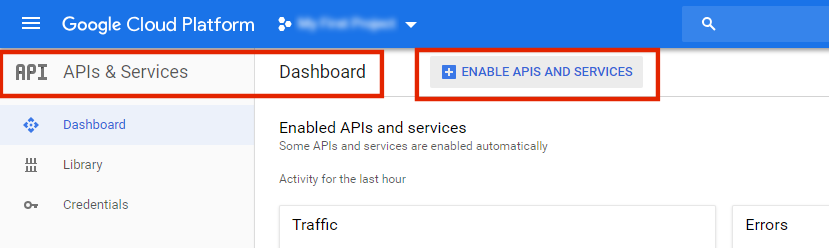
5.Click Enable APIs and Services.
The API Library page appears. For example:
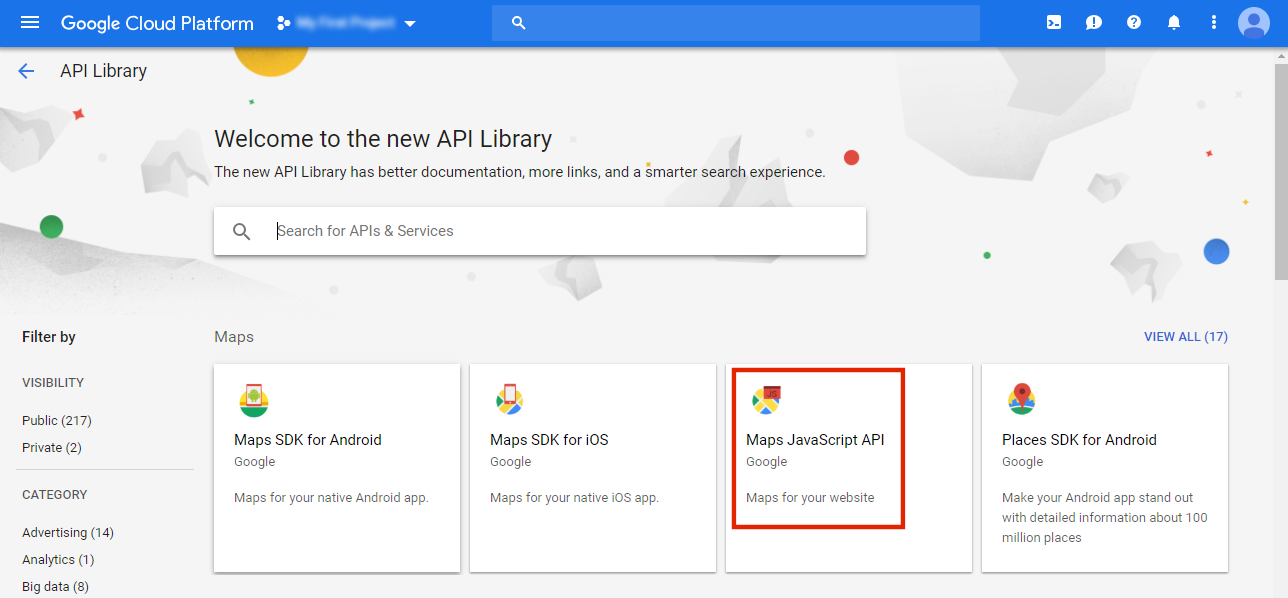
6.Under Maps, click Maps JavaScript API.
The Maps JavaScript API page appears.
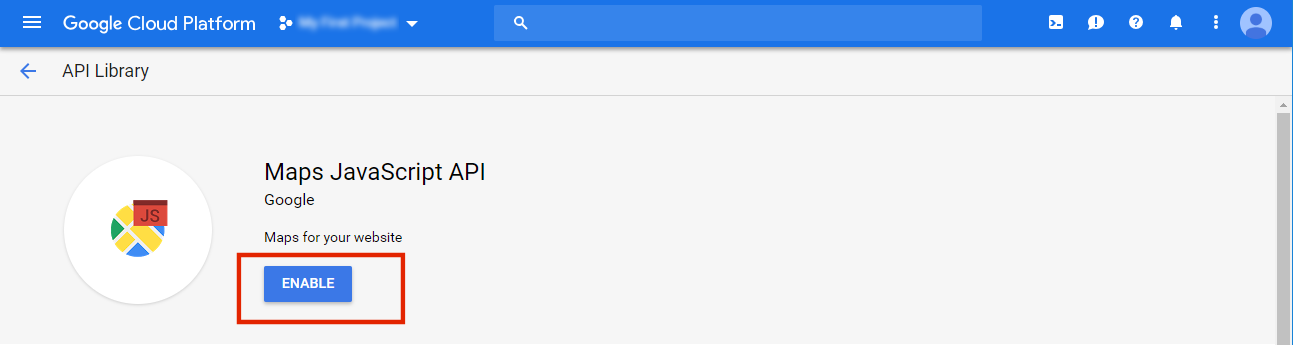
7.Click Enable.
The Maps JavaScript API page updates.

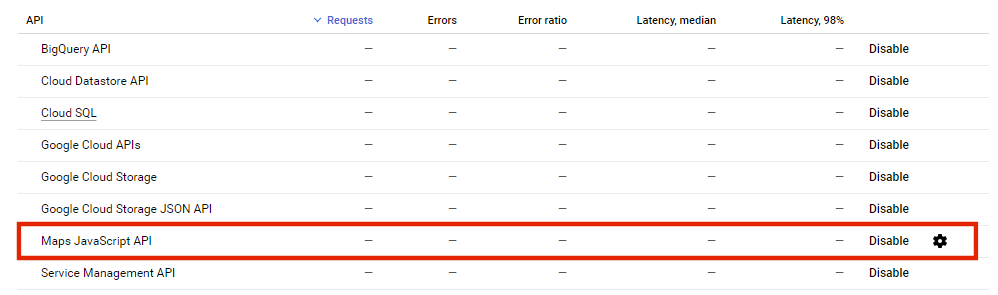
8.Return to the APIs & Services Dashboard and view the list of APIs.
The list now includes Maps JavaScript API. For example:
After you have enabled the Maps JavaScript API, you can create/select the required Google Cloud Platform project, see Creating a Google Cloud Project.
Creating a Google Cloud Project
Before you can create a Google API key for the required Google Cloud Platform project, you must create and access the required project.
To create a Google Cloud project:
1.Access the Google Cloud Platform website (https://cloud.google.com) in your browser.
2.Log into your account.
3.Access the Dashboard tab for your account.
4.Click the down arrow next to your current project name. For example:

The Select from dialog appears. For example:
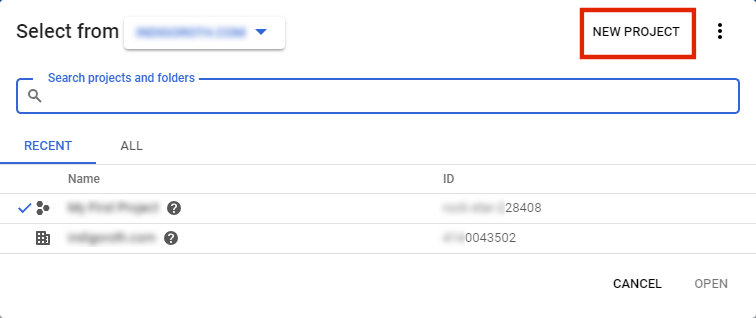
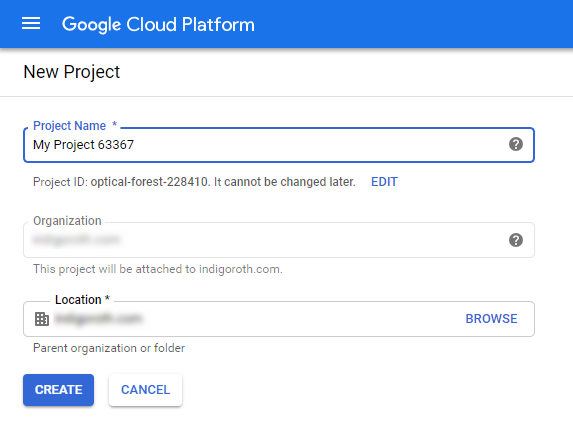
5.(Optional) Click New Project, complete the New Project page for your required project and click Create. For example:
6.In the Select From dialog, select the required project and click Open.
7.The selected project appears in your Google Cloud Platform dashboard.
After you have opened the required project in your dashboard, you can generate the Google API key for the project, see Generating a Google API Key for a Project.
Generating a Google API Key for a Project
After you have enabled the Google Maps JavaScript API and opened the required Google Cloud Platform project, you can create the Google API key for the project.
To create a Google API key:
1.Access the Dashboard tab for your Google Cloud Platform account.
2.In the left menu, click APIs & Services and then click Credentials.
The APIs & Services Credentials page appears. For example:
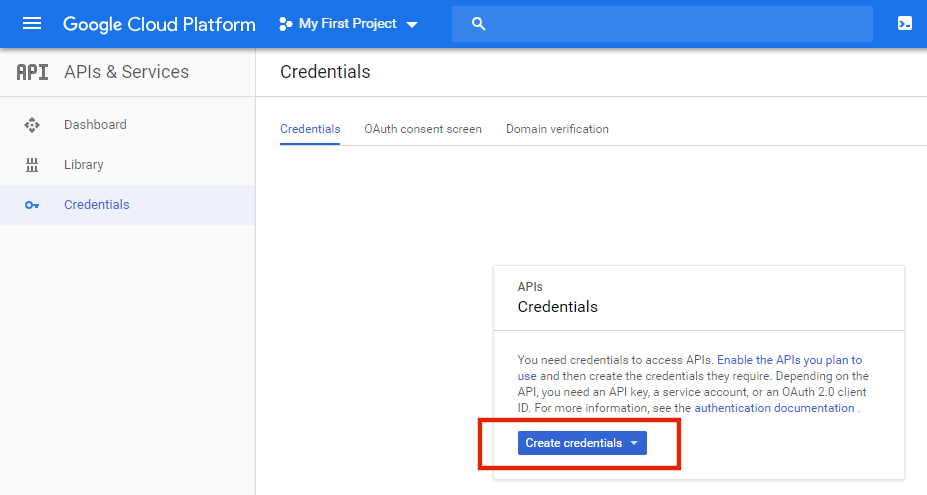
In this example, there are no existing API keys in the current project.
3.Click the Create credentials pull-down menu and then select API Key.
The API key created dialog appears. For example:
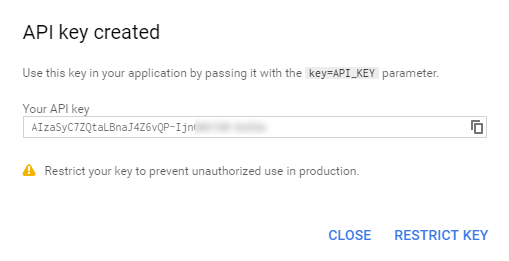
4.(Optional) Record Your API key and click Close.
You can click Copy (![]() ) to put the key into your browser clipboard for recording purposes.
) to put the key into your browser clipboard for recording purposes.
5.(Optional) To restrict your API key to prevent unauthorized use and potential quota theft, click Restrict Key.
The API key page appears. For example:
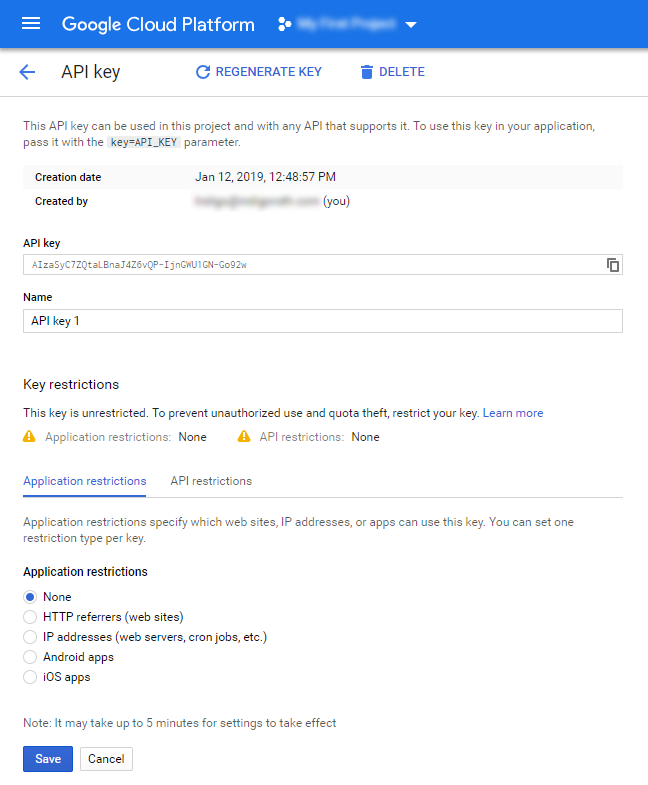
On this page, you can optionally perform any of the following:
•Specify a different Name for the API key.
•Click Copy (![]() ) to put the key into your browser clipboard for recording purposes.
) to put the key into your browser clipboard for recording purposes.
•Limit the use of the API at the application level by selecting the Application restrictions tab and specifying any required limitations.
•Limit the APIs that can be called using the key by selecting the API restrictions tab and specifying any required limitations. For example, if you want the API key to only be able to access the Map JavaScript API and no others, you can configure this requirement here.
•Click Regenerate Key to replace the current key, based on current criteria.
•Click Delete to remove the current key and close the dialog.
•Click Save to save the settings and close the dialog.
After you have created your API key, it is listed on the Credentials page. For example:
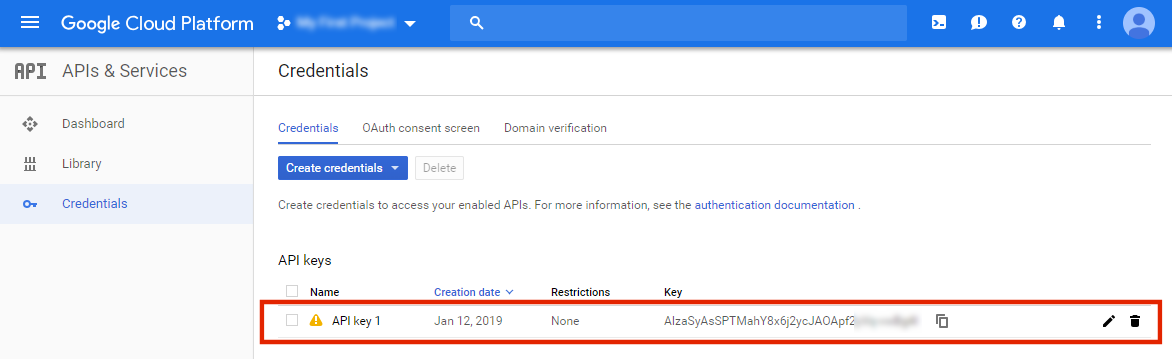
You can then use the API key to enable Pulse Workspace to render device locations using Google Maps, see Configuring Device Location.
Configuring Device Location
Device location requires iOS v10 or later, or Android 8.0 or later.
Configuring Workspace Properties to Enable Device Location
This section describes the configuration required for device location.
For mobile devices running Android 10 or later, the location permission is granular. Foreground and background permission need to be specifically requested. This involves the following properties:
|
Android Version |
Enable Location Service |
Enable Background Location Service |
Result |
|
10 or later |
Yes |
Yes |
Both locations enabled. |
|
No |
Foreground location enabled, background location disabled. |
||
|
No |
Yes |
Both locations disabled. |
|
|
No |
|||
|
<10 |
Yes |
Yes |
Both locations enabled. |
|
No |
|||
|
No |
Yes |
Both locations disabled. |
|
|
No |
To configure Pulse Workspace properties to support device location:
1.Start Pulse One.
2.Click the Settings icon on top-right corner of the page and select Workspace Properties.
The Workspace Properties page appears.
3.Expand the Workspaces group. For example:
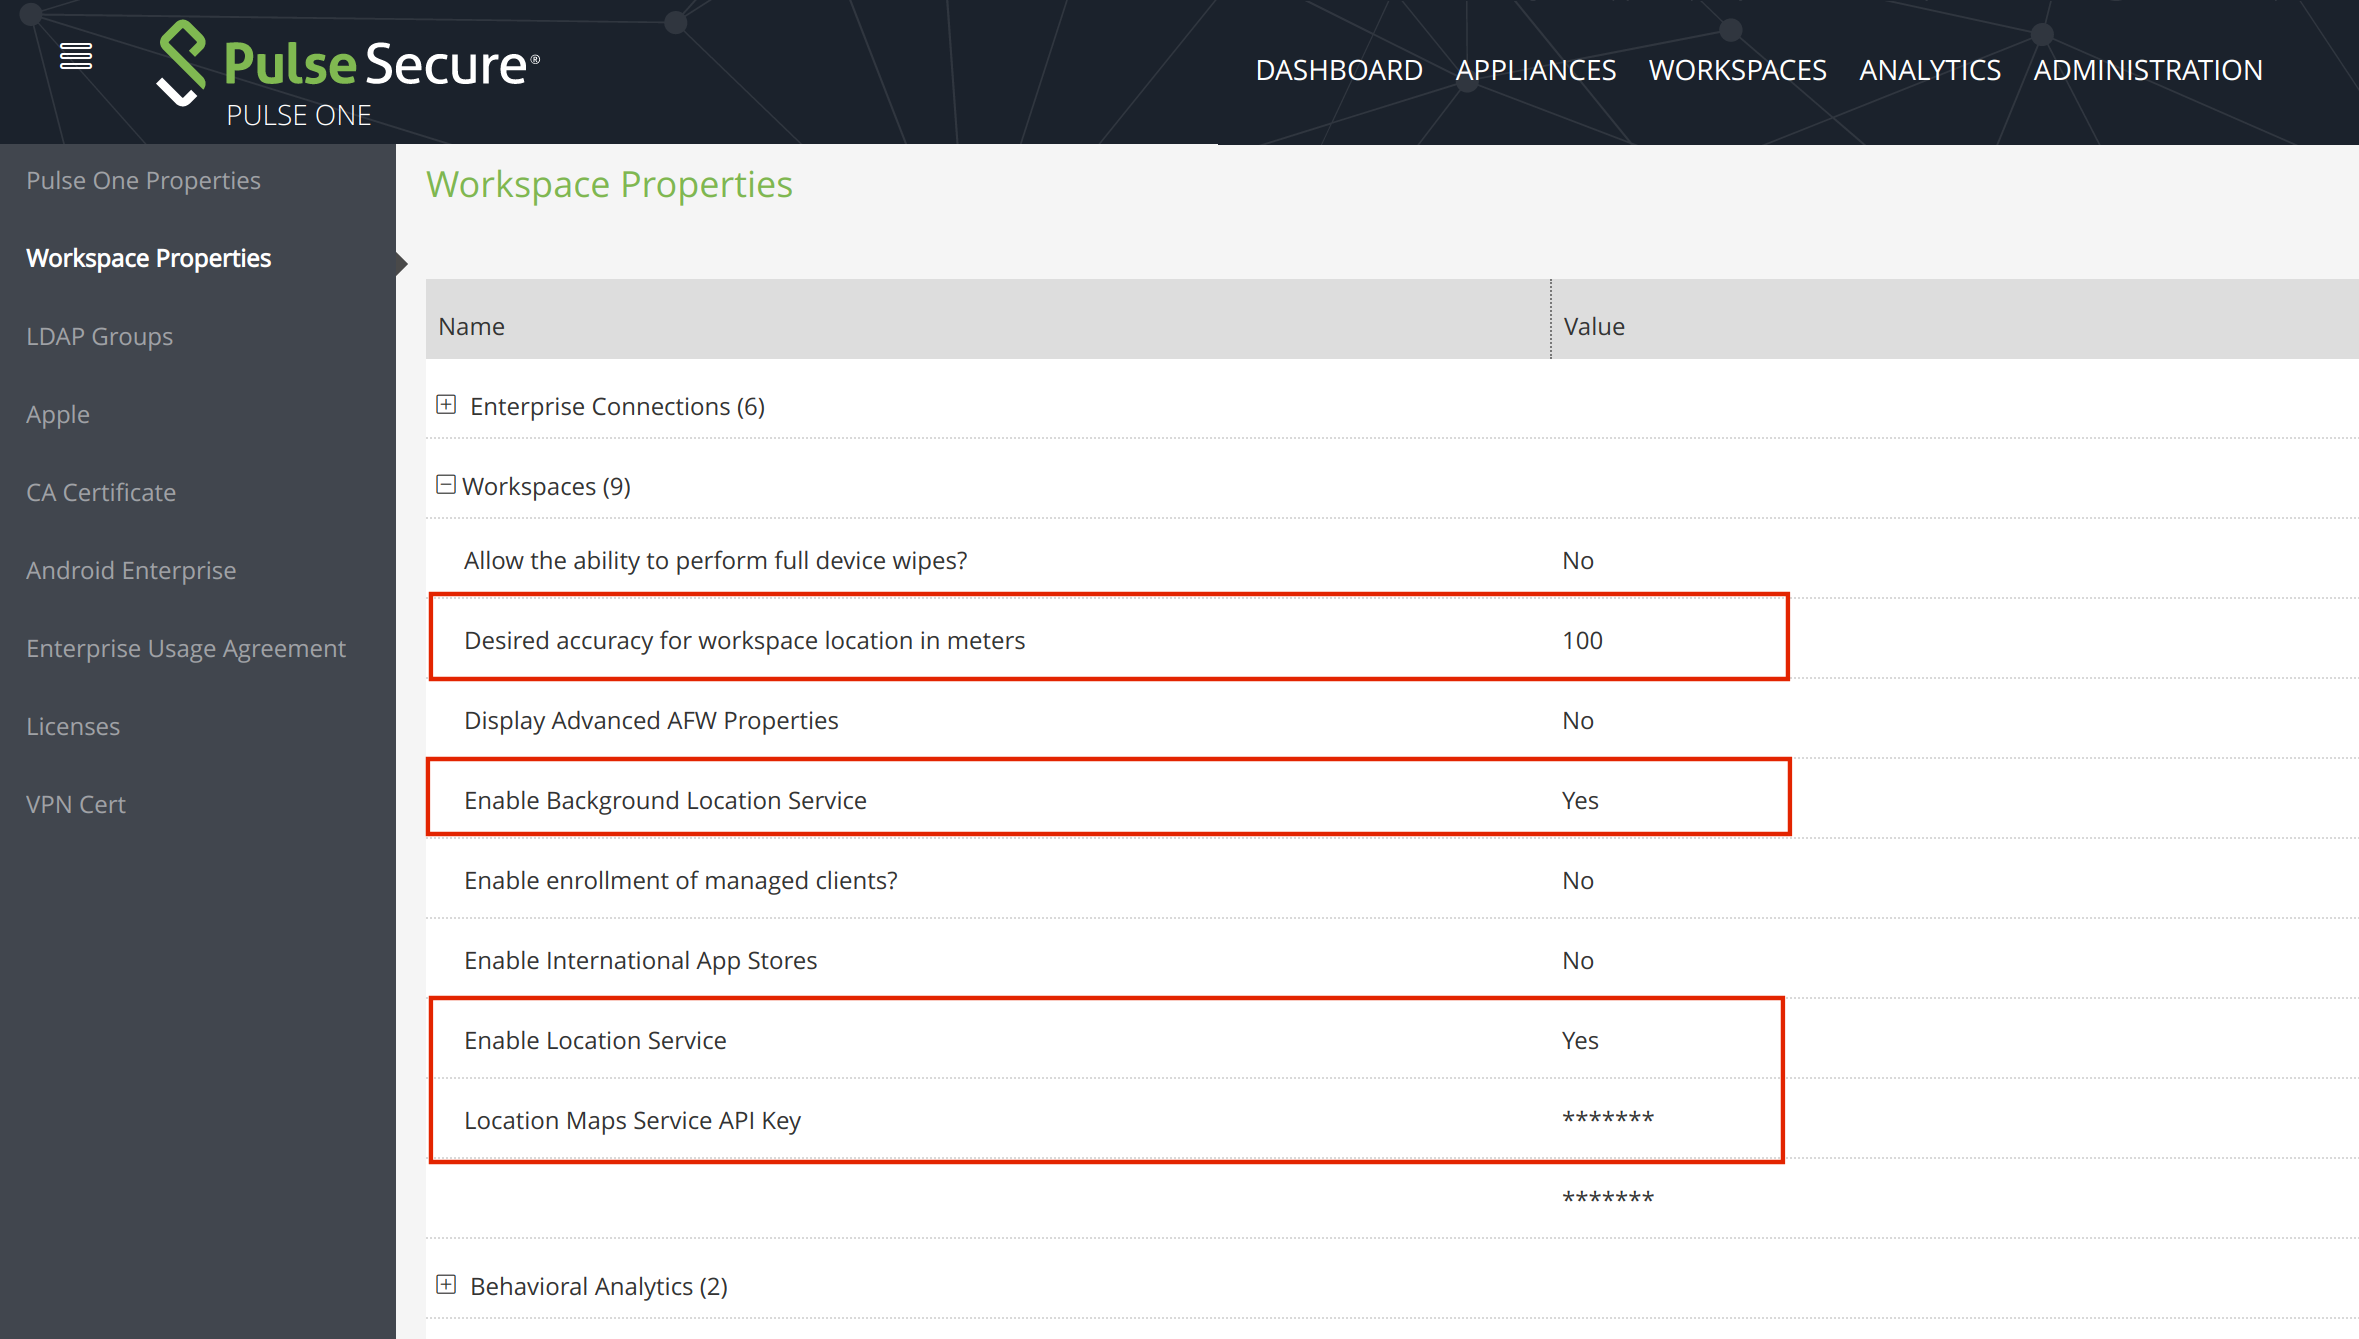
4.Click the Edit button for the Enable Location Service property.
The Edit Property dialog appears.
In this dialog, set Enable Location Service to Yes and then click Save.
This property enables location services generally, so that a mobile device to be located if the Pulse Client is running on the device.
5.(Optional) Click the Edit button for the Enable Background Location Service property. This property enables an Android mobile device (running Android 10 or later) to be located even if the Pulse Client is running in the background.
- This property will be supported on mobile devices running Pulse Client v9.8.x or later, which is scheduled for release in July 2021.
- This property is ignored if the Enable Location Service property is disabled.
6.(Optional) If you have a Google API Key (see Creating a Google API Key, click the Edit button for the Location Maps Service API Key property.
The Edit Property dialog appears.
In this dialog, enter the Location Maps Service API Key and then click Save.
7.For iOS device location, ensure that the Desired accuracy for workspace location in meters workspace property is set to your required accuracy. The default is 100 meters. See Working with Policies and Workspaces.
This property is not used to locate Android devices. The location of Android devices is always the closest location using available network information.
The configuration of workspace properties to enable device location is now complete.
Next, you must configure the policy properties and push the policy to all devices that use it, see Configuring a Policy to Support Device Location.
Configuring a Policy to Support Device Location
After you have configured workspace properties to enable device location, you can request the location of any compatible device. The Pulse Client app on the device will prompt the user for permission to access the Location Service. The user will have the option to allow or deny access.
The following policy properties determine whether refusing the use of this service on a device makes the device non-compliant:
•iOS Pulse Client Denied To Use Location Service
•Android Pulse Client Denied To Use Location Service
For both of these properties, there are three supported compliance settings:
•Allow. If the user declines the location service, the device is flagged as non-compliant, but the user’s access is not restricted.
•Restrict VPN. If the user declines the location service, the device is flagged as non-compliant, but access to the VPN from the device is restricted.
•Wipe. If the user declines the location service, the device is flagged as non-compliant, and the workspace will be wiped from the device.
To set the required Pulse Client Denied To Use Location Service property for a policy:
1.Select the Workspace tab.
2.Select the Policies tab.
3.Select the required policy.
4.Click the Properties tab for the policy.
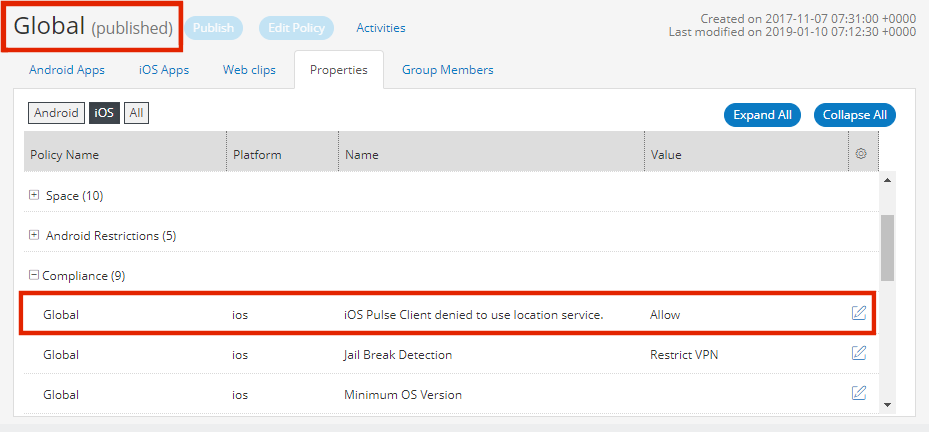
5.Expand the Compliance collection of policies.
6.Locate the required property. That is, either:
•iOS Pulse Client Denied To Use Location Service, or
•Android Pulse Client Denied To Use Location Service
For example:
7.Click the Edit (![]() ) icon for the required property.
) icon for the required property.
8.Make the required changes and click Save.
The policy updates, and indicates that it has been edited. For example:
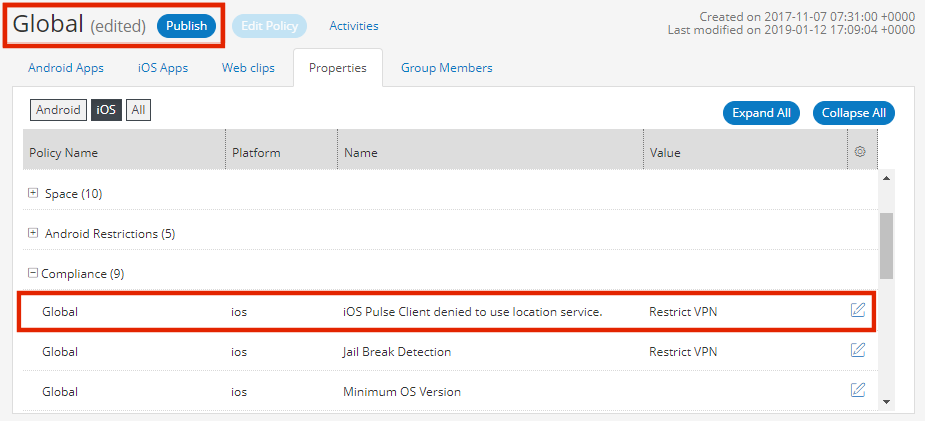
9.Publish the updated policy to implement it on all devices that use the policy.
The configuration of the policy is complete. The feature must then be enabled manually on each device that uses the policy, see Configuring a Device After Device Location is Enabled.
Configuring a Device After Device Location is Enabled
After you have updated a policy to support device location and published the policy to its devices, the Pulse Secure client on each device notifies the user about the device location feature. For example:
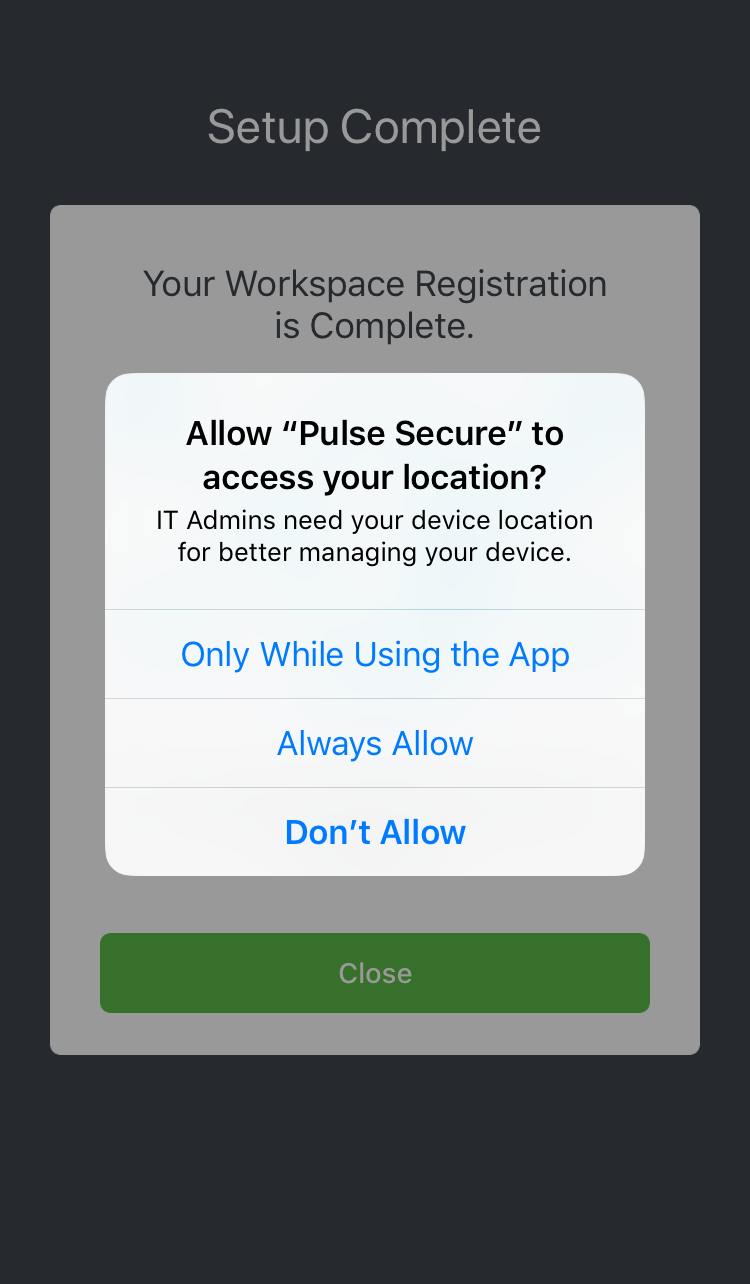
The results of each choice depends on the Android/iOS Pulse Client Denied To Use Location Service policy property, see Configuring a Policy to Support Device Location.
•Always Allow. The location of the device can always be retrieved from the device by Pulse Workspace.
The device is compliant for location policy.
•Only While Using the App. The location of the device can be retrieved by Pulse Workspace while the Pulse Secure client is running on the device.
The device is always non-compliant for location policy.
•Don’t Allow. The location of the device cannot be retrieved by Pulse Workspace.
The device is always non-compliant for location policy.
After a device user has confirmed that they allow the retrieval of their device location, Pulse Workspace can request the device location at any time, see Locating a Device.
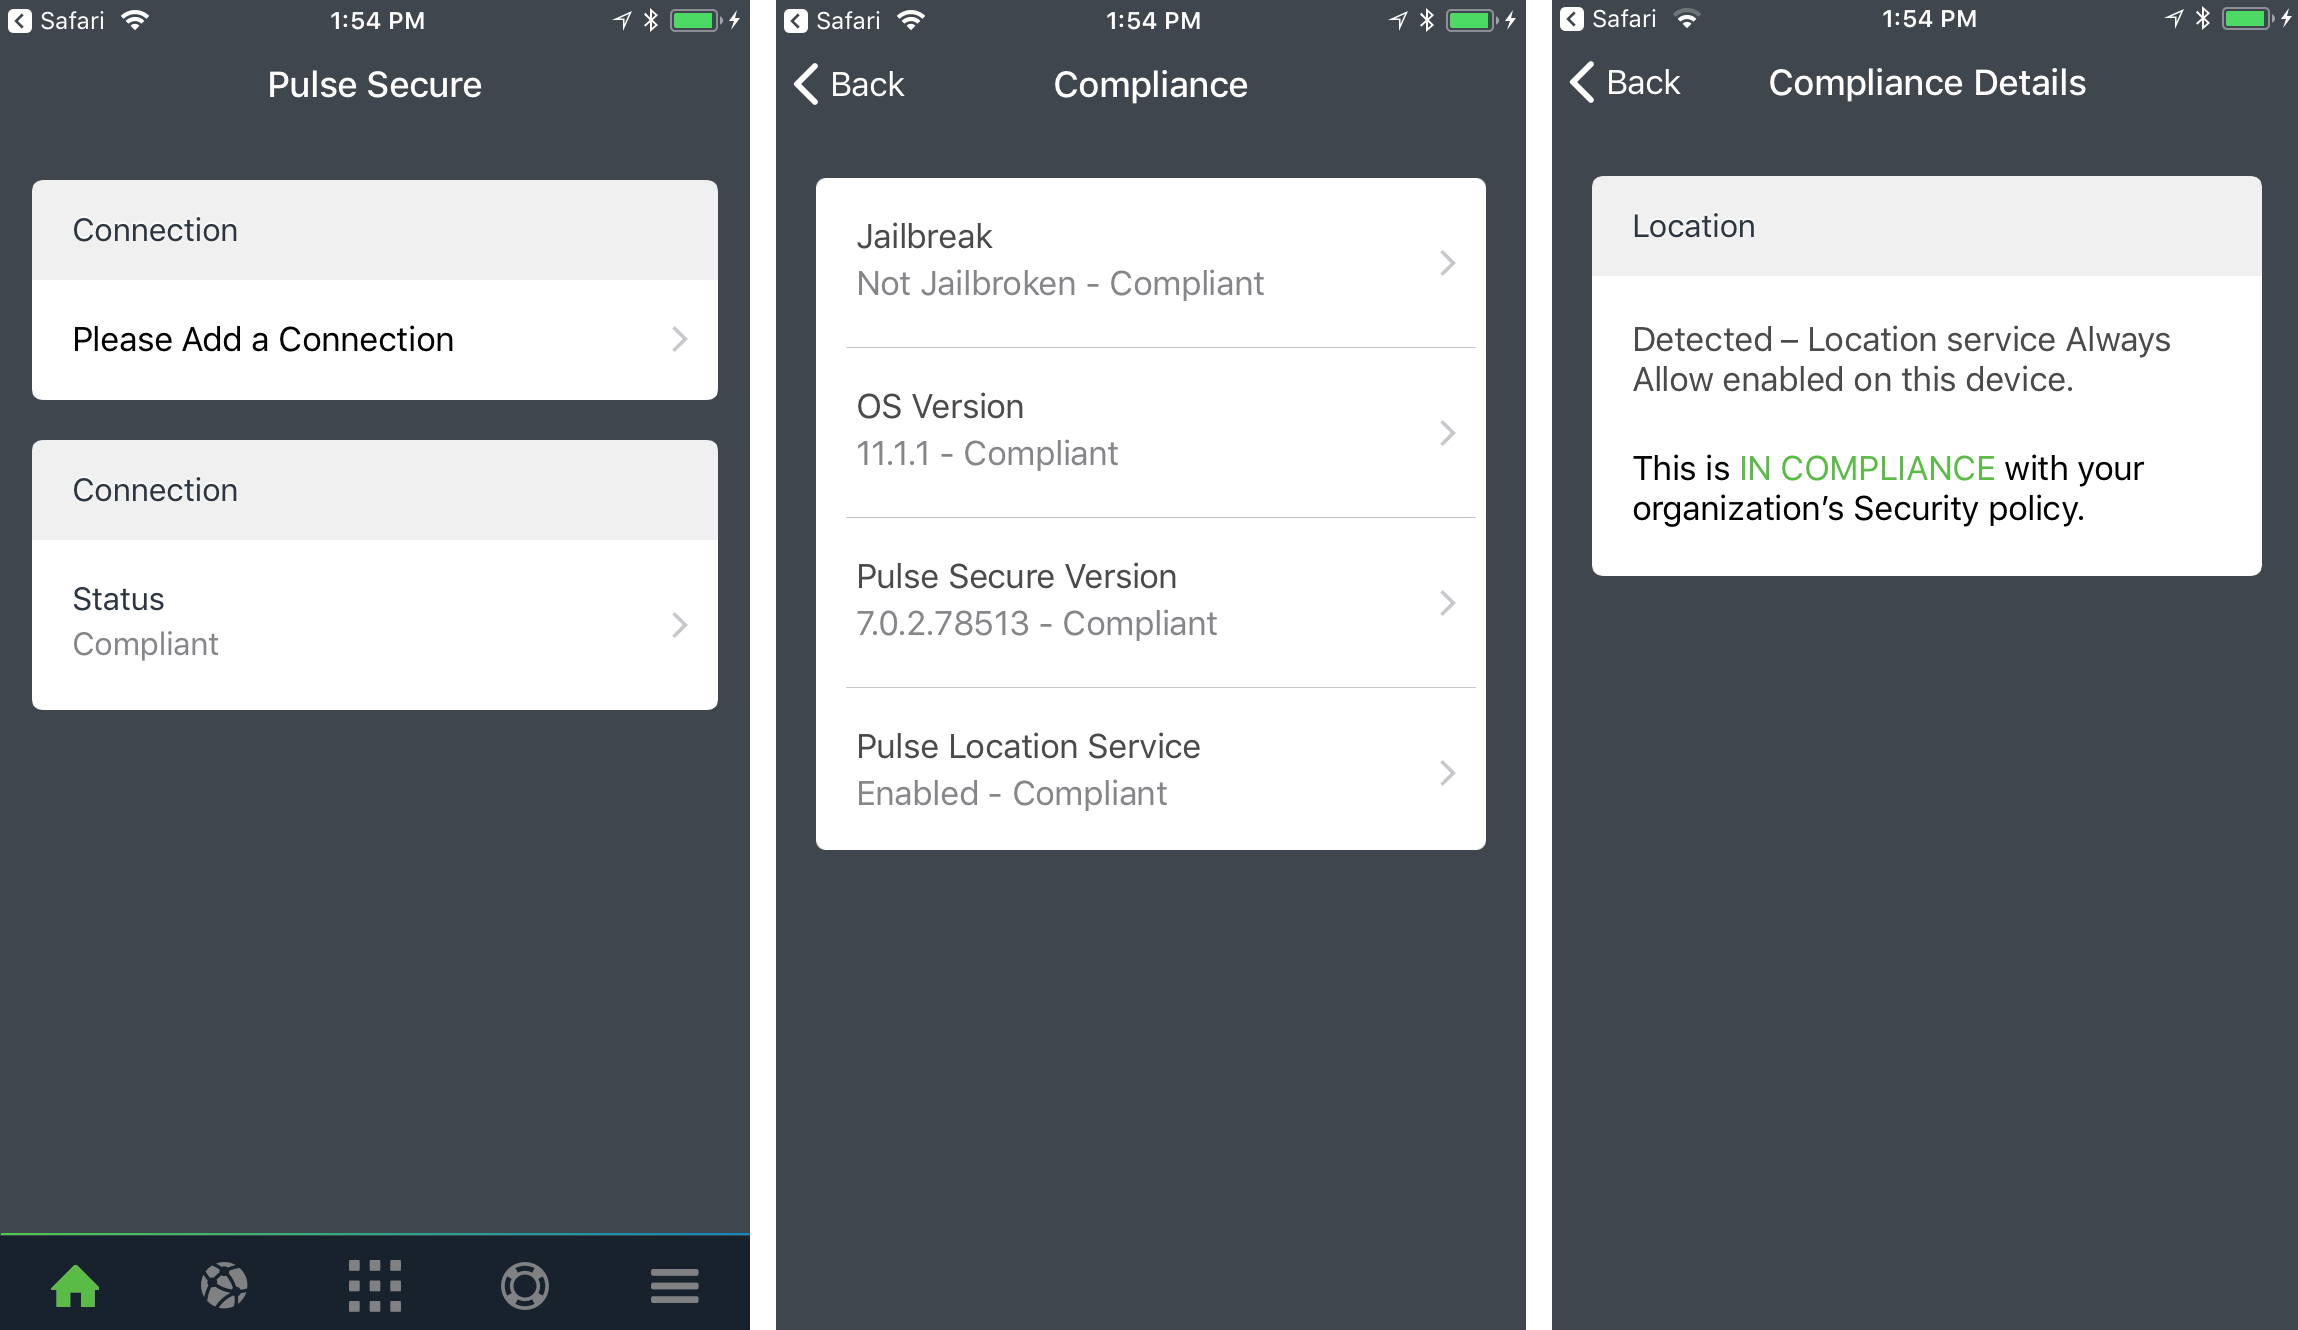
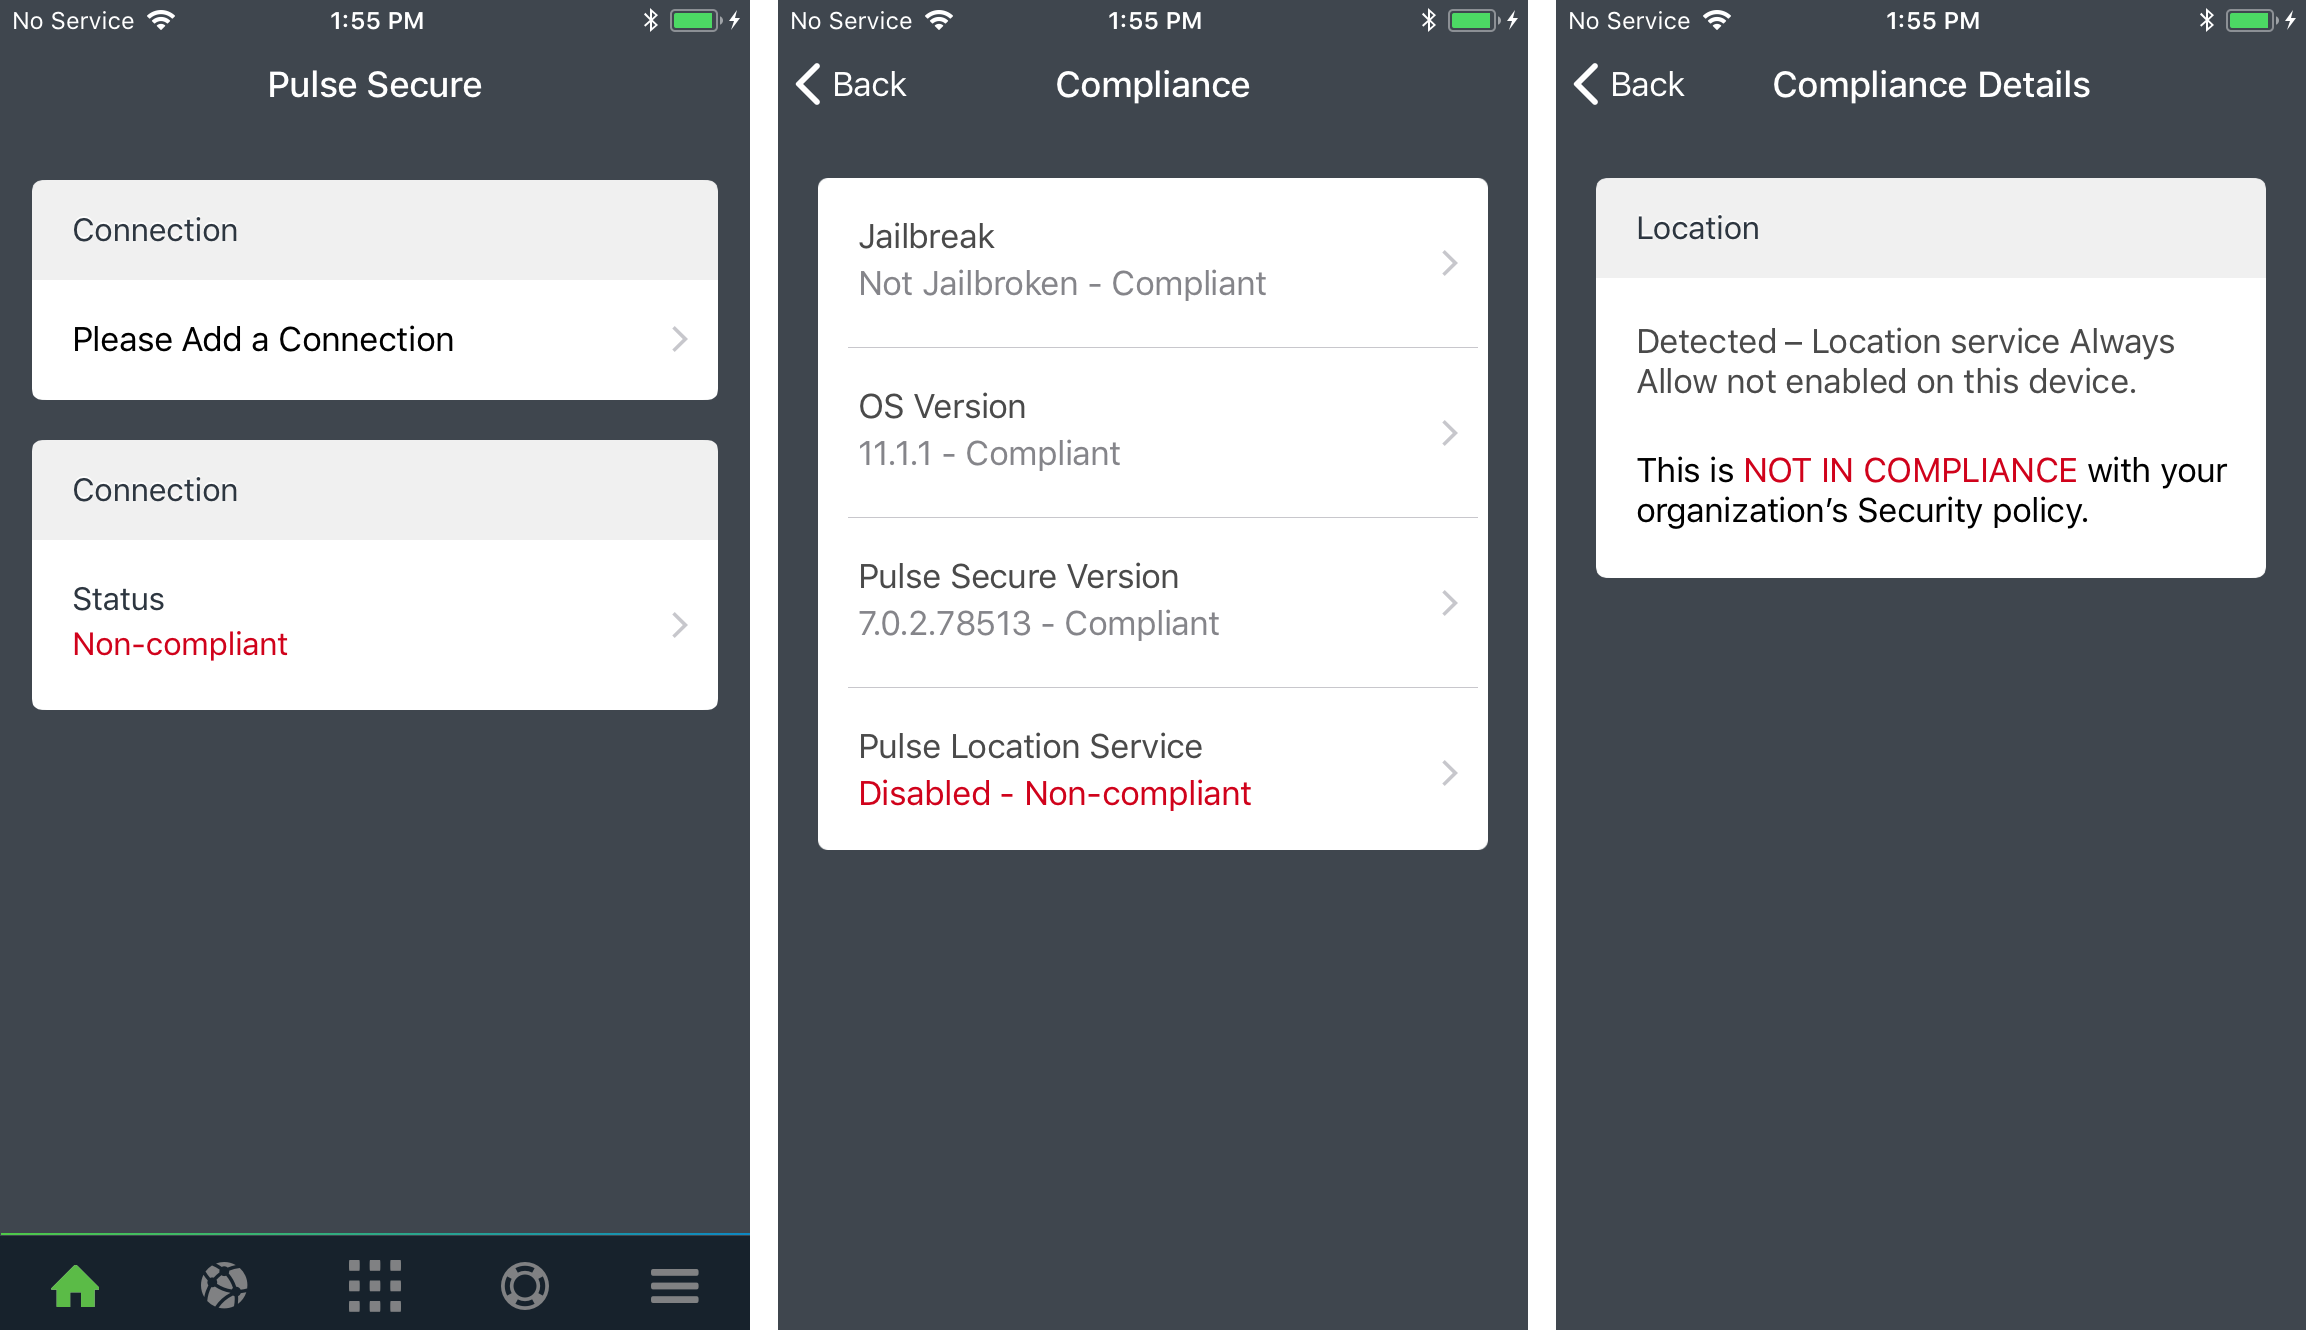
The device location compliance status can be seen from the device:
•A compliant device (in this example, an iOS device) is shown below:
•A non-compliant device (in this example, an iOS device) is shown below:
To enable/disable the Device Location feature:
•For iOS devices, use the Location Services switch in the iOS Privacy Settings for Location Services.
•For Android devices, use the Access to my location switch in the Google > Location settings.
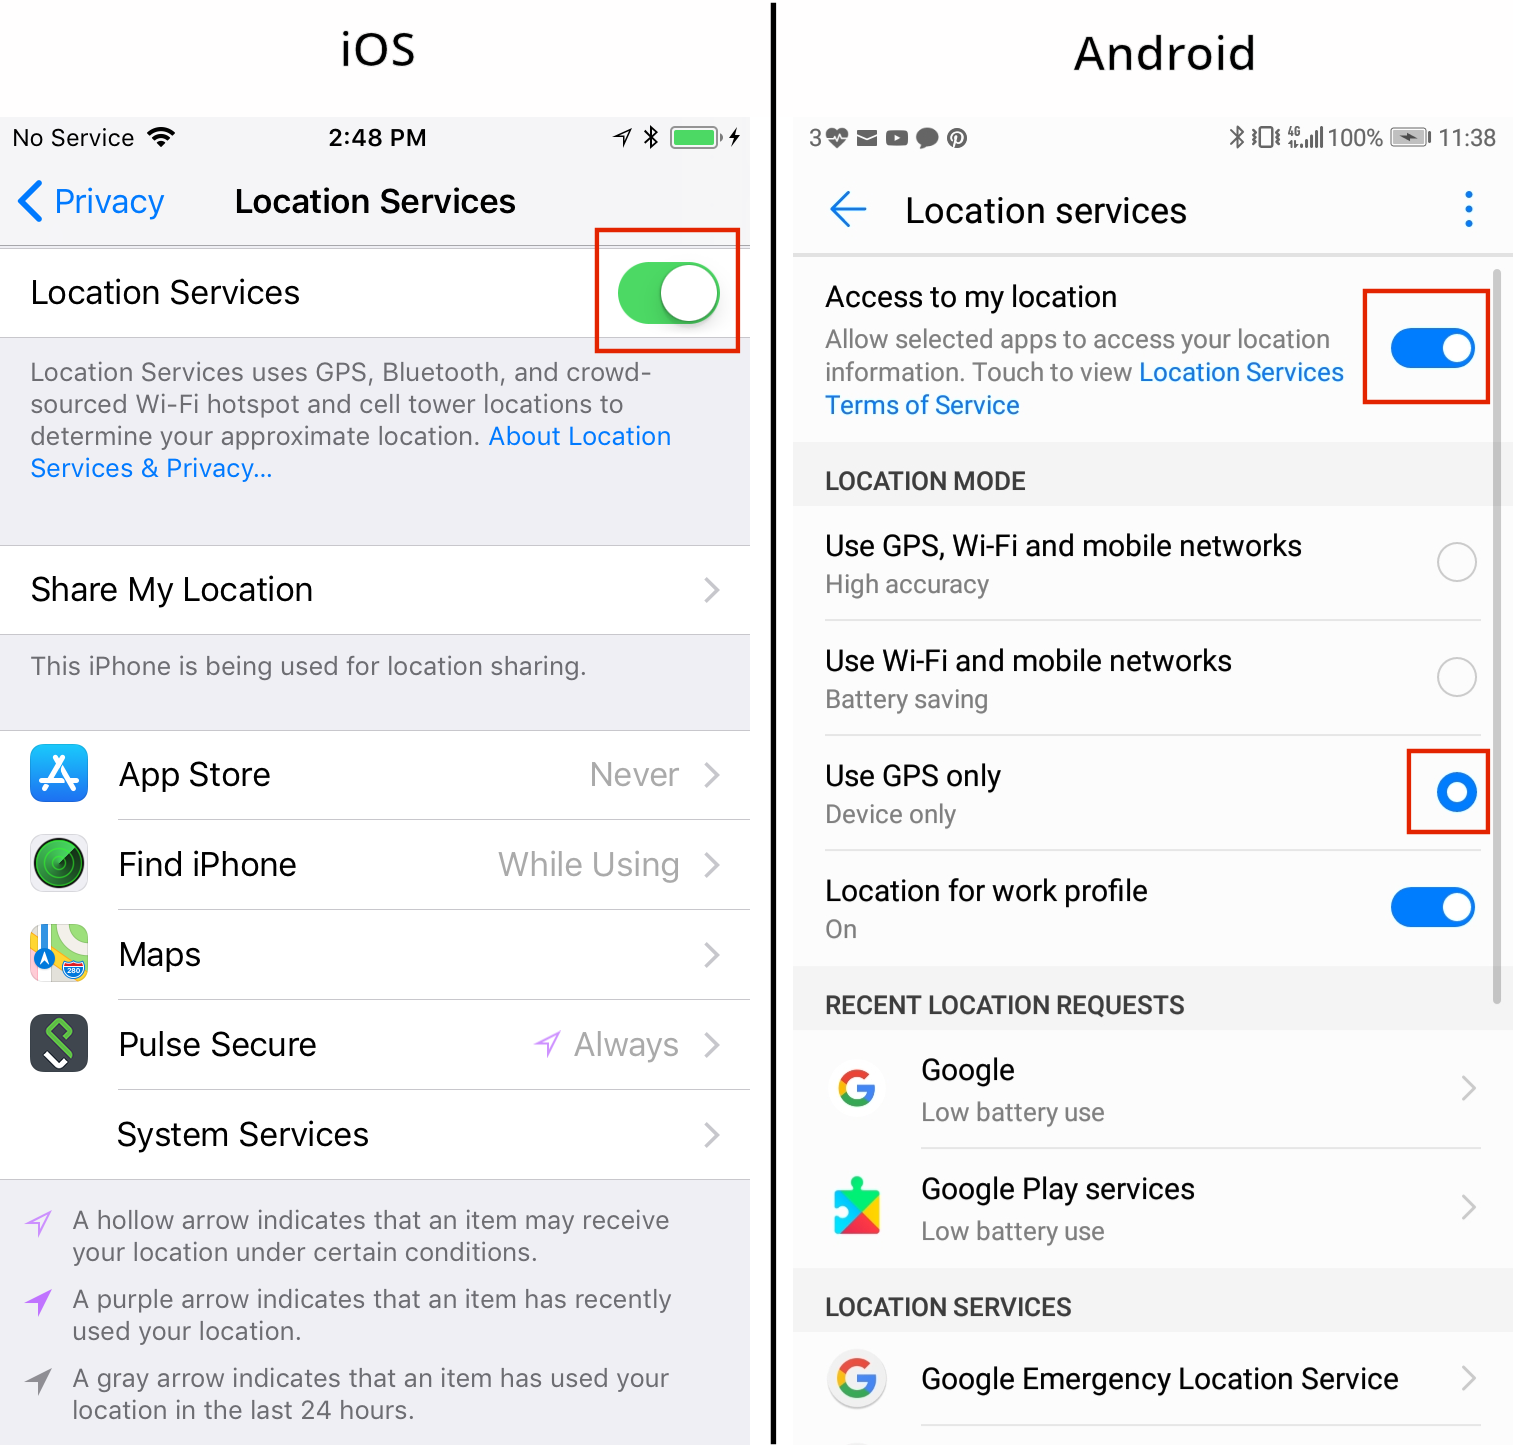
Once location services are enabled, you must also ensure that the location services are set to use GPS or (optionally) GPS with mobile networks. The location of a device cannot be determined using WiFi only. The device will be flagged as non-compliant unless GPS is enabled for device location.
When Location Services is enabled, you can update the current Allow Location Access setting in the Pulse Secure Client App Location Services settings.
Locating a Device
After a device user has confirmed that they allow the retrieval of their device location, Pulse Workspace can request the device location at any time.
Device location requires iOS v10 or later, or Android 8.0 or later.
To retrieve a device location:
1.Log into Pulse Workspace.
2.Select the Workspaces menu.
3.Select the Devices tab.
4.Select the required user and device.
The Workspace Details for the device appears. For example:
![]()
In this example, no device location has yet been retrieved.
5.Click the Actions pull-down menu and select Update Location.
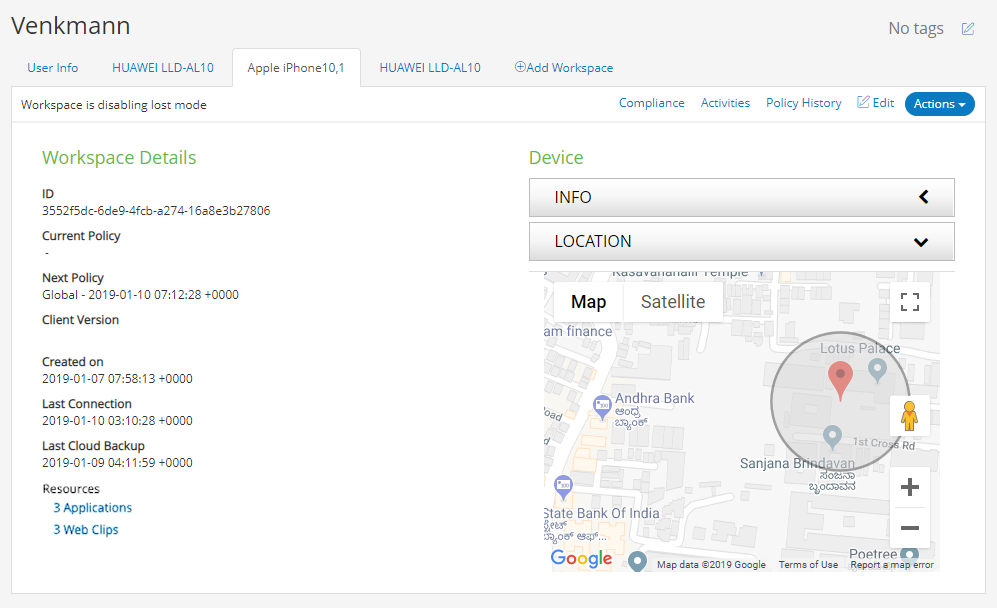
The device location request is sent. After it is retrieved, the device location appears. For example:
Working with Lost Mode for a Device
Lost Mode is only supported on Supervised iOS devices at version 10 or later.
In the event that a mobile device is lost, you can perform the following actions to secure the device and then assist with its recovery:
1.Enable Lost Mode for the device. This locks the device and displays a recovery message on the device.
2.Play a continuous loud tone on the lost device to assist in the search.
3.Request the geographical location of the lost device (where supported) to assist in the search.
After the owner has their device, Lost Mode can be canceled and the device can be used as usual.
To enable Lost Mode for a device:
1.Log into Pulse Workspace.
2.Select the Workspaces menu.
3.Select the Devices tab.
4.Select the required user and device.
The Workspace Details for the device appears.
5.In the Actions pull-down menu for the device, select Lost Mode:
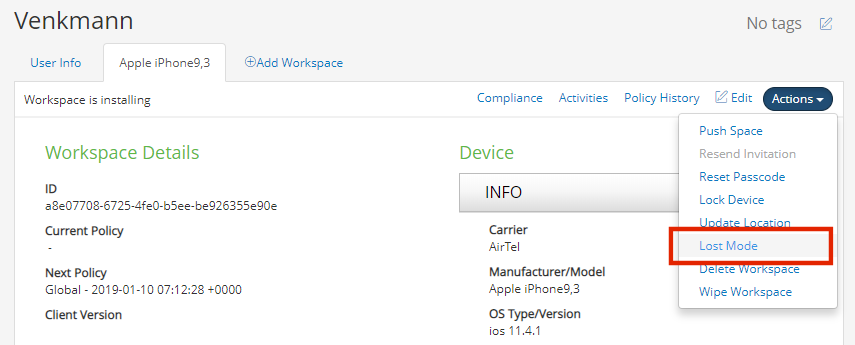
The Lost Mode dialog appears:
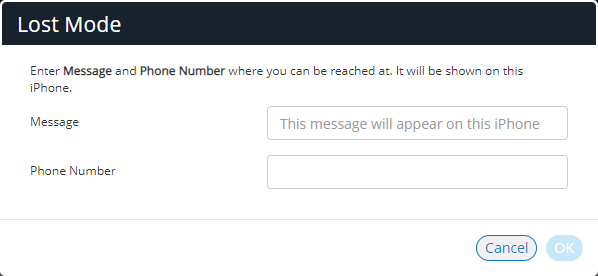
6.Enter a Message and a Phone Number to be displayed on the lost device, and click OK.
A confirmation message appears.
7.Confirm the confirmation message.
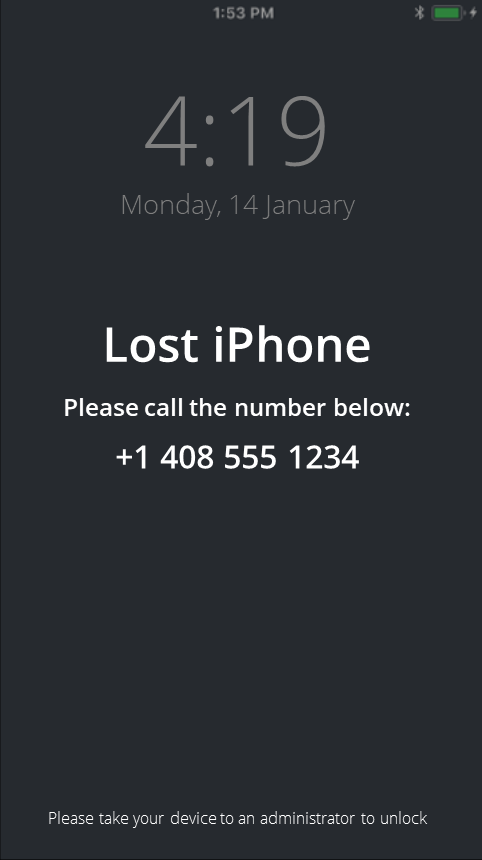
The device enters Lost Mode.
The lost device becomes locked, and displays the Message and Phone Number. For example:
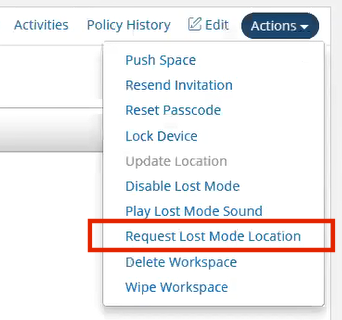
8.(Optional) To request the location of a lost device, select the Actions pull-down menu for the device and then select Request Lost Mode Location.
The Devices Location map updates when the device location is received.
9.(Optional) To play a loud continuous tone on the device to assist in its recovery, select the Actions pull-down menu for the device and then select Play Lost Mode Sound.
10.After the owner has their device, you can cancel Lost Mode. To do this, select the Actions pull-down menu for the device and then select Disable Lost Mode.