Avalanche powered by Wavelink
This page refers to an older version of the product.View the current version of the User Guide.
Credentials Certificate Payload (iOS)
A credentials certificate payload sends a certificate to a device that allows the device to use the company public key infrastructure system. This includes certificates for signing and encrypting email, establishing the device's identity when connecting to a company server, or verifying the server identity when connecting to Exchange, VPN, or WiFi.
The certificate must be in PKCS#12 format (with either a .p12 or .pfx extension). If you want to use the certificate for signing and encrypting email or establishing device identity, the certificate must be for only one identity and include the private key. If you want to use the certificate to verify server identity when the device connects to Exchange, VPN, or WiFi, the certificate must include the public key for the server's certificate.
When you have created a credentials certificate payload, use an Exchange, VPN, or WiFi payload to configure the device to use the certificate. (When the Exchange, VPN, or WiFi payload is applied, the credentials certificate payload associated with it is automatically applied as well.) For certificates that sign and encrypt email, the Avalanche user is prompted for the password associated with the certificate.
A credentials certificate payload has the following options:
|
Payload name |
The name of the payload. |
|
Certificate |
The name of the certificate. |
|
Password |
The password for the certificate. |
|
View Certificate |
Shows the details of the certificate. |
|
Remove |
Removes the certificate from the payload. |
To create a credentials certificate payload:
1.From the Profiles tab, click New Payload in the Available Payloads panel.
2.The Payload dialog box appears. Select the iOS option and then click Credentials Certificate.
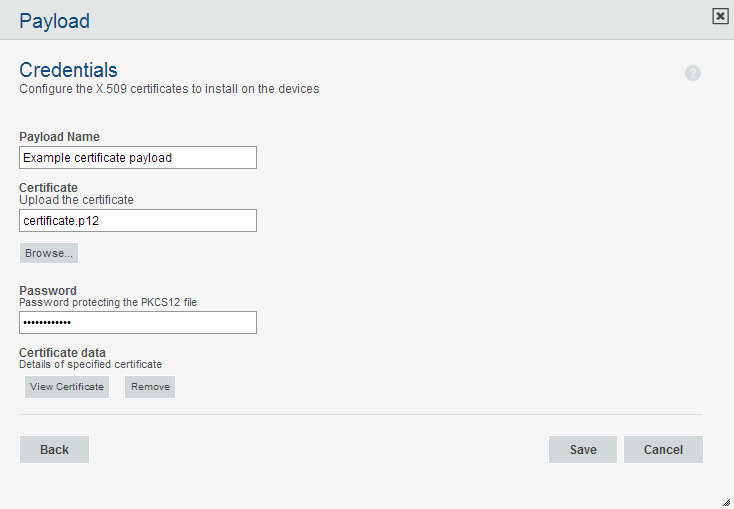
Credentials options
3.The Credentials options appear. Configure the settings and click Save.
This page refers to an older version of the product.View the current version of the User Guide.
The topic was:
Inaccurate
Incomplete
Not what I expected
Other
Copyright © 2017, Ivanti. All rights reserved.