Trusted Vendors
In this section:
About Trusted Vendors
Trusted Vendors can be specified in each Application Control rule node. Trusted Vendors are used for listing valid digital certificates. A digital certificate is an electronic document that uses a digital signature to bind together a public key with an identity. This includes information such as the name of a person or organization, address, and so on. Digital certificates are issued by a certificate authority and used to verify that a public key belongs to an individual. Application Control queries each file execution to detect the presence of a digital certificate. If the file has a valid digital certificate and the signer matches an entry in the Trusted Vendor list, the file is allowed to run, and overrides any Trusted Ownership checking.
You can check whether a file has a digital certificate by displaying the Properties dialog. A file has a digital certificate if there is a Digital Signatures tab in which you can view details of the certificate including, signer information, advanced settings and an option to display the certificate.
The Trusted Vendors sub node is available in each rule node, for listing valid digital certificates.
Add a Certificate to a Trusted Vendor
- Select the Trusted Vendors node to which you want to add the certificate.
- Click the Add drop-down arrow on the Rule Items ribbon and select the required option:
- From Signed File - Select a known file that has already been signed by the vendor whom you want to trust. Application Control can then identify the vendor’s specific signature to identify additional code from that same vendor.
- Import File-based Store - Add certificates from a P7B file, created in a file-based store, such as Certificate Manager.
-
Navigate to the required file and click Open.
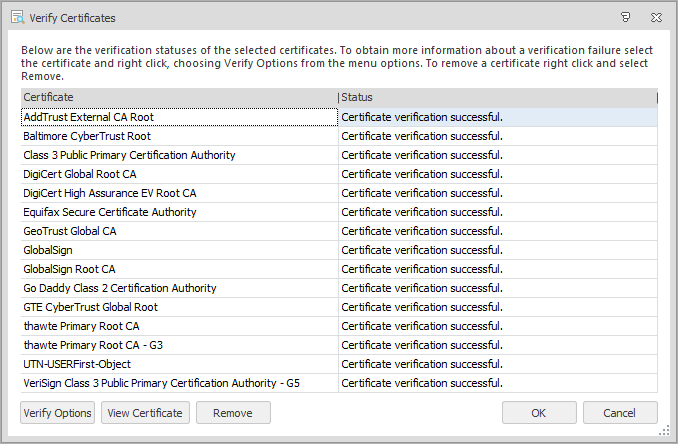
The Verify Certificates dialog lists the name(s) of all added certificates. The Status column shows whether the certificate has been validated successfully or if any errors have been detected.
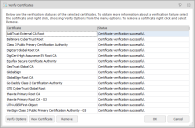
Further options are available for the listed certificates. Highlight the required certificate and select the one of the following:
-
Verify Options - Check the status of the certificate, enforce the certificate's expiry date and apply advanced certificate options.
For further information, see Verify Options.
- View Certificate - View more information about the selected certificate.
- Remove - Remove the selected certificates and prevent them from being added to the trusted vendor. Multiple certificates can be select and removed using the Shift and Ctrl keys.
-
- Click OK.
The listed certificates are added to the Trusted Vendors work area.
Verify Options
Verify options for Trusted Vendors allow you to specify parameters for validating a certificate by ignoring or allowing specific attributes. The certificate must be valid for the rule to be applicable, but there are different levels of validation with which you can configure a certificate.
The advanced options are available when adding metadata for files, by clicking Verify Options.
Altering the settings using the Advanced Certificate Options could reduce the level of security required to validate a certificate.
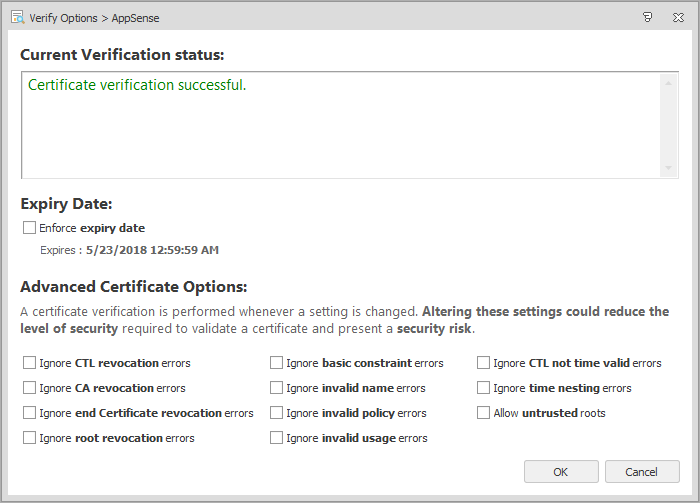
The Verify Options dialog displays the current status of a certificate and gives access to Expiry Date and Advanced Certificate options. The verify options are available from:
- Certificates for trusted vendors
- Metadata for allowed or denied files and folders
When you add a certificate, Application Control checks to see if it is valid and displays the result of the check in the Current Verification Status message box. The check is performed each time an option in this dialog is updated. For example, the certificate could be invalid due to an untrusted root certificate. If the Allow untrusted roots option is subsequently selected, Application Control checks the certificate again and updates the status to show that certificate validation is successful.
You can also choose whether to enforce the expiry date of the certificate. The default setting is that Application Control ignores the expiry date of certificates so they remain valid indefinitely. If you choose to enforce the expiry date, the certificate is unverified after that date and the vendor is no longer trusted.
Advanced Certificate Options
Advanced certificate options allow you to specify parameters for validating a certificate by ignoring or allowing specific attributes. The certificate must be valid for the rule to be applicable, but there are different levels of validation with which you can configure a certificate.
Altering the settings using the Advanced Certificate Options could reduce the level of security required to validate a certificate and present a security risk.
Apply the following settings when determining certificate verification:
- Ignore CTL revocation errors - Ignore errors when obtaining Certificate Trust List (CTL) revocation.
- Ignore CA revocation errors - Ignore errors when obtaining Certificate Authority (CA) revocation.
- Ignore end Certificate revocation errors - Ignore errors when obtaining the end certificate, or user certificate, revocation is unknown.
- Ignore root revocation errors - Ignore errors when obtaining valid root revocation.
- Ignore CTL not time valid error - Ignores that the certificate trust list is not valid, for example, the certificate may have expired.
-
Ignore time nesting errors - Ignores that the Certificate Authority (CA) certificate and the issued certificate have validity periods that are not nested.
The CA certificate may be valid from January 1st to December 1st, and the issued certificate from January 2nd to December 2nd. This means that the validity periods are not nested.
- Ignore basic constraint errors - Ignores that the basic constraints are not valid.
- Ignore invalid name errors - Ignores that the certificate has an invalid name.
- Ignore invalid policy errors - Ignores that the certificate has an invalid policy.
- Ignore invalid usage errors - Ignores that the certificate was not issued for the current use.
- Allow untrusted roots - Ignores that the root cannot be verified due to an unknown certificate authority.