File Director SAN certificates
File Director 2021.3 (and later) enables additional host names to be configured within the product itself - without using a Windows server.
The example described in this help topic applies to File Director 2021.1 and earler.
The Subject Alternative Name (SAN) field allows you specify additional host names that will be protected by same SSL certificate. For example, an administrator can use CNAME alias DNS records with an SSL certificate that has a different Common Name set within the subject of the certificate.
This section describes how to configure a File Director certificate that contains SAN extensions. In this example, a SAN certificate is generated using a private CA, exported as a PFX file and then uploaded to File Director.
Configuration comprises three parts:
Prerequisites:
File Director appliance with a base DNS, AD, admin user and license configuration applied.
DNS and SAN certificates
The A record is typically created when installing the File Director appliance and maps the IP address to the specified host name. A CNAME records allows you to map one domain name (an alias) to another (the A record for example).
Example of a SAN certificate using an A and CNAME DNS record
In the illustration shown, the CNAME record (on the right) references the A name record.

-
Create DNS entries for your appliance.
-
Confirm the DNS records resolve correctly using a command such as ping, for example.
Generating your SAN certificate
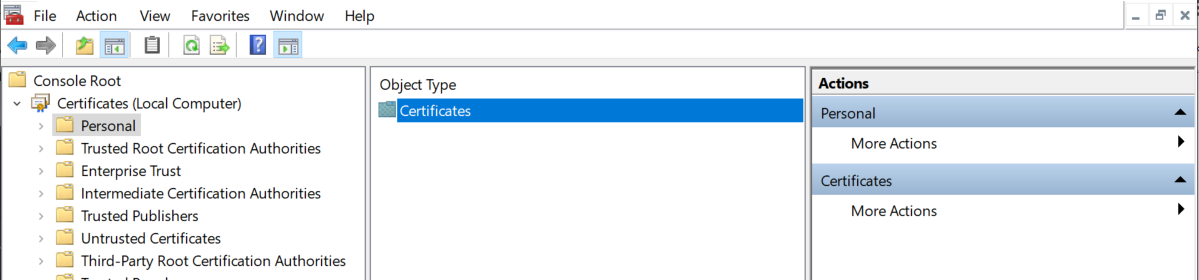
- Open Microsoft Management Console and click File > Add/Remove Snap-in...
The Add or Remove Snap-ins dialog displays. - From the Available snap-ins panel, select Certificates. Click the Add> button.
- In the Certificates snap in dialog, select the Computer account radio button then click Next.
- From the Select Computer dialog select the Local computer radio button
- Click Finish and OK.
- In the Certificates snap in dialog, select the Computer account radio button then click Next.
- Expand the Personal folder and select Certificates.

Select Certificates in the center panel, right-click and select All Tasks > Request New Certificate.
The Certificate Enrollment wizard displays. - Click Next and Next again.
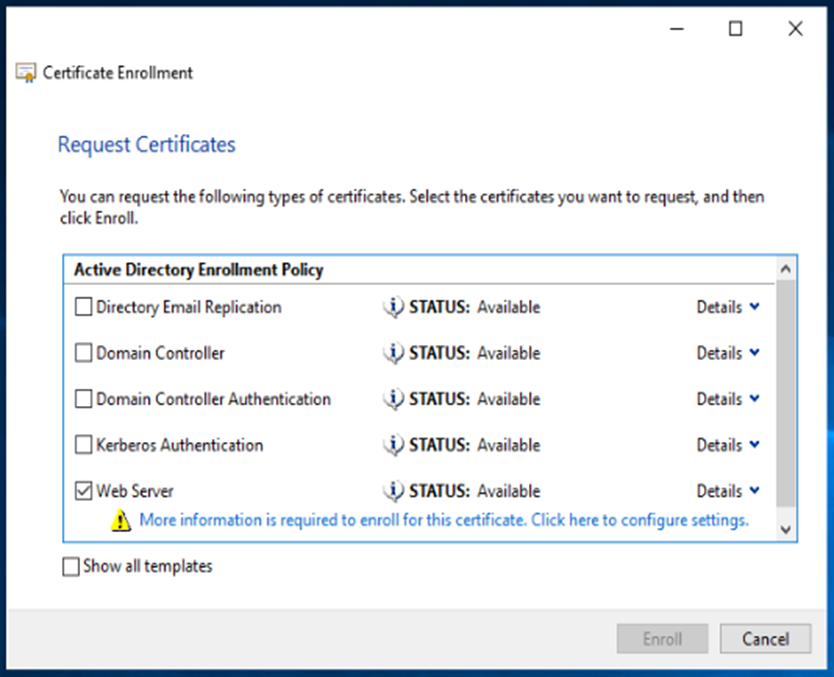
-
Select Web Server and click the drop-down arrow to expand the Details section.
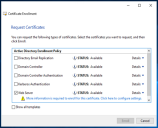
Click the Properties button to open the Certificate Properties dialog.
- In the Subject name panel, complete the following fields :
- Common Name
- Organizational Unit
- Organization
- Locality
- State
- Country
Email
Note, this is the same information required if generating a CSR request for the File Directorappliance
- In the Alternative name panel, select DNS from the Type drop down.
-
In the Value field, add the Alternative DNS names to be included in the certificate request.
.

-
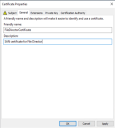
Select the General tab and enter a Friendly Name and optional Description.
- Select the Private Key tab and expand the Key Options.
-
Select Make private key exportable.
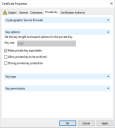
- Click Apply and OK.
-
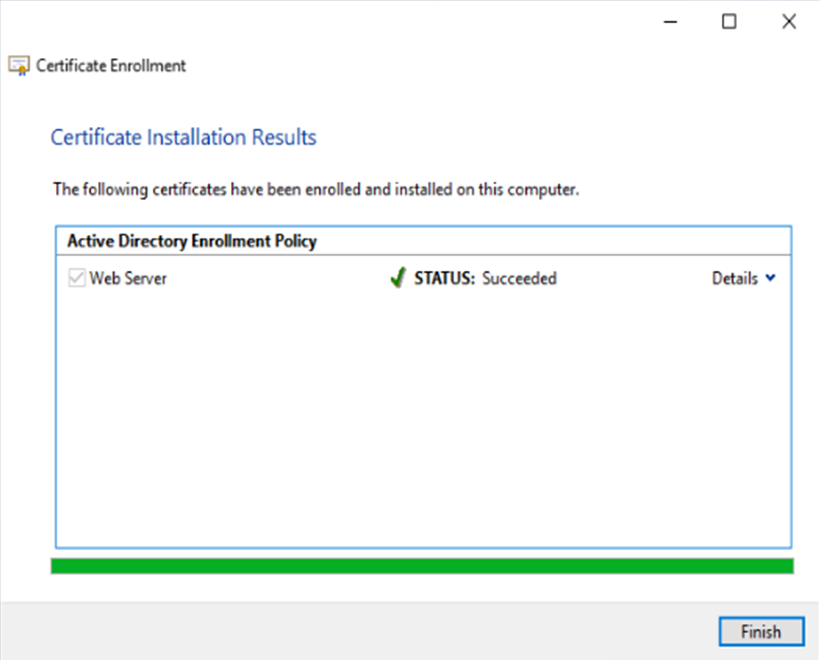
In the Certificate Enrollment dialog, click Enroll.
-
When the certificate has successfully enrolled, click Finish.

You should see the certificate in the Personal store.

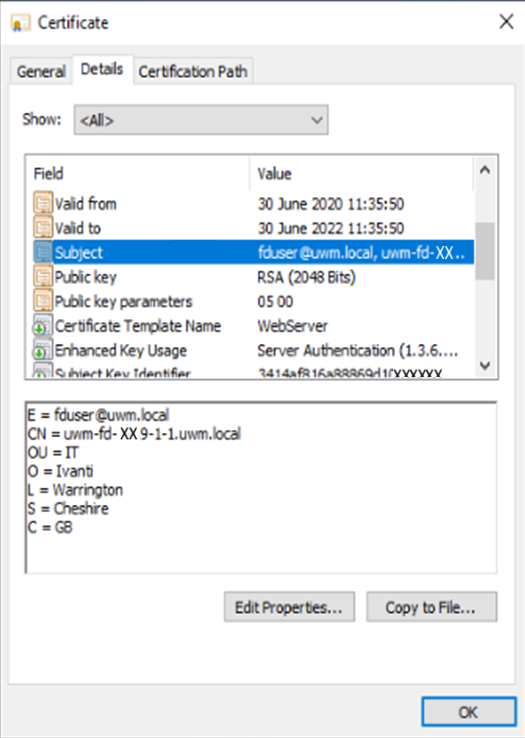
- Right-click on the new certificate and select Open.
-
Click on the Details tab and select Subject.
You will see the subject details for your certificate.

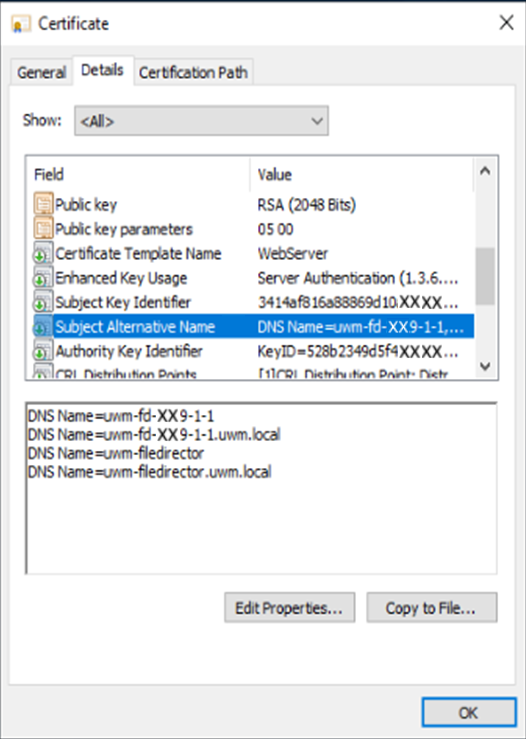
-
Scroll to the Subject Alternative Name section.
The alternative DNS names you configured should be visible.

- Click Copy to File and then OK.
- Click Next.
-
Enable the Yes, export the private key option and click Next.
-
In the export file format section, select Include all certificates in the certification path possible and click Next.
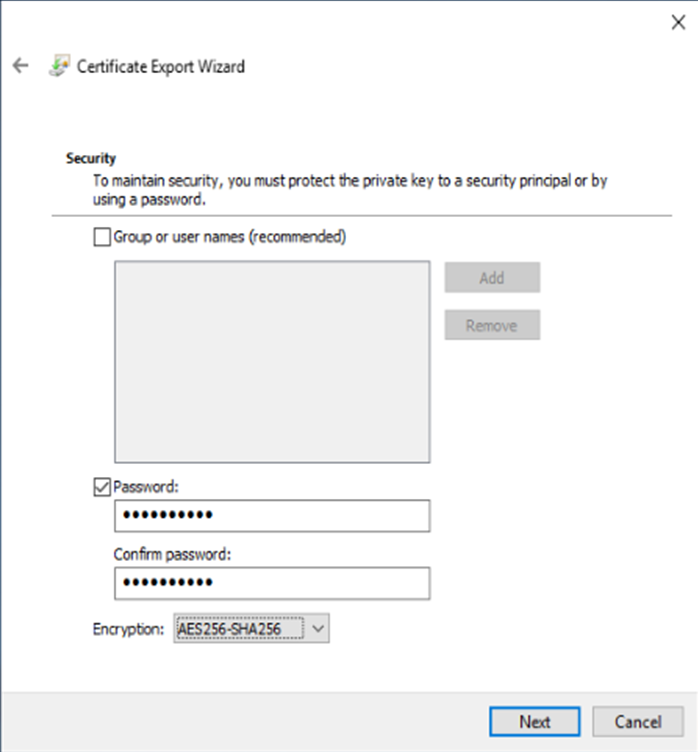
- Type and confirm a password.
- Ivanti recommend you use the most secure method of encryption to protect your files.
Click the drop-down arrow in the Encryption field and select the method required.
- Click Next.
- Save the certificate to a suitable location.
-
Complete the wizard by clicking Finish.


SAN certificates in the File Director appliance
- Open a web browser and connect to your appliance Admin console.
-
Select Configuration > SSL Certificate.
If required, click to expand the Upload an existing certificate section:

- Click Browse and select the required certificate.
- If the certificate was created with an encryption password, type it into the field.
- Click Upload Certificate and your certificate should be installed and enrolled for the host name you specified in the Certificate Subject.

You will now be able to use the A and CNAME record to connect to the appliance using SSL.